Building a 3D character used to mean opening Blender or Maya, sculpting a base mesh for a day, retopologizing for another day, unwrapping UVs, painting the textures, building a humanoid rig from primitives, weight-painting the bones onto the geometry, and finally posing animation clips one keyframe at a time. The 2026 alternative collapses every one of those steps into a browser tab and a few text prompts. A modern AI 3D character generator chains image generation, neural mesh extraction, automatic rigging, and text-to-motion into a single pipeline that runs end to end in under twenty minutes per character.
How an AI 3D character generator actually works in 2026
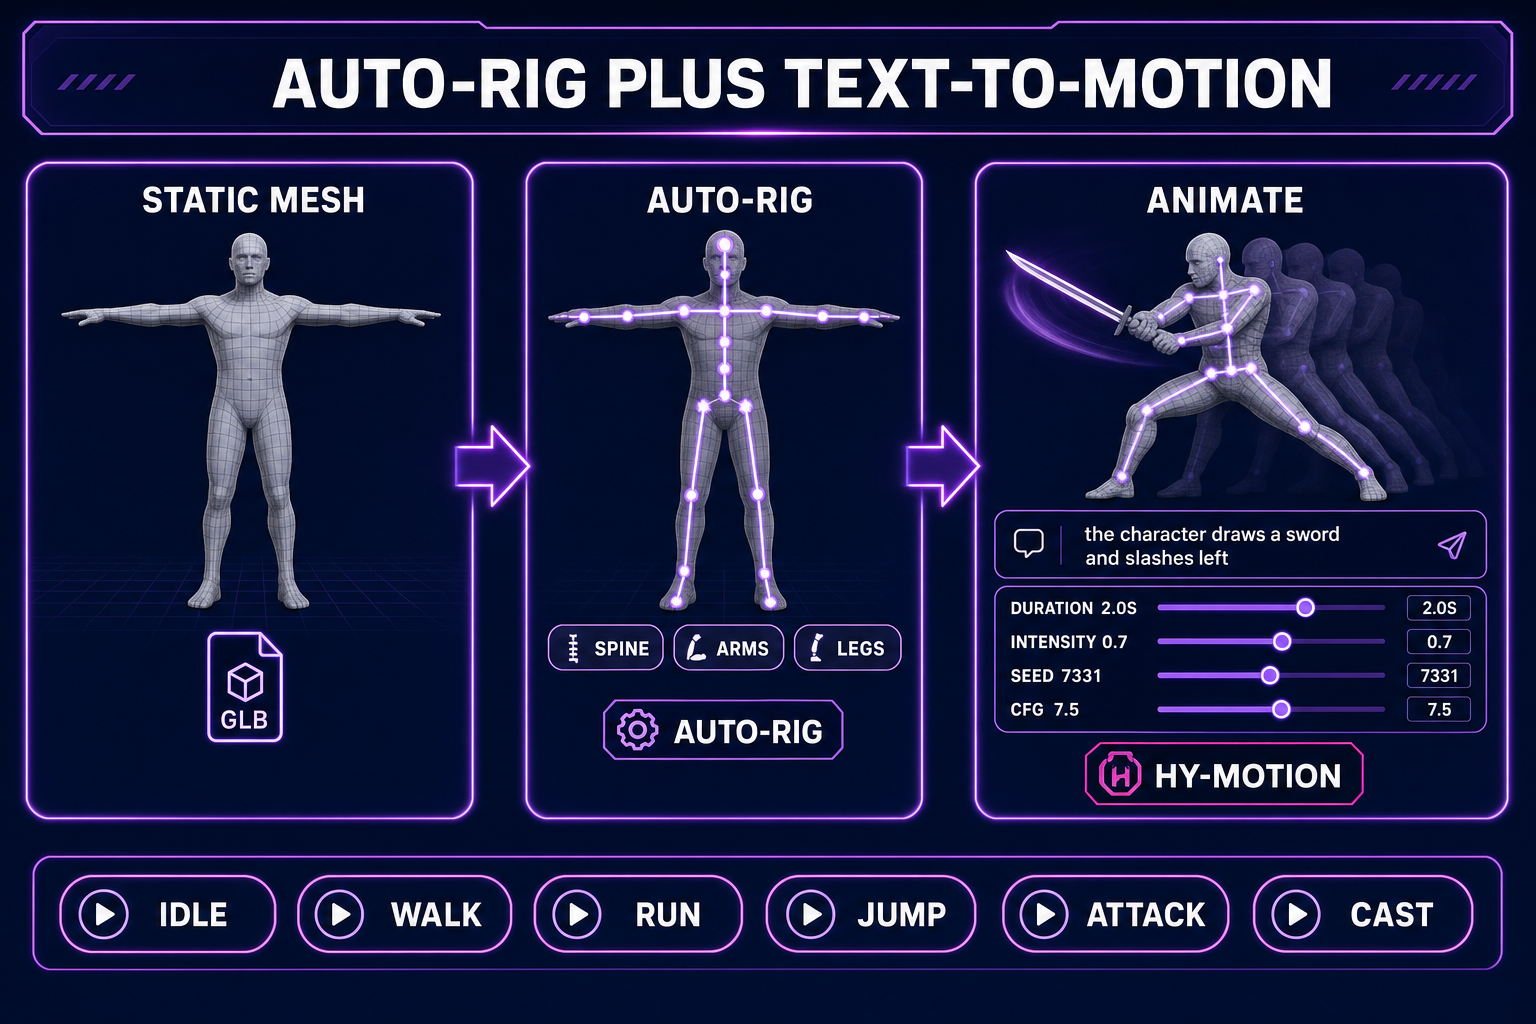
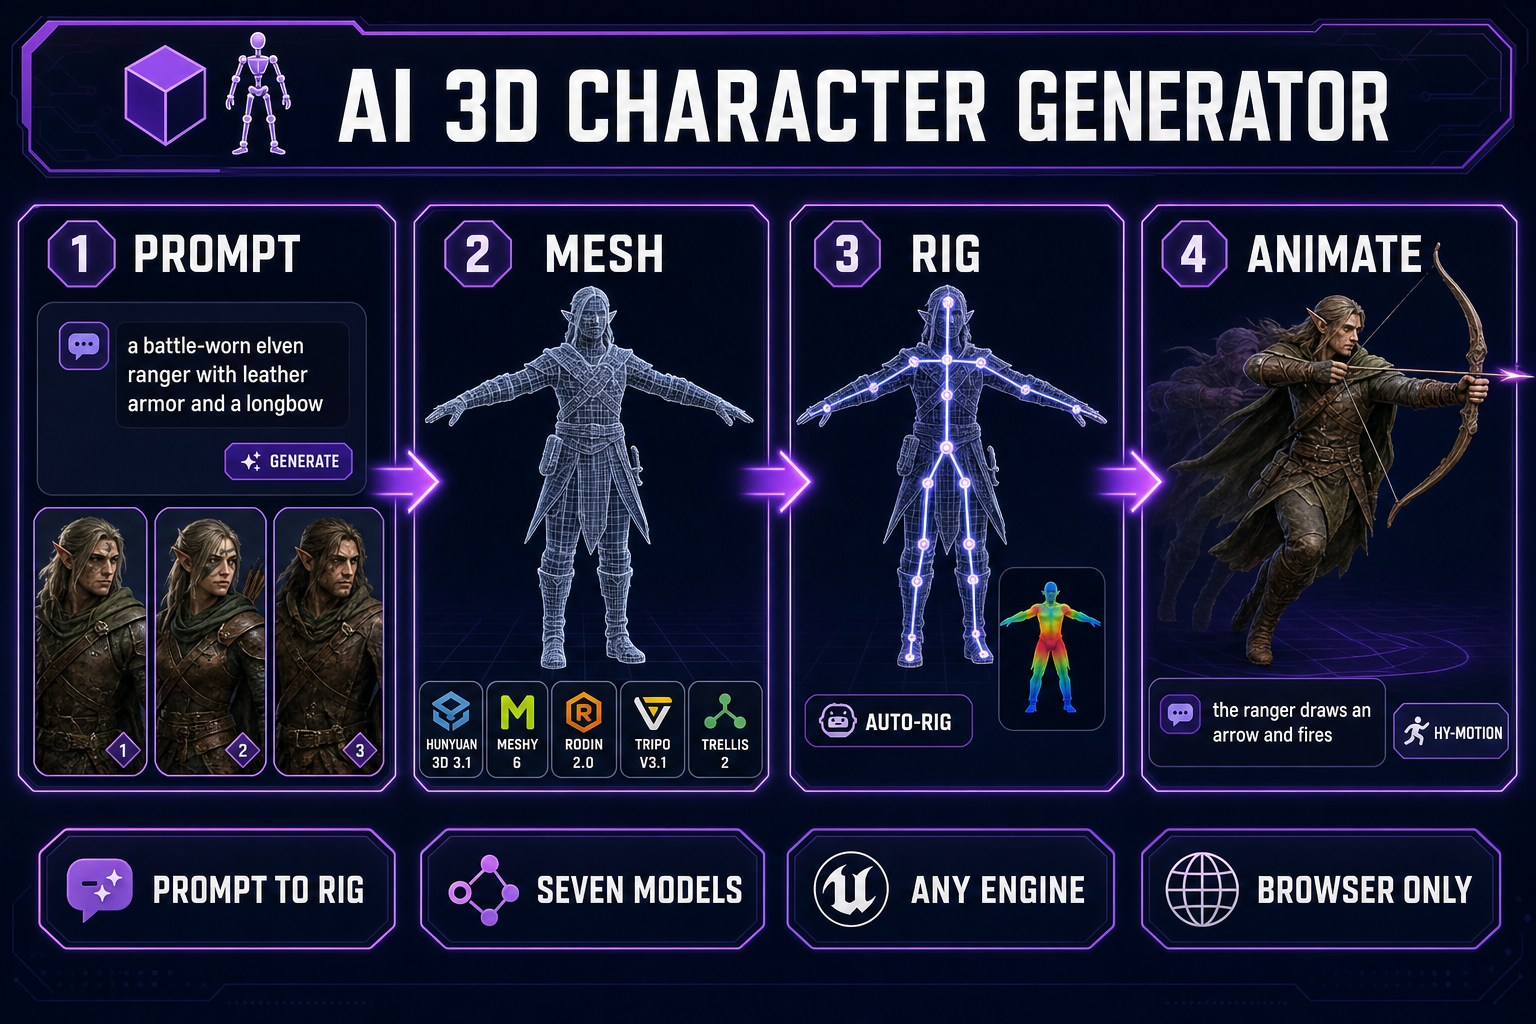
An AI 3D character generator is not a single model. It is a chain of specialised models, each tuned for a step the previous one cannot do well. A bare text-to-3D model will hand back a static mesh; that mesh will not animate, will not skin, and will not survive the trip into a game engine without a rig and weight paint that the model never produced. The pipeline that takes a beginner from a typed character description to a fully animated, engine-ready 3D character looks the same regardless of which vendor stack you assemble — concept image, single-image neural reconstruction into a textured mesh, automatic humanoid rigging, text-prompted motion. The Sorceress version of that pipeline runs every step inside 3D Studio, in the browser, with no engine install and no plugin to manage.
Verified May 9, 2026 against src/lib/threed-models.ts: the Generate tab inside 3D Studio currently exposes seven image-to-3D models — Hunyuan 3D 3.1, Meshy 6, Meshy 5, TRELLIS, TRELLIS 2, Rodin 2.0 (Hyper3D Gen-2), and Tripo v3.1. Five of those (Hunyuan, both Meshy generations, Rodin, Tripo) also accept text prompts directly when you do not have a source image. The Rig tab uses a procedurally fitted humanoid skeleton with auto-weight-paint. The Animate tab drives the rig with HY-Motion, a text-to-motion engine that turns a sentence like the ranger draws an arrow and fires into a baked, named animation clip with adjustable duration, intensity, classifier-free guidance, and seed.
The reason this chain matters more than any single step: a character that lands in your engine has to play arbitrary clips at runtime, blend between them, and survive the load-time skinning pass without snapping into a knot at the shoulder. That requires the right rest pose at generation time, the right topology at extraction time, and the right bone naming at rig time. Skipping any of those steps and bolting the rig on later is the failure mode that turns a five-minute pipeline into a three-day cleanup. A purpose-built AI 3D character generator handles them in order.
Step one — generate (or import) the source character image
The image-route input to 3D Studio outperforms the text-only route on every model in the lineup. The reason is geometric: the source picture pins the silhouette, palette, and body proportions before the 3D model starts inventing geometry. Without a source image, the model has to invent both the character and the mesh at the same time, and the silhouette becomes whichever average the training set drifts toward. With a source image, only the geometry is invented; the look is already fixed.
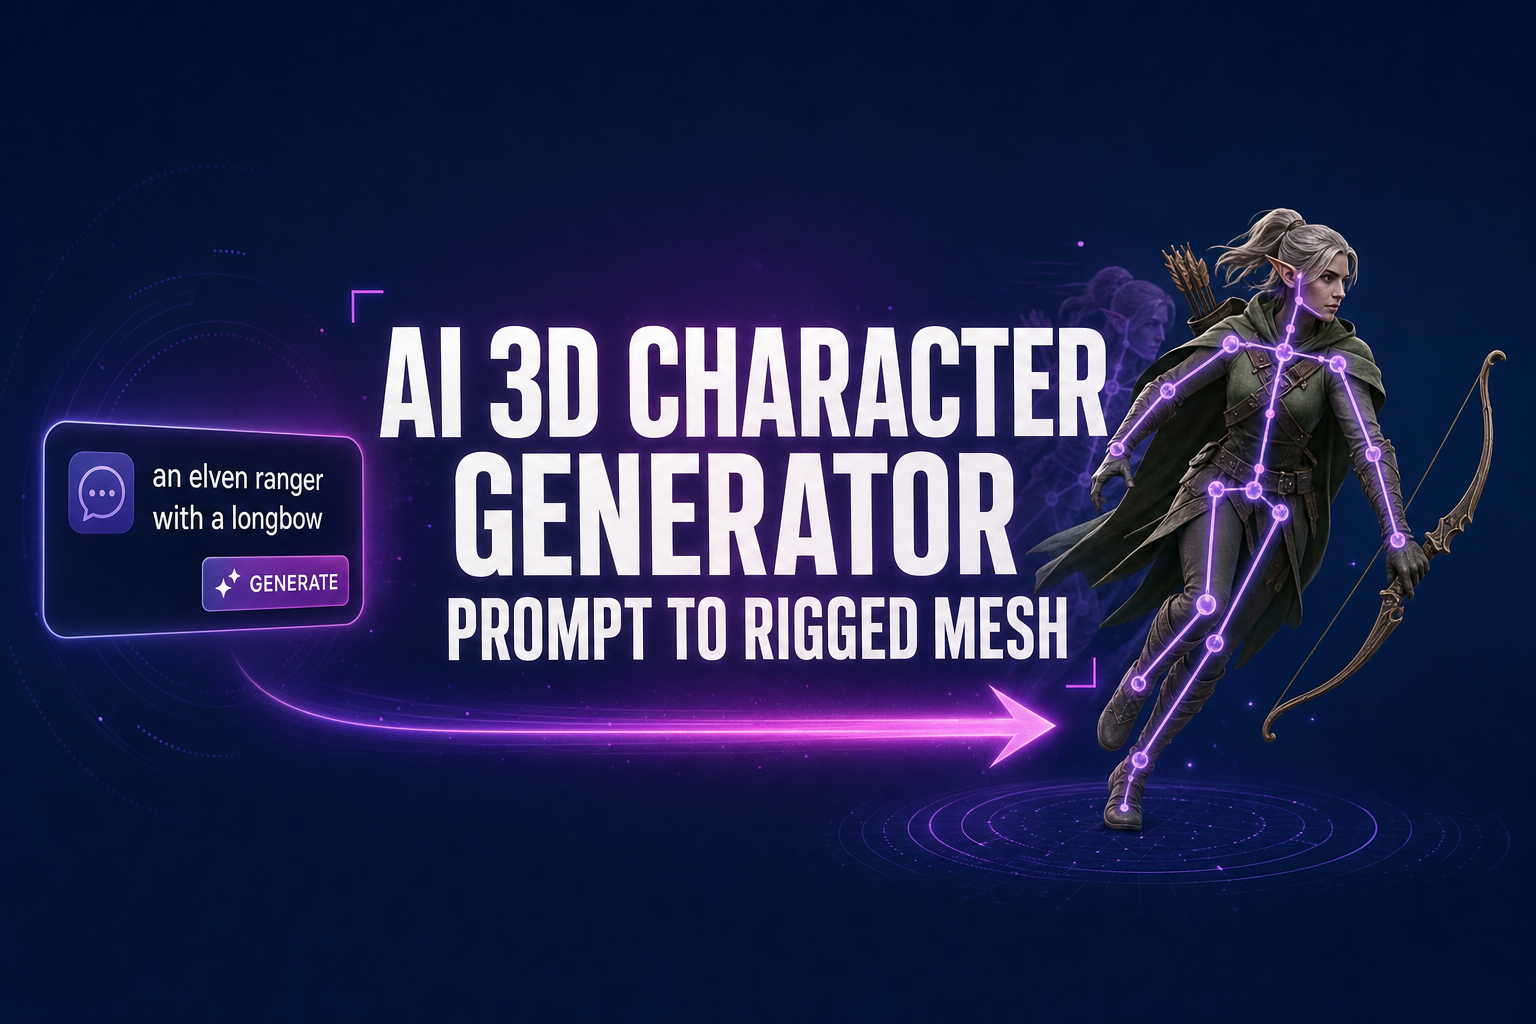
The standard front-of-pipeline tool is AI Image Gen. Drop into the page, pick a character-friendly image model, and write a prompt that describes body language and clothing in concrete terms. An elven ranger in green and brown leather armor, full body, T-pose, neutral background, three-quarter front view is a usable prompt. A cool elf with a bow is not — the model fills the gap with whatever the training average looks like, and the resulting silhouette is unpredictable.
Two practical rules for the source image. First, ask the image model for a T-pose or A-pose at the prompt level even when you intend to enable the Force T/A-Pose flag at the 3D extraction step — the rig downstream is most reliable when both stages agree on the rest pose. Second, keep the background neutral or transparent. Cluttered backgrounds confuse the depth estimator inside the image-to-3D model and produce ghost geometry behind the character. The full prompting recipe for character images, including the reference-image consistency trick for matching multiple poses across a cast, lives in the AI character generator guide.
Step two — lift the image into a textured 3D mesh
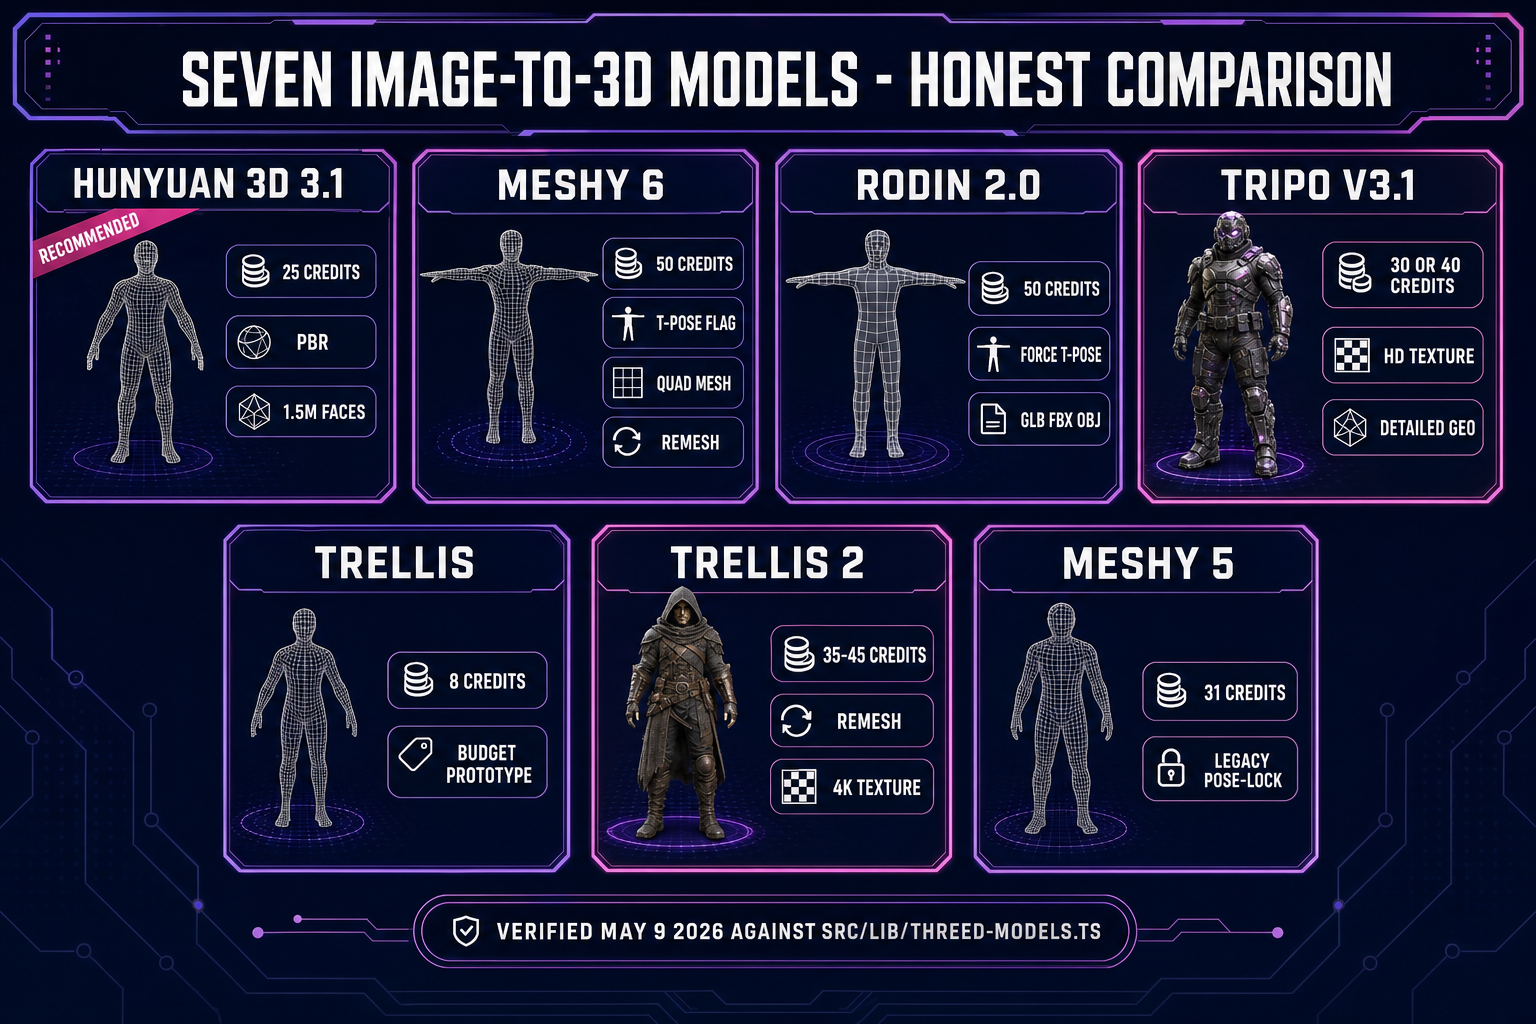
Inside 3D Studio, the Generate tab is where the geometric work happens. Drag the source image onto the canvas. The model picker on the right shows the seven image-to-3D models with credit cost and per-model parameter panels. The honest comparison, verified May 9, 2026 against the model registry:
- Hunyuan 3D 3.1 — 25 credits per generation, the recommended default. Strong silhouette fidelity per credit, adjustable face count from 40,000 up to 1.5 million, PBR materials on by default. The right choice for a hero character the camera will spend time on, and the cheapest production-grade option in the lineup.
- Meshy 6 — 50 credits base, 75 with texture, 88 with both texture and remesh. The most animation-friendly output: a Force T-Pose flag, a Quad topology mode for cleaner edge flow, and a remesh pass that produces uniform polygons the auto-rigger can grab cleanly. If the character is going to animate at all, Meshy 6 with quad and remesh is the safest source.
- Rodin 2.0 — 50 credits. Cleanest quad mesh in the catalog, with a forced T/A-Pose flag, a choice of PBR or Shaded materials (or both), and a multi-format export covering GLB, FBX, OBJ, USDZ, and STL. The strongest base for a fully rigged production character.
- Tripo v3.1 — 30 credits without texture, 40 with HD texture (or 45 with HD texture and Quad mesh). The standout on visual filigree: armor etching, fabric folds, and fine surface detail come through where other models smooth them away. The right pick when the character has visible material complexity.
- TRELLIS — 8 credits per run, image-to-3D only. The fastest, cheapest option for prototyping a silhouette before committing credits to a longer pass. Useful for iterating on character concept art before the production take.
- TRELLIS 2 — 35 credits at 512p, 40 at 1024p (default), 45 at 1536p. Adds a higher-resolution structure pass and a remesh option for cleaner topology. Good middle ground between TRELLIS and Meshy 6.
- Meshy 5 — 31 credits, the older generation kept available for characters where the v6 generation behavior changed in a way that broke a specific look. Most teams stay on Meshy 6 unless reproducing a v5 result.
Across every model the same generation flag matters more than which model you pick: turn Force T-Pose or A-Pose on if you intend to rig and animate the character. The T-pose is the canonical rest pose because every rigging algorithm assumes the limbs are extended along clear primary axes — arms straight out, legs straight down. A character generated in a dramatic action pose will rig, but the resulting motion will read as awkward because the bone alignment is off by enough degrees to drift the joint pivots.
A practical workflow: run TRELLIS first at 8 credits to lock the silhouette. Inspect the result in the viewport, decide whether the character reads correctly from front, side, and three-quarter views, and iterate on the source image if it does not. Once the silhouette is right, re-run on Hunyuan 3D 3.1 or Meshy 6 with Force T-Pose enabled for the production take. The total credit cost lands well under what a single Rodin 2.0 run would cost, and the production mesh starts from a silhouette that has already been validated.
Step three — auto-rig the humanoid skeleton
The Rig tab inside 3D Studio takes the static textured mesh produced by Step two and fits a procedurally generated humanoid skeleton inside it. Auto-rigging adds a small flat credit cost on top of the mesh generation. The skeleton uses the canonical biped layout — root, hips, spine chain, shoulders, upper and lower arms, hands, neck, head, upper and lower legs, feet — with bone names that match the conventions used by Three.js, Babylon.js, and most engine-side animation libraries.
The auto-rigger does three things in sequence. First, it does skeletal-animation-style bone fitting: it finds the silhouette’s central axis and lays the spine chain along it, then branches to the limb endpoints by following the silhouette’s narrow extensions. Second, it auto-weight-paints — assigning each vertex of the mesh a weighted influence from the bones near it, so when a bone moves the surrounding skin moves with it without tearing. Third, it computes a Linear Blend Skinning matrix per vertex so the runtime skinning pass is cheap.
For a humanoid character the auto-rig is reliable enough to skip manual cleanup in most cases. The Refine tab inside 3D Studio is the escape hatch when the auto-rig gets a vertex group wrong — it exposes weight painting on the surface so you can fix a shoulder that crinkles oddly when the arm raises, or a hip that stretches when the leg lifts. For a non-humanoid character (a dragon, a quadruped, a multi-armed creature) the auto-rig falls back to a procedural skeleton fitted to the silhouette rather than the canonical biped template; the browser auto-rig guide walks through the fitting in detail. Multi-legged creatures with custom locomotion are handled by the dedicated Procedural Walk tool, not the standard auto-rigger.