Snap an Image to Pixel Art AI (Browser, Sprite-Ready)

By Arron R.13 min read
Image to pixel art AI is the workflow: generate or supply a still or video, then convert it to palette-locked pixel sprites. Sorceress True Pixel runs it in the

An image to pixel art AI workflow is one of the most-searched conversions in 2026 indie game dev: a single AI-generated portrait, a screen capture, a 3D render, or an MP4 clip becomes a palette-locked sprite sheet that drops into a Godot, GameMaker, Phaser, RPG Maker, or Construct project without a hand-cleanup pass. The two halves of the job — producing the source art and converting it to honest pixel art — rarely belong in the same tool, and conflating them is why so many free converters watermark the export or stop at a thumbnail. This walkthrough covers what the image to pixel art AI pipeline really does, which Sorceress tools run each side, the five-step recipe that produces a sprite-sheet-ready output, and the palette / dither rules that decide whether the result reads as intentional pixel art or as a crushed photograph. Verified June 5, 2026 against src/app/pixel-art/page.tsx, src/app/quick-sprites/page.tsx, and the live /spritely page source.

Sorceress image to pixel art AI workflow showing five steps, AI input on the left with a generated knight character, clean step with chroma key removal, palette step with PICO-8 sixteen-color preset, dither step with Floyd-Steinberg pattern, and packed sprite sheet output on the right, on a dark navy background with purple, fuchsia, cyan, emerald, and amber accents
The full image to pixel art AI pipeline: AI source becomes palette-locked, dither-tuned, sprite-sheet-ready output. Verified June 5, 2026.

What an image to pixel art AI workflow actually means in 2026

The phrase “image to pixel art AI” covers two distinct jobs that searchers usually mash together. The first job is producing the source image — a character render, a tile, an effect, a cutscene frame — with a diffusion model conditioned by a text prompt or a reference photo. The second job is converting that source image into honest pixel art: downscaling it to a target resolution, mapping every pixel to a fixed palette, and applying dithering only where the palette is small enough to need it. Almost every browser converter that markets itself as image to pixel art AI is solving the second job; the AI half of the name comes from accepting AI-generated inputs cleanly. A small minority of tools fold the first job in by running their own text-to-image generation step before the conversion.

For a real game pipeline, decoupling the two jobs is the right call. The signal-processing side — color quantization against a fixed palette, error-diffusion dithering, edge cleanup — is mathematically the same in 2026 as it was in 1996. What changed is that the inputs are now AI-generated 1024 by 1024 PNGs with soft anti-aliased edges instead of hand-painted photographs, and the converter has to handle those inputs without producing a fringy mess. The technical underpinning is color quantization, the same algorithm that gave us indexed-color GIFs in the 1990s, combined with Floyd-Steinberg error-diffusion dithering or ordered (Bayer-pattern) dithering. The Wikipedia entries on color quantization, indexed color, and Floyd-Steinberg dithering are the canonical primary sources for the math; the practical takeaway is that every modern image to pixel art AI converter is running the same three operations in different orders with different default parameters.

How Sorceress runs image to pixel art AI in the browser

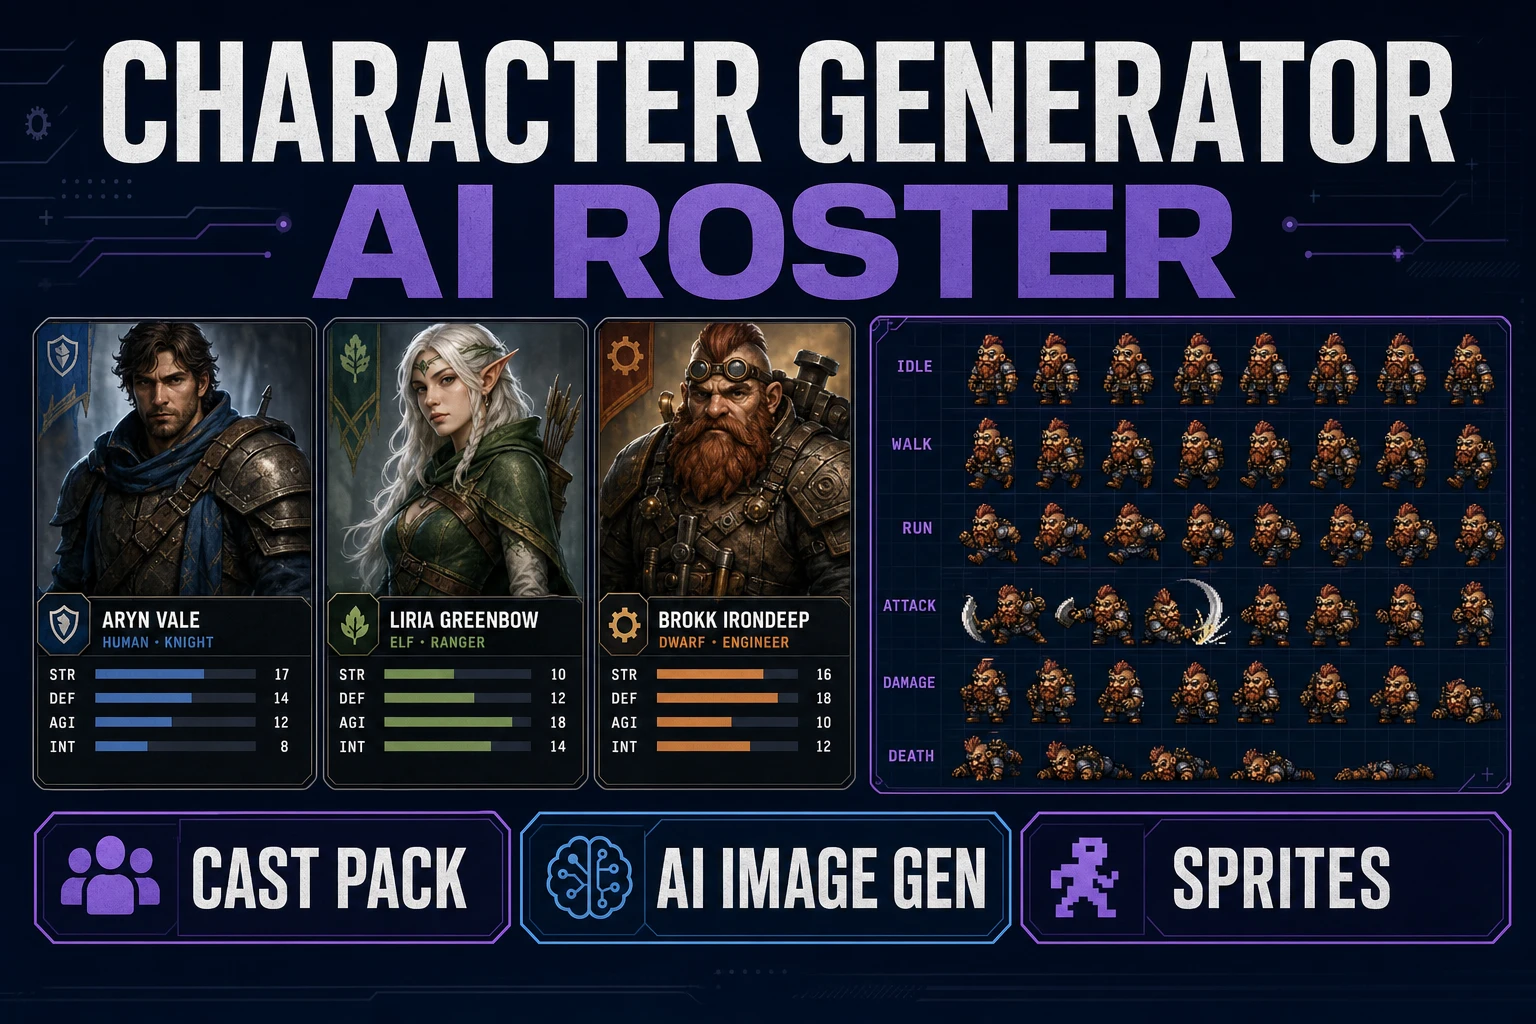
Sorceress ships three tools that cover the image to pixel art AI workflow end-to-end, each anchored to a specific slice of the pipeline. True Pixel at /pixel-art is the conversion side: it accepts any image or MP4 video, exposes eight palette presets (PICO-8 16, SWEETIE-16, Endesga 32, Game Boy, CGA, NES 54, Grayscale 8, and 1-Bit, verified against the PALETTE_PRESETS array in src/app/pixel-art/page.tsx on June 5, 2026), and runs Floyd-Steinberg, ordered, and no-dither modes against any of them. The chroma-key cleanup and the Auto Edge Chroma multi-pass cleanup live in the same workflow and run at full source resolution before the downscale — that is what stops AI-generated halos from bleeding into the final palette. The sprite-sheet pack step at the bottom of the workspace exports a transparent-background PNG sheet at any frame size for a Phaser, Godot, GameMaker, Construct, or RPG Maker import.

Pixel Snap at /spritely is the AI-source companion: it accepts AI-generated stills and videos, snaps the artwork to a true square-pixel grid, cleans the background, and aligns animation frames so they loop without drift. Verified against the live /spritely page source on June 5, 2026, Pixel Snap covers the three steps that are specific to AI inputs — cleanup, grid snap, frame alignment — and feeds a sprite sheet or per-frame export downstream. Quick Sprites at /quick-sprites is the prompt-to-sprite path that skips the AI-image step entirely: it runs the Retro Diffusion rd-animation model at nine credits per generation (verified at MODEL_ID = 'retro-diffusion/rd-animation' and CREDITS_PER_GEN = 9 in src/app/quick-sprites/page.tsx on June 5, 2026) with three preset shapes: Four Angle Walking at 48 by 48 pixels, Small Sprites at 32 by 32, and VFX Effects between 24 by 24 and 96 by 96. The output is a packed sprite sheet plus an animated GIF preview.

Side by side comparison infographic showing AI image gen plus True Pixel on the left lane and Quick Sprites prompt to sprite on the right lane, with feature pills for two step flow, manual framing, palette locked, and edge cleanup on the left versus one step flow, fixed sizes, Retro Diffusion, and fast iteration on the right, on a dark navy background with purple and cyan accents
The two paths through the image to pixel art AI workflow: convert an existing AI image with True Pixel, or generate the sprite directly with Quick Sprites. Verified June 5, 2026.

True Pixel versus Quick Sprites: which path the project actually needs

Picking between the two paths is the single decision that drives how the image to pixel art AI workflow runs for a given project. The two paths produce different sprite shapes, eat different credit budgets, and ask different things of the artist. The honest framing is that they cover adjacent slices of the same problem, not the same slice.

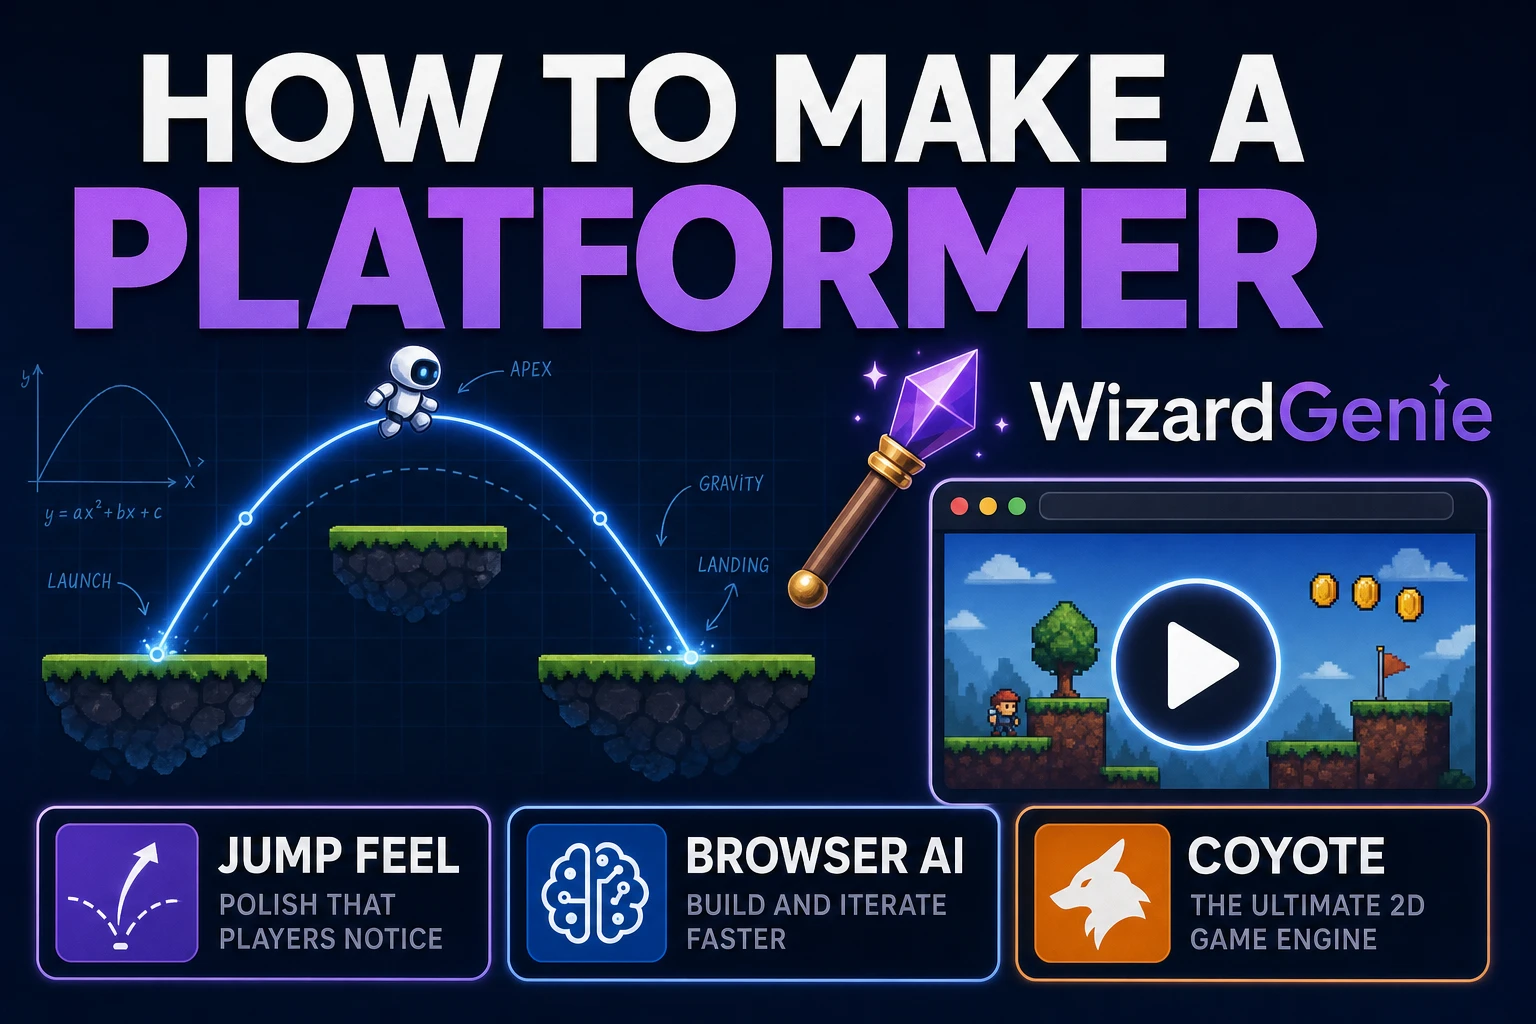
  • True Pixel is the right pick when the source already exists. An AI render from Sorceress AI Image Gen, a photograph the project has license to use, a 3D Studio screen capture, an exported Blender frame, a cutscene MP4 — any of those becomes the input, and True Pixel handles palette locking, dithering, edge cleanup, and sheet packing. The strength is full control over output size (32 to 1024 pixels along the longest edge), over palette choice across the eight presets, and over which frames out of an MP4 make the final sheet.
  • Quick Sprites is the right pick when the sprite has to come from a text prompt and the project has not produced a source image yet. The strength is speed: one prompt, three preset sizes, a packed sprite sheet plus an animated GIF preview in roughly forty-five seconds at nine credits per generation. The cost is fixed framing (48 by 48 for the four-angle walk, 32 by 32 for the small-sprites preset, 24 to 96 for VFX) — the project takes whatever pose vocabulary Retro Diffusion ships, not what an AI image generator can be coaxed into producing with a long prompt.
  • True Pixel plus Quick Sprites pairs naturally on a multi-character pipeline. A protagonist with seven specific poses ships through True Pixel: generate eight character renders in AI Image Gen with a pinned reference photo, drop each one into True Pixel against the chosen palette, pack into a single sheet. The background NPCs and the boss ship through Quick Sprites for the walk cycle on each character. Both flows write into the same Collections panel, and the final game project pulls from both sheets at runtime.

The sprite-sheet generator path covers the Quick Sprites side in depth, and the image-to-pixel-art conversion guide covers the True Pixel side. The current post is the AI-source-specific framing of the same workflow: every step assumes the source is an AI render or an AI video, which changes the cleanup defaults and the palette choice relative to a photographed or hand-painted source.

Step-by-step: from an AI image to a packed pixel art sprite sheet

The recipe below produces a sprite-sheet-ready pixel art output from an AI image in roughly five minutes of active work and around five credits of cost on the conversion side. The AI generation itself uses two to nine credits depending on the model, all verified against src/lib/models.ts on June 5, 2026. Every step references a real UI surface in the live Sorceress app, not a marketing diagram.

  1. Generate or supply the AI source. Open /generate, pick a model (Z-Image Turbo at two credits is the cheapest, Nano Banana 2 at nine credits is the default for character work), write a prompt that names the subject and the framing, and produce the source image at 1024 by 1024 or 1536 by 1024. Add “centered subject, clean flat background, transparent or solid color background” to the prompt — that single addition removes the busy-background problem before it can fight the converter.
  2. Open True Pixel and load the source. Navigate to /pixel-art. Drop the AI image into the upload area at the top of the workspace, or paste a URL. Multiple images or a folder of frames can load in a single batch through the queue panel on the left.
  3. Run the chroma-key cleanup (only if needed). If the AI render has a busy background, click the eye-dropper picker, click on the dominant background color, then enable the Auto Edge Chroma multi-pass cleanup. Verified against src/app/pixel-art/page.tsx lines 1583 and 2227 on June 5, 2026, the cleanup pass forces a hard subject boundary at full source resolution before the downscale — that is what stops the AI’s soft anti-aliased edges from becoming a fringy halo in the final palette-mapped output.
  4. Pick the palette. Open the palette dropdown and pick the preset that matches the target game aesthetic: PICO-8 (16) for the chunky retro fantasy aesthetic, SWEETIE-16 for soft pastel illustrations, Endesga 32 for the modern indie pixel-art look, Game Boy (4 colors) for the GB Studio aesthetic, NES (54) for an NES-era roster, CGA (4) for a DOS-era look, Grayscale (8) for prototyping, or 1-Bit for a stark monochrome aesthetic. The palette decision matters more than the dithering decision — pick wrong here and no dithering setting can save the result.
  5. Pick the dithering mode. Match the dithering intensity to the palette size. Floyd-Steinberg is the best general-purpose pick for AI sources at 16 to 54 colors because the AI render usually has smooth gradients the error-diffusion algorithm can spread across the limited palette without producing visible static. Ordered (Bayer-pattern) dithering is the right pick when the aesthetic explicitly wants visible texture (Game Boy with intentional dithering for shadow areas). No dithering is the right pick for the 4-color Game Boy palette and the 1-Bit palette — the eye reads clean color blocks as intentional pixel art, and dithering across four colors looks like noise.
  6. Set the output size. Pick the target pixel dimensions along the longest edge. For a single character sprite the sweet spot is between 48 and 128 pixels — bigger reads as detailed pixel art, smaller reads as classic 8-bit. The output preview updates live as the slider moves.
  7. Pack the sprite sheet. Click the export panel at the bottom of the workspace. For a multi-frame sheet, set the frame width and height and the columns, then click pack. The output is a transparent-background PNG sprite sheet that imports directly into a Phaser this.load.spritesheet call, a Godot AtlasTexture, a GameMaker sprite, an RPG Maker MV character sheet, or any custom 2D engine’s atlas loader.

The total credit cost for the full pipeline — one AI generation at nine credits plus the True Pixel conversion at no per-conversion credit cost since True Pixel runs locally in the browser after the initial load — is roughly nine to fourteen credits per finished sprite, well inside the Starter tier’s thousand-credit allotment at ten dollars verified against the live pricing page on June 5, 2026, and inside the no-recurring forty-nine-dollar Lifetime tier that unlocks every Sorceress tool without a monthly bill.

Palette and dither pick reference chart for AI sourced pixel art, four panels showing small palette low dither with Game Boy four colors no dither, small palette high dither with Game Boy four colors heavy dither labeled wrong match, medium palette Floyd-Steinberg with SWEETIE-16 sixteen colors labeled best for AI art, and large palette no dither with Endesga thirty-two colors clean, on a dark navy background with purple fuchsia cyan and emerald accents
Match dithering intensity to palette size. Floyd-Steinberg across 16 colors is the sweet spot for AI-sourced pixel art. Verified June 5, 2026.

Common failure modes when converting AI images to pixel art

Four classes of failure account for almost every “the image to pixel art AI converter ruined my sprite” complaint. Each has a specific fix that does not require switching tools.

  • The output looks like static or noise. Cause: the dithering setting does not match the palette size. Floyd-Steinberg dithering across a four-color Game Boy palette is mathematically the same algorithm as Floyd-Steinberg across a 32-color Endesga palette, but the visual result is wildly different because the algorithm has more colors to distribute the error across. Fix: drop the dithering setting to none or ordered with a low intensity for small palettes (4 to 8 colors), keep Floyd-Steinberg only for medium palettes (16 to 54 colors).
  • The character has a fringy halo around the edges. Cause: the AI render has soft anti-aliased edges and the palette quantizer mapped each blurred pixel to a slightly different color. Fix: run the chroma-key cleanup and then the Auto Edge Chroma multi-pass cleanup at full source resolution before the downscale. The cleanup pass forces a one-pixel hard subject boundary, which the quantizer can map to a single transparent or background-color pixel cleanly.
  • The character looks crushed at small output sizes. Cause: the target output resolution is too small for the palette complexity. A 32-color Endesga palette needs at least 64 pixels along the longest edge to read as deliberate pixel art at gameplay scale; below that, the palette compresses into mud. Fix: either raise the output size (96 to 128 pixels for medium palettes) or drop to a smaller palette that fits the target resolution.
  • The sprite sheet animation flickers between frames. Cause: each frame ran through the palette quantizer independently, so the same shadow color in frame 3 might map to a slightly different palette color in frame 14 if the AI source had subtle differences. Fix: True Pixel’s video input mode (drop an MP4 directly) runs the temporal-stability pass that builds one shared palette from every selected frame and re-runs the quantization against that single palette. The same shadow color stays the same color across the whole loop.

Bonus: converting an AI-generated video into a looping pixel art sprite sheet

The MP4 conversion path is the highest-leverage move in the image to pixel art AI workflow because it solves the eight-frame walk cycle problem at the same speed the converter handles a single still. Verified against src/app/pixel-art/page.tsx lines 3397 to 3452 on June 5, 2026, True Pixel extracts frames from an MP4 at 30 FPS, displays the frame strip across the bottom of the workspace, and lets the user pick which frames make the final sprite sheet before the conversion runs. Generate an AI animation (Sorceress AI Video Gen at /generate for the source, an existing AnimateDiff loop, a rendered Blender clip, or a screen capture of a 3D Studio rotation), drop the MP4 into True Pixel, pick eight to sixteen frames from the strip, set the palette and dithering once, and the converter produces a packed sprite sheet where every frame shares the same palette anchor. The shared-palette pass is what stops the loop from flickering at runtime, and it is the single feature that separates a real game-ready AI video to pixel art pipeline from a frame-by-frame converter that produces a slideshow of independently-quantized stills.

The verdict: when image to pixel art AI ships, when it does not

Three concrete recommendations based on the actual project shape:

  • Image to pixel art AI is the right call when the project commits to a specific art style for the whole game. Pick the palette once (PICO-8, SWEETIE-16, Endesga 32, or Game Boy are the four that read as intentional in 2026 indie shipping), pick the dithering mode once, then run every AI render through True Pixel against that same setting. The aesthetic stays consistent across hundreds of sprites, and the converter never has to second-guess the artist.
  • Quick Sprites is the right call when the project needs sprites fast and does not care about palette commitment. Prompt to packed sheet in under a minute at nine credits per generation; ship a hundred sprites in an afternoon. The trade is fixed framing and Retro Diffusion’s house aesthetic, but for game jams, prototypes, and quick iteration the speed wins.
  • True Pixel plus Pixel Snap plus Quick Sprites is the right call for a full-stack pixel art pipeline. Quick Sprites for the protagonist walk and the basic enemies, True Pixel for the bosses and cutscene frames, Pixel Snap for cleaning AI video loops and AI-generated effects into grid-snapped sheets. All three live in the same browser tab, all three write into the same Collections panel, and the final game pulls every sprite from a single coherent palette-locked source.

An image to pixel art AI workflow is a sequence of three operations — AI source production, palette mapping, frame packing — that no single tool used to cover end-to-end. The 2026 answer is that AI Image Gen, True Pixel, Pixel Snap, and Quick Sprites together cover all three, and the recipe above runs every step in the browser without a download or a desktop install. Pair it with the image-to-pixel-art converter walkthrough, the grid-based conversion guide, the no-Aseprite sprite-generator path, and the sprite-ready pixel-art primer for the full pixel-art toolkit on Sorceress.

Frequently Asked Questions

What is the best image to pixel art AI converter for game development in 2026?

The honest answer is that &ldquo;image to pixel art AI&rdquo; is two different jobs and the best tool depends on which one you mean. If the source image already exists &mdash; an AI render, a photograph, a video clip &mdash; the converter side of the job is signal processing, not a neural network: downscale, color quantize against a fixed palette, and dither to soften gradients. Sorceress <a href="/pixel-art?ref=blog">True Pixel</a> runs that conversion in the browser against eight built-in palettes (PICO-8, SWEETIE-16, Endesga 32, Game Boy, CGA, NES 54, Grayscale 8, and 1-Bit, verified against the <code>PALETTE_PRESETS</code> array in <code>src/app/pixel-art/page.tsx</code> on June 5, 2026), plus Floyd-Steinberg and ordered dithering, chroma key cleanup, and packed sprite-sheet export. If the goal is to skip the AI image step entirely and go straight from a text prompt to a sprite sheet, <a href="/quick-sprites?ref=blog">Quick Sprites</a> runs the Retro Diffusion <code>rd-animation</code> model at 9 credits per generation and produces a packed PNG plus an animated GIF preview in a single browser session. Pick the converter when the art exists, the generator when it does not.

Can I really turn any AI-generated image into a pixel art sprite sheet?

Almost any. The shape that converts cleanly is a centered character or object on a clean background at a resolution between 512 and 2048 pixels along the longest edge. The shapes that fight the converter are wide cinematic compositions with multiple subjects, photographic backgrounds with depth-of-field haze, and AI artifacts at sub-pixel scale that confuse the quantizer. The fix for the second and third cases is to clean the source first: drop the AI render into <a href="/pixel-art?ref=blog">True Pixel</a>, run the chroma-key picker on the dominant background color, then run the Auto Edge Chroma multi-pass cleanup at full resolution before the downscale. The cleanup pass forces a hard subject boundary instead of an anti-aliased halo, and that single change is what closes the visible gap between a pixel-art sprite that reads as intentional and one that reads as a crushed photograph. Verified against the live <code>/pixel-art</code> page source on June 5, 2026.

How does Pixel Snap differ from True Pixel for an image to pixel art AI workflow?

<a href="/pixel-art?ref=blog">True Pixel</a> is the converter that takes any image or video and produces palette-locked pixel art with full quantization, dithering, and edge-cleanup controls. <a href="/spritely?ref=blog">Pixel Snap</a> is the &ldquo;AI art into real pixel art&rdquo; companion: it accepts AI-generated stills or videos, snaps the artwork to a true square-pixel grid, removes background noise, and aligns animation frames so they loop without drift. Verified against the live <code>/spritely</code> page source on June 5, 2026, Pixel Snap&rsquo;s pipeline is three steps &mdash; AI art or video in, clean and snap to grid, then preview and export sprite sheets and individual frames. The two tools cover adjacent slices of the same workflow: True Pixel is the right call when the input is any image and the output needs careful palette control, Pixel Snap is the right call when the input is AI art that needs to be coerced into a true pixel grid for animation.

Why does my AI-generated image look bad after pixel art conversion?

Three causes account for almost every &ldquo;why does my AI pixel art look like noise&rdquo; complaint. First, the AI source had soft anti-aliased edges and the quantizer mapped each blurred pixel to a slightly different palette color, producing fringe instead of a clean outline &mdash; the fix is to run True Pixel&rsquo;s chroma-key cleanup before the conversion, then enable Auto Edge Chroma to force a one-pixel boundary at the subject edge. Second, the target output resolution was too high relative to the chosen palette, so the quantizer had room for noise patterns to read as detail. Pick a target between 32 and 96 pixels along the longest edge for a single sprite when the palette is small (4 to 16 colors), or 64 to 128 pixels when the palette is larger (32 to 64 colors). Third, the dithering setting did not match the palette &mdash; Floyd-Steinberg dithering across a 4-color Game Boy palette will look like static, while ordered dithering across a 32-color Endesga palette will look obviously patterned. Match dithering intensity to palette size: high for small palettes, low or off for larger ones.

Is there a free image to pixel art AI converter without watermarks?

Several browser tools advertise free image to pixel art AI conversion, and almost all of them either watermark exports, strip the alpha channel, cap the output to a thumbnail, or stop at the editor stage and force the user to refine the result pixel by pixel. <a href="/pixel-art?ref=blog">True Pixel</a> is a paid Sorceress tool with a Pro badge in <code>src/app/_home-v2/_data/tools.ts</code> (verified June 5, 2026), but new accounts start with credits and the conversion produces transparent-background PNG sprite sheets at any output resolution without watermarks. The honest answer is that an image to pixel art AI converter built for a real game pipeline costs something &mdash; either credits to the converter, or hours of hand-tracing inside a free pixel-art editor. The watermark-and-thumbnail-cap tier of free converters is the wrong call for any sprite that has to ship in a game.

Can I convert an AI-generated video into a pixel art sprite sheet?

Yes. <a href="/pixel-art?ref=blog">True Pixel</a> accepts video input directly. Verified against the live <code>/pixel-art</code> page source on June 5, 2026, the tool extracts frames from an MP4 at 30&nbsp;FPS, displays the frame strip at the bottom of the workspace, and lets the user pick which frames make the final sprite sheet before running the conversion. The temporal-stability pass builds one shared palette from every selected frame and re-runs the quantization against that single palette so the same shadow color in frame&nbsp;3 stays the same shadow color in frame&nbsp;14 &mdash; that is what stops AI-generated animation loops from flickering between frames at runtime. The packed PNG sprite sheet imports directly into Phaser, Godot, GameMaker, Construct, RPG Maker, and any custom 2D engine without a hand-cleanup pass.

Should I use Quick Sprites or convert an AI image with True Pixel?

Use <a href="/quick-sprites?ref=blog">Quick Sprites</a> when the sprite needs to come straight from a text prompt and the project has not produced a source image yet. Quick Sprites runs the Retro Diffusion <code>rd-animation</code> model at 9 credits per generation (verified at <code>MODEL_ID = 'retro-diffusion/rd-animation'</code> and <code>CREDITS_PER_GEN = 9</code> in <code>src/app/quick-sprites/page.tsx</code> on June 5, 2026) with three preset shapes &mdash; Four Angle Walking at 48&times;48, Small Sprites at 32&times;32, and VFX Effects between 24&times;24 and 96&times;96 &mdash; and writes a packed sprite sheet plus an animated GIF preview to the user&rsquo;s collection. Use <a href="/pixel-art?ref=blog">True Pixel</a> when the source already exists (an AI render from the <a href="/generate?ref=blog">image generator</a>, a photograph, a 3D render, a screen capture) and the goal is to lock that art to a specific palette. The two tools pair naturally: Quick Sprites for the protagonist walk, True Pixel for the bosses, props, and cutscene frames that have to match the same palette.

Sources

  1. Pixel art - Wikipedia
  2. Color quantization - Wikipedia
  3. Floyd-Steinberg dithering - Wikipedia
  4. Diffusion model - Wikipedia
  5. Sprite (computer graphics) - Wikipedia
  6. Indexed color - Wikipedia
  7. Nearest-neighbor interpolation - Wikipedia
Written by Arron R.·2,819 words·13 min read

Related posts