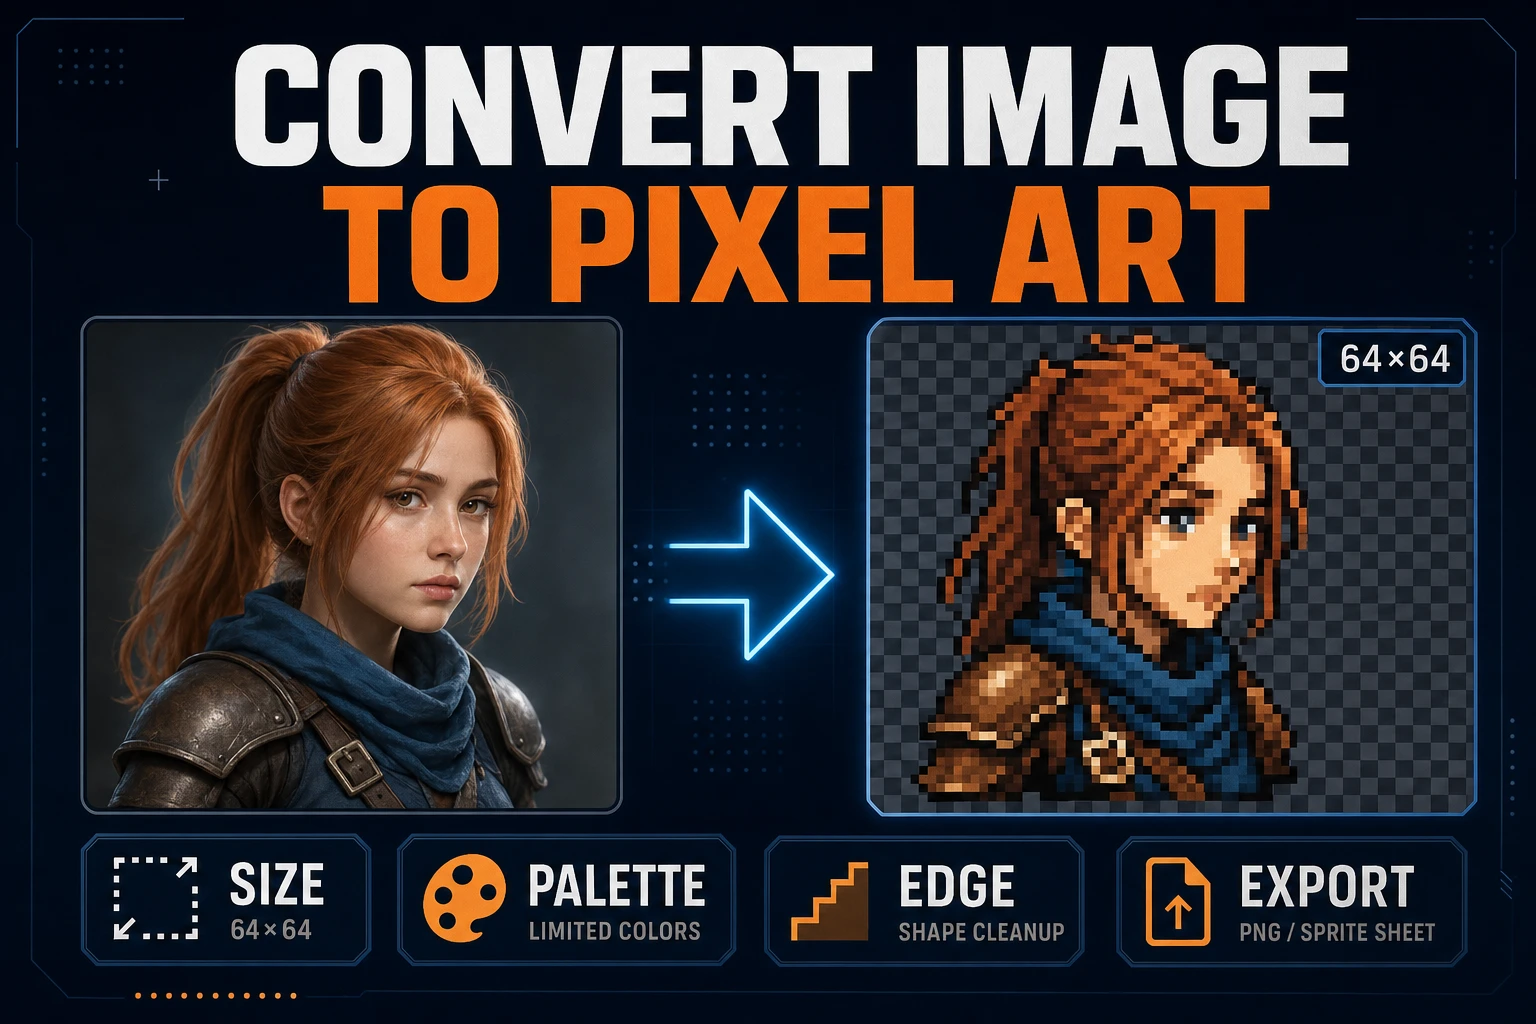
Convert Image to Pixel Art (Game Sprite Pipeline)

By Arron R.8 min read
Convert image to pixel art only after you lock cell size, palette, and transparency. True Pixel downscales and quantizes in-browser; inspect the result before y

A soft photograph and a game sprite are different assets. One stores continuous color; the other stores a finite grid of intentional pixels. If you convert image to pixel art without locking cell size, palette, and transparency first, the result looks like a blurry thumbnail instead of a readable character. This guide walks the Sorceress path—prepare the source, convert in True Pixel, inspect edges, then export a sharp PNG—verified against the live product source on July 20, 2026.
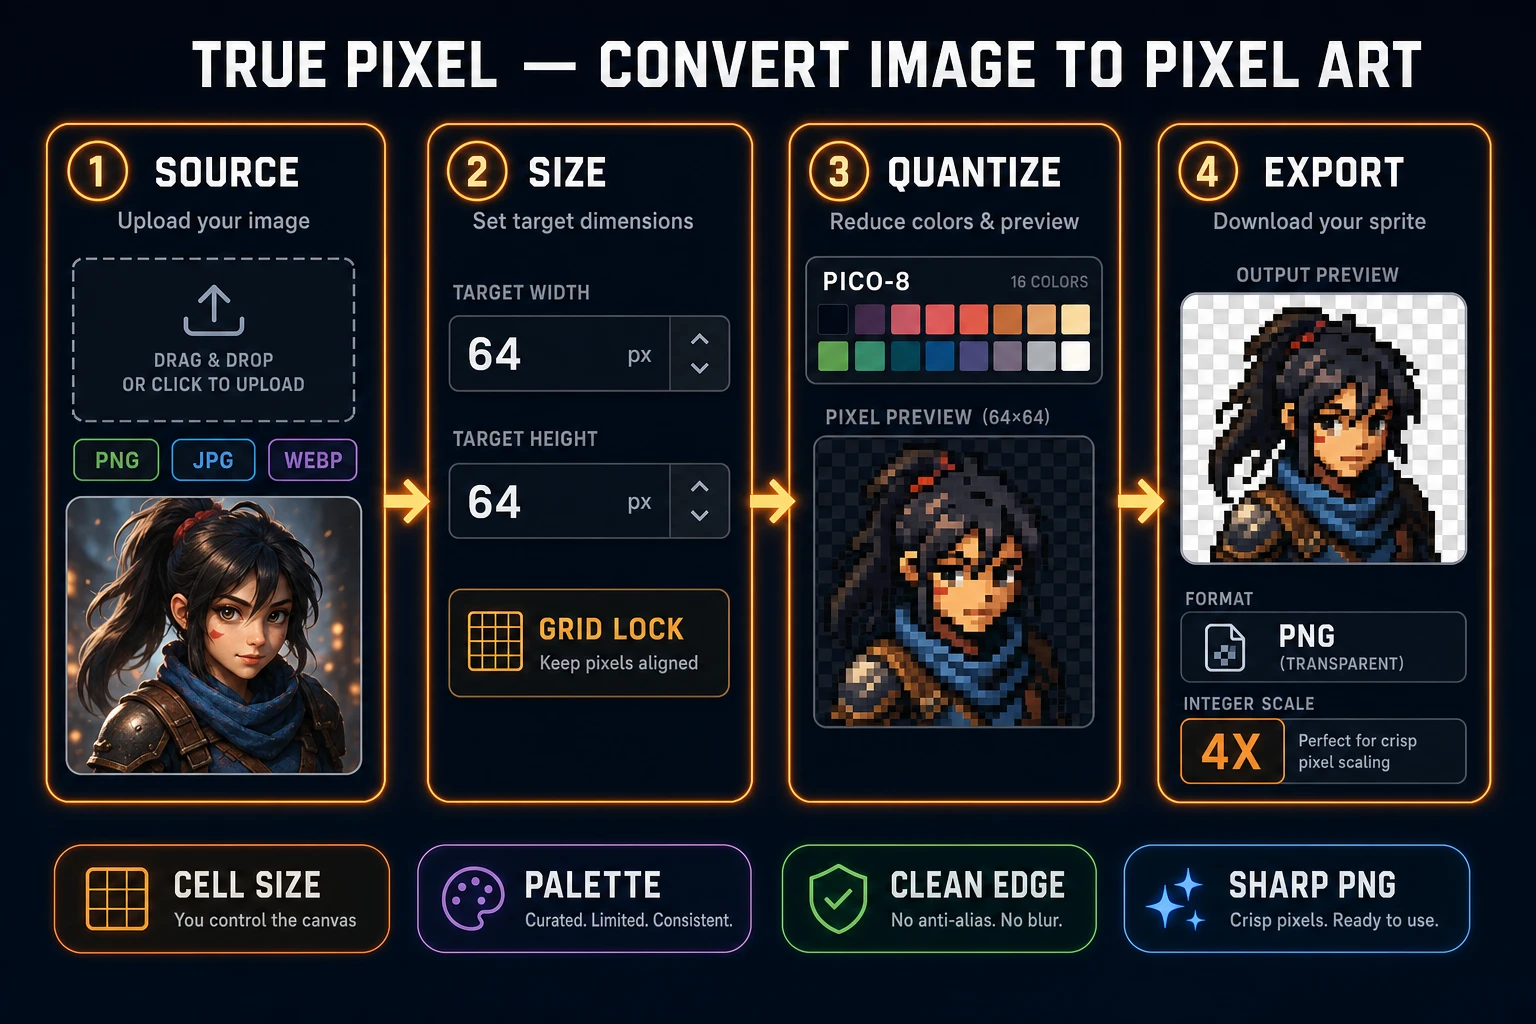
Convert image to pixel art workflow from source upload through cell size, palette quantization, and sharp PNG export
A game-ready conversion locks grid size and palette before downscaling, then exports a transparent PNG that survives integer upscaling.

What convert image to pixel art must preserve for games

When you convert image to pixel art, you are not applying a filter for social media. You are reducing resolution and remapping color so a runtime can draw the sprite at integer scales without muddy edges. The exact phrase has 1,300 monthly searches and KD 20 in the DataForSEO pull generated July 20, 2026. Searchers want a pipeline that ends in a usable game asset, not a novelty posterization.

Three properties have to survive the pass:

  • Silhouette. At the final cell size, a player should still recognize the body, weapon, and facing direction.
  • Clustered color. Related pixels should share palette entries so shadows and materials read as blocks, not noise.
  • Honest transparency. Background pixels must become alpha, not dark outlines that stick to the character after import.

The PNG specification is the usual delivery format because it preserves alpha and exact RGB values. That only helps if the conversion itself produced hard pixels. Soft anti-aliased edges encoded into a “pixel” PNG still blur when the engine scales them.

Treat conversion as acceptance testing. A pass means the sprite is readable at 1× on a zoomed grid and still readable at 2×, 3×, or 4× with nearest-neighbor scaling. A fail means you change size, palette, or source framing—not that you apply more blur on export.

Choose target size, palette, and transparency before converting

Decide the destination grid before you open a converter. Common indie targets are 16×16, 32×32, 48×48, and 64×64 for characters, with tiles often matching the same base unit. If the game camera shows the hero at 64 on-screen pixels, authoring at 32 and scaling ×2 is usually cleaner than authoring at 128 and hoping a shrink looks intentional.

Pick the palette budget next. Sorceress True Pixel ships classic presets including PICO-8 (16), SWEETIE-16, Endesga 32, Game Boy, CGA, NES (54), Grayscale, and 1-Bit, plus modes that sample a limited color count from the image. A locked game style sheet should name the preset or the max color count so every later prop matches the first sprite.

Plan transparency as a third decision. Flat studio backdrops are easy to chroma-key. Busy photographs are harder—crop tighter, replace the backdrop, or remove it before downscaling so background hues never enter the silhouette. If you leave the backdrop in, quantization will spend precious palette slots on wallpaper instead of the character.

Write the contract down in one line: “64×64 hero, PICO-8, transparent PNG, no dither for UI clarity.” That line becomes the checklist for every convert image to pixel art pass on the project.

Run the Sorceress convert image to pixel art workflow

Open True Pixel. In the current catalog it is marked Pro. The page converts images and videos into pixel-art frames with chroma keying, palette quantization, edge cleanup, outline controls, batch frame handling, and PNG download. Complementary tools for cleanup and sheet inspection are Canvas and Sprite Analyzer.

  1. Upload the source. True Pixel accepts PNG, JPG, WebP, GIF, MP4, and WebM. For a single sprite, start with a still PNG that already has a clear subject.
  2. Set target width and height. Defaults begin at 64×64; change them to the cell size your game actually draws.
  3. Choose palette mode. Select a preset or a constrained auto color count. Prefer “none” dithering when you need crisp HUD-like edges; use ordered or Floyd–Steinberg only when you intentionally want gradient texture.
  4. Remove the backdrop if needed. Enable chroma key, pick the key color, and tune tolerance. Optional AI-assisted Corridor Key removal can run for harder cutouts and may cost credits depending on resolution and backend; local/simple paths stay credit-free.
  5. Review outlines and contrast. Edge enhance, outline, brightness, and contrast controls exist for readability—use them to recover silhouette, not to invent detail the grid cannot hold.
  6. Download the PNG. True Pixel names exports with width, height, and output scale (for example a 4× preview PNG). Keep a 1× master when your pipeline needs the native grid.
  7. Inspect before engine import. Zoom the result on a checkerboard, then open multi-frame sheets in Sprite Analyzer when timing matters.

The conversion math runs in the browser on the source pixels. That means you can iterate size and palette quickly. It also means a bad source stays a bad source—True Pixel will not invent missing limb separation or repair a character fused into a busy photograph.
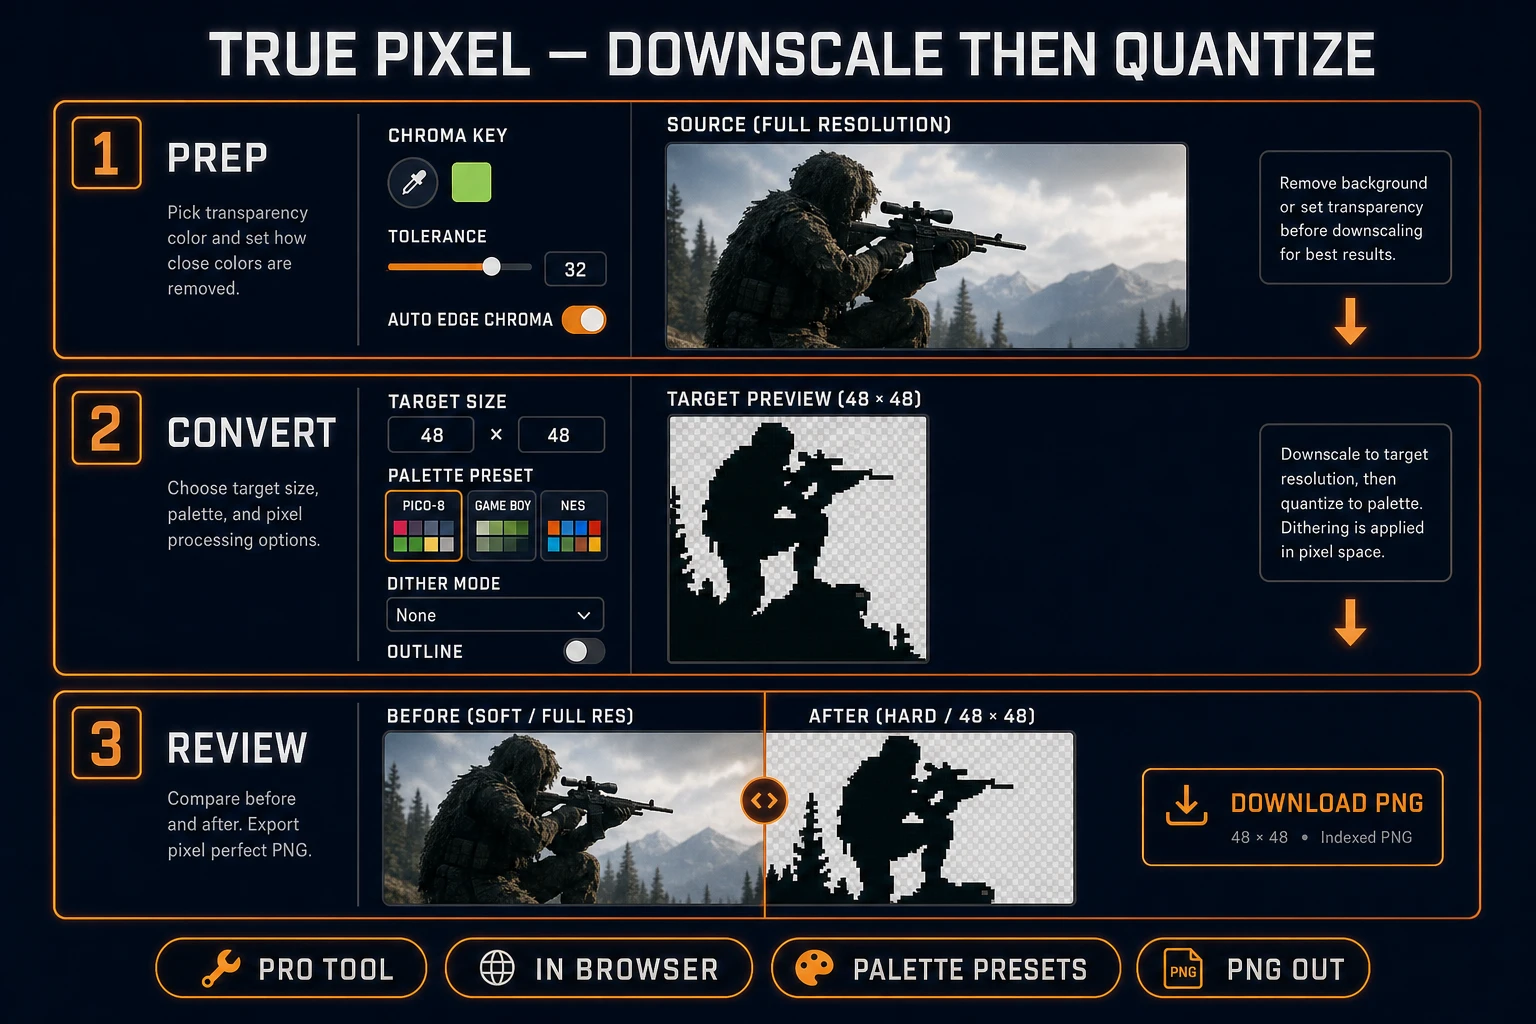
True Pixel convert image to pixel art UI showing chroma prep, 48 by 48 target, palette presets, and PNG download
Prepare transparency at full resolution, lock the target grid, then quantize—review the hard silhouette before you trust the download.

Step 1 — prepare a readable source image

Start from a source that already looks like a sprite candidate. Facing the camera or a clear three-quarter view beats a motion-blurred action shot. Arms should not merge into the torso. A weapon should sit on one consistent side. If you generated the portrait in AI Image Gen, prompt for a flat backdrop, centered framing, and limited costume materials before you convert.

Crop aggressively. Empty margin wastes pixels after downscale and shrinks the character into a postage stamp. Leave a few pixels of padding so outline tools do not clip the silhouette, but do not keep a full environment plate unless the environment is the asset.

Check contrast. A charcoal cloak on a black backdrop will vanish at 32×32. Raise separation in the source or plan a lighter outline after conversion. The converter can boost contrast, but recovering a silhouette that never existed in the source is guesswork.

If the backdrop is removable, remove it before quantization. Chroma key and edge cleanup at full resolution keep background samples out of the downscale bins. That single habit prevents the most common failure mode: a halo of muddy colors glued to the character.

Step 2 — downscale, quantize, and clean edges in True Pixel

With the source loaded, set the exact target width and height your game expects. Resist “make it bigger so it looks sharper.” Extra pixels that the camera will never display become soft mush when the engine later shrinks them. Author at the grid you ship.

Run the conversion and read the preview at 1× zoom on a checkerboard. Ask:

  • Is the head still a distinct cluster?
  • Do hands and feet remain as readable blocks?
  • Did the palette steal slots for leftover backdrop crumbs?
  • Are anti-aliased photo edges turned into stepped pixels, or into gray sludge?

Adjust one variable at a time. If the silhouette collapses, raise the target size or simplify the source pose. If colors feel noisy, drop the color count or switch to a classic preset. If edges fray, enable outline or edge enhance modestly, then re-check that the outline color exists in the palette story of the game.

Dithering is optional texture, not a rescue pass. Ordered and Floyd–Steinberg modes can sell gradients on large tiles, but they often hurt tiny characters and UI icons. For most convert image to pixel art character work, start with dithering off.

When you need hand fixes, send the frame to Canvas for pixel-level edits, then return to the sheet workflow. Do not upscale with a smooth filter and call it done—that undoes the conversion.

Step 3 — inspect frames and repair weak pixels

A single still can pass a glance test and still fail in motion. If you converted video frames or a turnaround set, scrub every frame. Look for flickering palette assignments, wobbling outlines, and props that teleport between hands. Temporal cleanup options in True Pixel exist for animation batches; use them when adjacent frames disagree on the same surface color.

Open multi-frame results in Sprite Analyzer when you need grid metadata, playback, and per-frame inspection. Confirm cell width, cell height, and that transparent regions stay transparent. A sheet that looks fine as a filmstrip can still be misaligned for an engine that expects fixed columns.

Repair rules that stay honest:

  • Fix silhouette holes and merged limbs at the native grid.
  • Keep the palette count you already published to the art bible.
  • Reject “AI upscale then shrink again” loops that reintroduce blur.
  • Compare against a known-good sprite from the same game for scale and outline weight.

For brand-new characters instead of photo conversion, Quick Sprites can generate directional sheets that already live on a pixel grid. Conversion and generation are different doors into the same acceptance checklist.

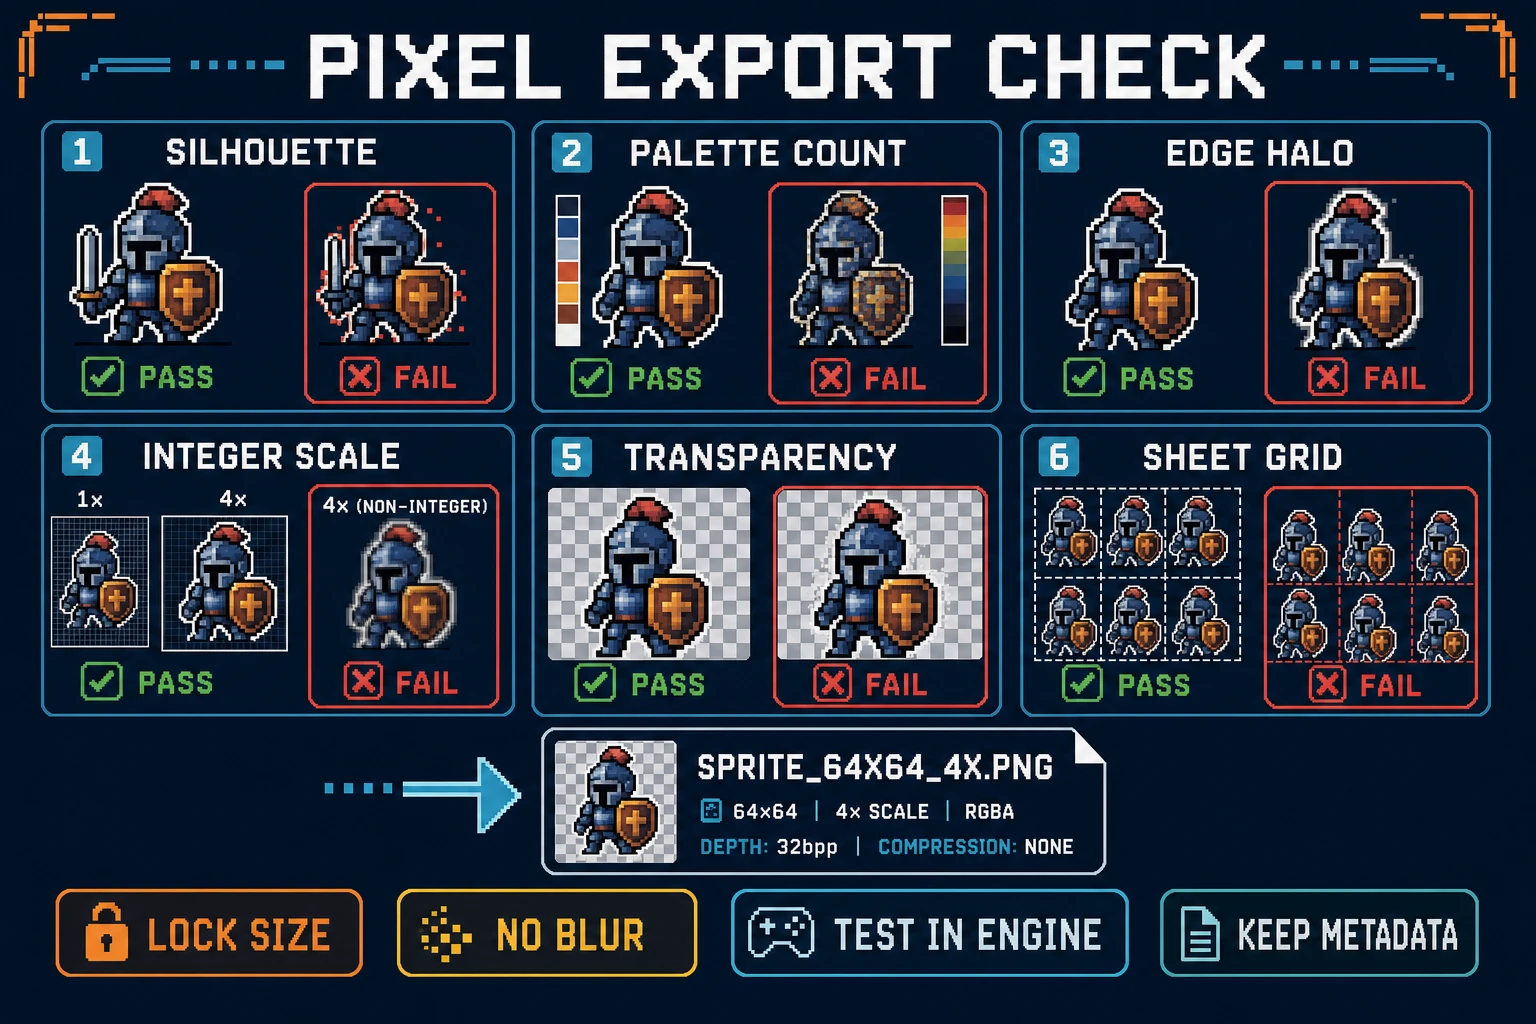
Pixel export checklist for convert image to pixel art covering silhouette palette edges integer scale transparency and sheet grid
Export only after silhouette, palette budget, edges, integer scale, transparency, and sheet grid each pass a deliberate check.

Export convert image to pixel art results without blur

Download the PNG from True Pixel and keep the filename’s size tags so the grid stays obvious later. Prefer a 1× master in source control even if you also keep a 4× preview for docs. Engines and browsers should upscale with nearest-neighbor intent, not with the default smooth resampling meant for photographs.

In CSS, set image-rendering to pixelated or crisp-edges when you display scaled pixel art in the browser. On canvas draws, disable imageSmoothingEnabled before scaling sprites. Those two switches prevent the most common “my conversion looked sharp in the tool and blurry in the game” report.

Final acceptance checklist:

  1. Open the PNG and confirm width × height match the authored grid.
  2. Inspect alpha on a checkerboard—no leftover backdrop fringe.
  3. Scale to 2× and 4× with nearest-neighbor; edges must stay blocky.
  4. Drop the sprite into the real camera size of the game.
  5. Record palette preset, target size, and source filename beside the asset.

Related reading on adjacent Sorceress paths: image to pixel art AI for AI-assisted framing, pixel art upscaler when you need clarity without changing authoring size, and the Tools Guide for the wider asset suite.

The practical rule is simple: convert image to pixel art only after the grid and palette are decided, remove the backdrop before quantization when you can, and export a PNG you are willing to inspect at 1×. Start in True Pixel, verify the silhouette like a QA step, and keep nearest-neighbor scaling on the way into the game. That is how a photograph becomes a sprite instead of a soft sticker.

Frequently Asked Questions

What does convert image to pixel art actually change?

It reduces the image to a chosen pixel grid and remaps colors onto a limited palette. A good conversion keeps silhouette, readable clusters, and intentional transparency. A bad conversion averages detail into mud, softens edges, or invents colors the game never planned to use.

Which file types can Sorceress True Pixel convert?

True Pixel accepts PNG, JPG, WebP, GIF, MP4, and WebM uploads. Still images convert to a single pixel frame or sheet workflow; videos become extractable frames you can quantize as a batch. The page is marked Pro in the current catalog, so upload requires a Pro-capable account.

Should I pick a classic palette or auto colors?

Pick a classic palette when the game already has a locked look—PICO-8, Game Boy, CGA, NES, or similar presets. Use a constrained auto color count when the source has unique hues you need to keep. Either way, decide the budget before converting so later assets match the first sprite.

Why does my pixel sprite look blurry in the browser?

The browser is probably interpolating the image or displaying it at a non-integer scale. Keep the source grid exact, scale by whole-number multiples, set CSS image-rendering to pixelated or crisp-edges where appropriate, and disable canvas image smoothing when drawing scaled frames.

When should I use chroma key before conversion?

Use chroma key when the background is a flat color you can pick and remove before downscaling. Removing the backdrop at full resolution prevents background pixels from bleeding into the silhouette during quantization. AI-assisted Corridor Key removal can cost credits; simple color keying and local processing paths are available in the tool.

Sources

  1. Portable Network Graphics (PNG) Specification (Third Edition) — W3C
  2. CSS image-rendering property — MDN Web Docs
  3. CanvasRenderingContext2D: imageSmoothingEnabled — MDN Web Docs
Written by Arron R.·1,761 words·8 min read

Related posts