Image to Pixel Art Grid (Sprite-Ready in Two Clicks)

By Arron R.13 min read
The cleanest way to go from image to pixel art grid is two browser tools chained: True Pixel quantizes the source to a fixed palette at sprite resolution, then

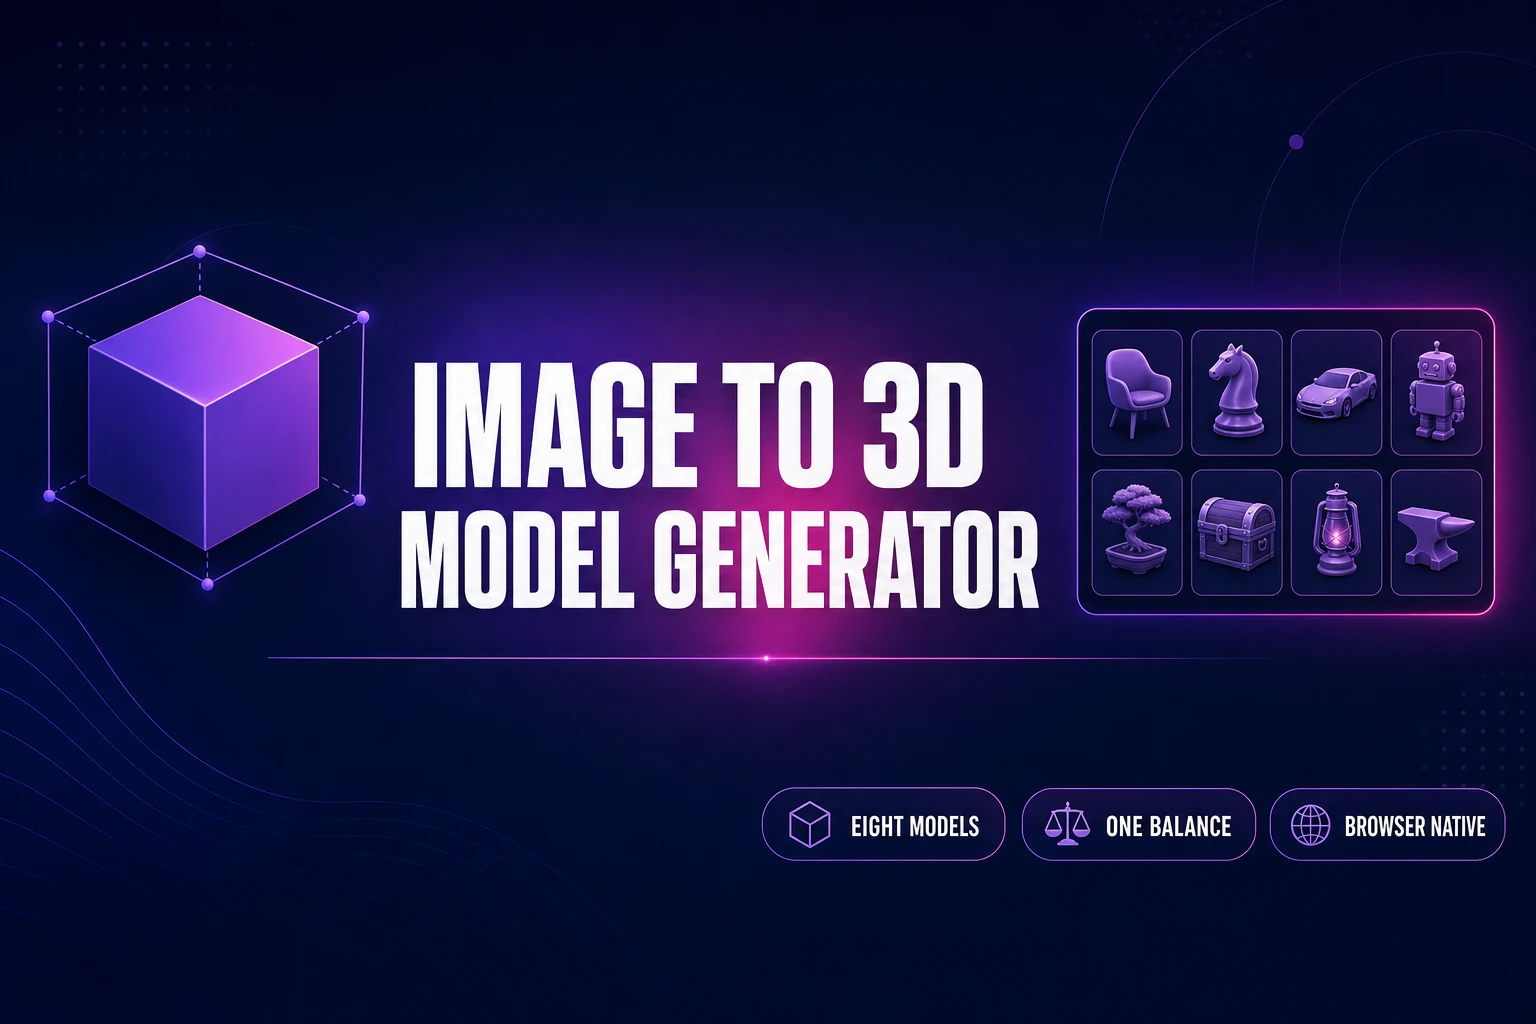
The fastest path from an image to pixel art grid frames an engine can read is two browser tools chained back to back. A sprite has to live inside a regular grid — fixed cell size, transparent background, frames laid out in row order — before Phaser or Three.js will play it as an animation. True Pixel at /pixel-art quantizes the source to a fixed palette at sprite resolution, and Slicer at /slicer cuts the result into individual frames on an explicit grid. No Aseprite license, no Photoshop, no command-line, no install. This guide walks the full pipeline against the live source code as of May 16, 2026 — every UI control, every palette preset, every export format verified — and finishes with the one-line Phaser 4 loader that consumes the output.

Four-panel pipeline showing the image to pixel art grid workflow: drop a source image into True Pixel, quantize to a 16-color PICO-8 palette at 64-pixel sprite resolution with Floyd-Steinberg dithering, then open the result in Slicer's Grid mode and place horizontal and vertical lines to define an 8-frame walk-cycle layout, then export individual sprite tiles ready for engine import with frameWidth 64 and frameHeight 64
The two-click image to pixel art grid pipeline — quantize in True Pixel, slice on a grid in Slicer, drop into the engine. All UI elements verified against the live source on May 16, 2026.

What "image to pixel art grid" actually means for a sprite sheet

An image to pixel art grid is not the same thing as a pixel art image. A pixel art image is a single rendered frame — a portrait, a tile, a key art piece — with a deliberately limited palette and a low resolution. A pixel art grid is a regular array of those frames laid out on a single canvas at a fixed cell size, where every cell is one frame of an animation or one tile in a tileset. Engines like Phaser 4, Three.js, Godot, and any custom WebGL renderer all read sprites as grids — the loader takes a frame width, a frame height, and a row/column count, then carves the image into addressable frames at runtime. The grid is the difference between a static portrait and a walk cycle. Get the grid wrong (drifting cell sizes, irregular margins, mixed transparency, frames in the wrong order) and the engine renders chopped-up sprites mid-stride. Get it right and the import is one line of code.

The constraints are non-negotiable. Every cell must share the same width and height in pixels. Every frame must sit on the same baseline pixel grid (no half-pixel drift between idle and walk). The background must be fully transparent (alpha 0, not "near white"). The cell order must match the engine's read order (left-to-right, top-to-bottom by default). And — the part most pure-prompt AI generators get wrong — the palette must be locked across every frame so the same character does not pick up extra greens or blues halfway through the cycle. The sprite-sheet format has not meaningfully changed since the 1980s arcade era; what changed is that the source images are now AI renders and the slicing is now browser-native.

Why the standard image to pixel art tool stops short

The standard pixel-art workflow online is "drop image, pick palette, click pixelate, download PNG." That gives you a single quantized image. It does not give you a grid. If the source was already laid out as a multi-frame sheet (eight frames of a walk cycle, for example, generated by an AI sprite tool), the pixelate step will quantize the entire sheet — but every cell will go through palette assignment independently. With a custom-fit palette extracted from the source, the colours can drift between cells: frame 3 picks up a slightly more orange skin tone than frame 4 because the dominant pixels in that cell happened to fall on a different cluster centroid. The result reads as a flickering character on engine playback. The same problem affects naive downscale-then-slice pipelines that downscale each cell separately after slicing.

The fix is to lock the palette once, run quantization at the source resolution before slicing, and only then carve the grid. That ordering — quantize first, slice second, with a shared palette across the whole sheet — is what produces a clean image to pixel art grid that engines render without flicker. It is also why chaining True Pixel into Slicer beats running any single-tool converter in isolation: True Pixel keeps the palette consistent across the whole canvas, Slicer cuts the canvas without any further resampling, and the output is a folder of frames that all share the same palette by construction.

The two-click pipeline — image to pixel art grid in under a minute

Here is the entire workflow, verified against the source on May 16, 2026.

Click one — quantize in True Pixel. Open /pixel-art, drop your source onto the canvas. The source can be anything: a render from AI Image Gen, a multi-frame sheet from Quick Sprites, a hand-drawn sheet from Canvas, a screenshot of an existing game, even a photograph. Pick a palette from the eight presets: PICO-8 (16 colors), SWEETIE-16, Endesga 32, Game Boy (4), CGA (16), NES (54), Grayscale (8), or 1-Bit. The exact RGB values for each preset are defined in src/app/pixel-art/page.tsx — PICO-8's 16 colors match the fantasy console's canonical palette exactly. Set the target resolution to whatever your engine grid will use (32 by 32 for retro, 64 by 64 for indie standard). Pick a dither mode if the source has gradients — Floyd-Steinberg for soft falloffs, ordered for hard tile-style art, none for clean cell-shaded renders. The quantizer runs k-means++ clustering on a perceptually-weighted RGB sample of the source, then snaps every pixel to the nearest quantized colour. Click Export and you have a packed PNG at the target resolution with the palette locked.

Click two — slice in Slicer. Open /slicer, drop the quantized PNG, and switch the selection mode from Square to Grid using the four-mode toggle bar (Square, Free, Polygon, Grid). The Grid sub-panel that appears has two place-line buttons: Horizontal and Vertical. Click to place a horizontal line at the row boundary, click again to add the next one. Switch to Vertical, place column boundaries. Each line snaps to the pixel grid using the Grid Snap value (preset values 1, 5, 10, 20, 50, plus a custom field) so frames stay on whole-pixel boundaries. The canvas shows a live preview of every cell the grid creates. Hit Save and Slicer exports each cell as a separate PNG plus a manifest mapping cell indices to coordinates. That is the entire image to pixel art grid pipeline — two browser tabs, two clicks each, no install.

Two-row infographic showing how to pick the right grid for image to pixel art grid work: row one compares 16, 32, 64, and 128 pixel sprite resolutions side by side with the same character; row two compares 4-frame, 6-frame, 8-frame, and 12-frame walk-cycle strip layouts
Sprite resolution and frame count drive the grid math. Pick the cell size your engine renders at, then pick the frame count that captures the motion cleanly. Verified May 16, 2026.

Picking the grid: resolution, frame count, layout shape

The grid math comes down to three decisions. Cell resolution sets how detailed each frame is — 16 by 16 for NES-era mini sprites where readability comes from silhouette alone, 32 by 32 for Game Boy and SNES character size where you can suggest a face with a few pixels, 48 by 48 and 64 by 64 for modern indie pixel art where faces and armor details read clearly, and 128 by 128 for hero portraits and key art. The rule is to pick the size your engine will actually render the sprite at — there is no point quantizing to 32 by 32 then upscaling 4× at runtime because the eye reads the upscale artefacts more than the palette work. True Pixel's Output Scale slider does the upscale at export time using nearest-neighbour, which is the only correct algorithm for pixel art (bicubic or bilinear smoothing destroys the look).

Frame count drives the animation budget. A 4-frame walk cycle is the absolute minimum — two contact poses (when a foot hits the ground) and two passing poses (when the legs cross). 6 frames is the comfort zone for most indie titles. 8 frames buys smoother motion with a high arc in the step, which reads as a more athletic character. 12 frames is overkill for anything that is not a featured hero animation. Most idle loops want 4 frames, walks want 6 to 8, runs want 6, jumps want 4 to 6, attacks want 4 to 8 depending on weapon weight. Layout shape is the third decision: a 1-by-N strip (all frames in a single row) is easiest for Slicer's Grid mode because you only place vertical lines; an N-by-M packed sheet (frames wrapped onto multiple rows) packs denser for texture-atlas budgets but requires both horizontal and vertical lines. Strips win for clarity, packed sheets win for memory. Both produce a valid image to pixel art grid as long as the cell math is consistent.

Locking the palette across an entire animation

The palette is the dominant visual signature of pixel art — three or four signature colors will tell a player which character they are looking at faster than any silhouette. That is why locking the palette across an entire animation matters: if the idle loop uses one teal and the walk cycle drifts to a slightly different teal, the eye reads two different characters. True Pixel handles this two ways. The first is the preset path: pick PICO-8 or SWEETIE-16 or Endesga 32, run the same preset on every animation in the project, and every frame quantizes to the same fixed palette by definition. The second is the custom palette path: extract a palette from the first reference frame using the built-in palette extractor (k-means on the source samples), save the resulting palette to disk, then reload it for every subsequent animation. The custom path preserves brand-specific colors the presets do not include.

For the source images themselves, the upstream consistency primitive is reference-image conditioning at the generation step. The AI Image Gen picker on Sorceress includes ten models — Z-Image, Flux 2 Pro, Seedream 4.5, Seedream 5 Lite, Nano Banana, Nano Banana Pro, Nano Banana 2, GPT Image 1.5, GPT Image 2, Grok Imagine — all of which accept reference images as input. Reference-image conditioning is how a generator stays on model across eight poses; without it, pure-prompt sessions produce eight beautiful but distinct characters. The full character-consistency workflow is the Canva vs game-ready pipelines piece and the stay-on-model reference images deep dive. By the time the source hits True Pixel, the character should already be on model; True Pixel locks the palette, and Slicer carves the grid.

The Slicer Grid mode — every control verified against the source

Slicer's UI has four selection modes, accessible from the toggle bar in the left sidebar: Square (drag a single rectangular selection), Free (drag with aspect ratio unlocked), Polygon (click to place vertices, double-click to close), and Grid (place horizontal and vertical lines to define a multi-cell layout). Grid is the mode that matters for the image to pixel art grid workflow. When you switch to Grid, a sub-panel appears with two place-line buttons (Horizontal and Vertical) and a line counter that reads "Nh + Nv lines." Click Horizontal, click anywhere on the canvas to place a line. Click near an existing line to remove it. Click Vertical, place column boundaries. The Clear Lines button wipes the grid; the Grid Snap value (1, 5, 10, 20, 50, or a custom integer) snaps every new line to that pixel modulus. For a 4-by-2 walk cycle on a 256 by 128 canvas with 64-pixel cells, the configuration is one horizontal line at y=64 and three vertical lines at x=64, x=128, x=192 — Slicer interprets those four divisions as eight cells in row order.

The export step packages every cell as a separate PNG. Slicer's output is a ZIP of named frames plus a manifest mapping cell indices to source coordinates (useful for any custom loader that wants to preserve frame order without relying on filename parsing). For an engine that prefers a single packed sheet (Phaser, Three.js, Godot all do), the right output is the quantized source itself — Slicer's Grid mode is the verification and naming layer, while the original packed PNG goes straight into the loader. For an engine that wants individual frame files (some custom HTML5 game runtimes), Slicer's per-cell export is the deliverable. Both paths share the same underlying grid; the choice is downstream of the slice.

Three-panel engine-import diagram showing the packed pixel art grid sprite sheet at 256 by 128 pixels with 8 frames at 64-by-64 cell size on the left, a Phaser 4 code snippet with the spritesheet loader and animation create call in the middle, and the runtime canvas mockup with the character mid-stride at 60 FPS on the right
Engine side: one line for the loader, one anims.create for the animation, one play call to start it. Phaser 4 API verified May 16, 2026 against the official documentation.

Engine side: one line of code per animation

Once the image to pixel art grid is sliced, the engine side is trivial. Phaser 4's spritesheet loader takes the path to a packed PNG and a frame configuration. The pattern for a 64 by 64 walk cycle packed as a 4-by-2 sheet is:

preload() {
  this.load.spritesheet('hero', 'assets/walk.png', {
    frameWidth: 64,
    frameHeight: 64
  });
}

create() {
  this.anims.create({
    key: 'walk',
    frames: this.anims.generateFrameNumbers('hero', { start: 0, end: 7 }),
    frameRate: 12,
    repeat: -1
  });
  this.add.sprite(400, 300, 'hero').play('walk');
}

That is the entire engine integration. The frameWidth and frameHeight values must exactly match the cell size you used in Slicer; if they drift by even one pixel the loader will read partial frames from neighbouring cells and the animation will flicker. generateFrameNumbers with start: 0, end: 7 enumerates the 8 cells in left-to-right top-to-bottom order; frameRate: 12 plays the cycle at 12 frames per second (the standard for a casual walk); repeat: -1 loops indefinitely. Three.js takes the same packed PNG, wraps it in a THREE.Texture, sets the repeat and offset properties per frame, and animates with a clock. Godot loads the sheet as a SpriteFrames resource and assigns it to an AnimatedSprite2D node. The image to pixel art grid is the universal format; the engine plumbing differs by a few lines.

Common failure modes and how to fix each one

Three failure modes account for almost every broken image to pixel art grid in the wild.

Failure 1: drifting cell sizes. The source sheet was generated at a resolution that does not divide cleanly into the target cell size. A 250 by 125 source sliced into 64-pixel cells leaves 5-pixel and 3-pixel slivers on the edges; the engine reads those as garbage frames. The fix is to crop or pad the source to a multiple of the cell size before quantizing in True Pixel. If you control the source generation (which you do when using Quick Sprites or AI Image Gen), specify the canvas size as cell × frames upstream.

Failure 2: palette drift between cells. A custom palette extracted from a multi-frame source can drift when k-means picks slightly different centroids for clusters that span cell boundaries. The fix is to run the quantizer with a fixed preset (PICO-8 if the source supports it) or to extract the palette from a single representative frame and save it as a custom palette for the rest of the animation. The save-and-reload custom palette path in True Pixel is the workhorse here.

Failure 3: background bleed. The source has a not-quite-transparent background — a faint gray cast from JPG compression, a 1% alpha border from a soft eraser, anything that is not literally rgba(0,0,0,0). The engine reads that as opaque rectangles behind every sprite. The fix is to run the source through BG Remover before True Pixel, or use True Pixel's chroma-key mode to pick the background colour and set a tolerance. The cleaned image then goes into the quantizer and emerges with crisp alpha edges. The background remover for sprites piece covers the full workflow.

How this fits the rest of the Sorceress pipeline

The image to pixel art grid step sits in the middle of a longer chain. Upstream is asset generation: AI Image Gen for character art with reference-image consistency, Quick Sprites for animated sprite sheets generated directly from a prompt, Auto-Sprite v2 for video-to-sprite-sheet extraction. Downstream is engine integration and animation polish: Sprite Analyzer for inspecting an existing sheet's grid math, Canvas for hand-tweaking individual frames in-browser, and the WizardGenie coding agent for wiring the sprite into a working Phaser 4 game. The five-tool path from prompt to playable build is: AI Image Gen → Quick Sprites → True Pixel → Slicer → WizardGenie. Five browser tabs. No install. No subscription beyond Sorceress Pro.

The longer reads on the adjacent steps: the 2-minute sprite sheet piece covers the Quick Sprites side, the image to pixel art conversion piece covers True Pixel's standalone use, the AI sprite generator piece covers prompt-to-animated-sprite, and the Phaser game tutorial covers the WizardGenie agentic build that consumes the output. The image to pixel art grid step is the connective tissue between the asset side and the engine side; once it is two clicks long, the whole pipeline collapses into an afternoon.

The verdict — two clicks is the new baseline

Before browser-native quantizers and slicers, the standard image to pixel art grid pipeline was a five-tool dance: open the AI render in Photoshop, run a pixelate filter, manually clean palette boundaries, save out, open in Aseprite, configure import sprite sheet, slice manually, export individual frames. An hour minimum, two hours if the source had bad alpha. The 2026 version is two browser tabs and four clicks (drop source, pick palette, switch to Grid mode, place lines, export). The output is identical in shape to what Aseprite produces — fixed-cell-size packed PNG with a manifest — and the import code is the same single Phaser line. The handcraft workflows in traditional pixel art are still the gold standard for original work designed pixel by pixel from scratch. But for the "I have an AI render, I want it on a grid the engine can read" workflow, the two-click path beats every install-required alternative on raw time-to-deliverable. Drop the source, pick the palette, switch to Grid, place the lines, export. That is the image to pixel art grid workflow in May 2026, and it lives entirely in two browser tabs you can open right now.

Frequently Asked Questions

What is an image to pixel art grid, and why does it matter for sprite sheets?

A pixel art grid is a single image laid out as a regular array of cells, where every cell is one frame of an animation (or one tile in a tileset). Engines like Phaser, Three.js, and Godot all read sprites as grids — the loader takes a frame width, a frame height, and an optional row or column count, then slices the image at runtime into addressable frames. That is why the image to pixel art grid step matters: a beautiful pixel-art portrait at 256 by 256 is a single sprite, while the same character laid out as eight 64 by 64 frames in a 4-by-2 grid is a walk cycle the engine can play. The grid is the difference between a static image and an animation. The shape is non-negotiable — every cell must be the same size, frames must sit on a fixed pixel baseline, the background must be transparent, and the cell order has to match how the engine reads frames (left-to-right, top-to-bottom). Get the grid wrong and the engine renders chopped-up sprites mid-frame. Get it right and the import is a single line of code.

How do I convert an image to pixel art grid frames without an art skill?

The two-click path is to chain a palette quantizer and a grid slicer. Step one: open True Pixel at /pixel-art, drop the source image (a render from AI Image Gen, a photo, an existing sprite sheet at the wrong size, anything), pick a palette preset (PICO-8 at 16 colours is the default safe pick), set the target sprite resolution that matches your engine grid (32 by 32 is the SNES character size, 64 by 64 is the modern indie size), and export the quantized PNG. Step two: open Slicer at /slicer, drop the quantized PNG, switch the mode to Grid, then place horizontal and vertical lines on the canvas to define the grid. Slicer exports each cell as a separate PNG plus a manifest. That is the entire image to pixel art grid pipeline — no Aseprite, no Photoshop, no command-line, no install. If the source is already a clean sprite sheet at the wrong cell size, you can skip step one and go straight to Slicer.

What grid size should I pick when converting an image to a pixel art grid?

Match the grid cell size to the resolution your engine will render the sprite at, then pick a frame count that captures the animation cleanly. The standard sprite cell sizes in 2026 are 16 by 16 for NES-style mini sprites, 32 by 32 for Game Boy and SNES characters, 48 by 48 and 64 by 64 for modern indie characters with readable detail, and 128 by 128 for hero portraits and key art. For frame counts, a 4-frame walk cycle is the absolute minimum (two contact poses, two passing poses), 6 frames is the comfort zone, 8 frames gives smooth motion with a high arc, and 12 frames is overkill for anything that is not a hero animation. Multiply: 8 frames at 64 by 64 fits in a 4-by-2 grid that is 256 by 128 pixels total, or a 1-by-8 strip that is 512 by 64. Strip layouts are easier for Slicer's Grid mode because you only place vertical lines. Square layouts pack denser for texture-atlas budgets.

What is the difference between Slicer's Grid mode and just downscaling a sprite sheet?

Grid mode in Slicer defines explicit horizontal and vertical lines on the source image, then exports each rectangular cell between consecutive lines as a separate PNG. The lines are placeable, removable, and snapable to a pixel grid — useful for sprite sheets that are not perfectly aligned, or for irregular layouts where some frames are wider than others. Downscaling, by contrast, throws away pixel data — a 1024 by 512 sprite sheet downscaled to 256 by 128 loses 75 percent of the resolution and blurs the palette boundaries. The two are complementary, not interchangeable. The right pipeline for image to pixel art grid work is downscale to the target sprite resolution first (True Pixel's source-resolution master keeps the palette clean), then slice on a grid at that target resolution (Slicer's Grid mode cuts without further resampling). Doing them in the other order — slice first, downscale each cell — produces palette inconsistency across frames because each cell quantizes independently.

How do I import the sliced image to pixel art grid into Phaser?

Phaser 4's spritesheet loader takes a key, the path to the packed sheet, and a frame configuration. If you exported the grid as a single packed PNG with a fixed cell size (which is the format most engines prefer over individual frames), the loader call is one line in the preload function. The path is this dot load dot spritesheet, key string, asset URL, and a frame config with frameWidth and frameHeight matching your cell size. Then the animation creation step uses anims dot generateFrameNumbers to enumerate the frames in order. For example, a 64 by 64 walk cycle packed as 1-by-8 strip becomes this dot load dot spritesheet hero, assets walk png, frameWidth 64 frameHeight 64, then the create step uses anims dot create with key walk, frames anims dot generateFrameNumbers hero start 0 end 7, frameRate 12, repeat negative one. Drop the sprite with add dot sprite x y hero play walk. That is the whole engine side. Three.js and Godot import the same packed PNG with their own equivalents — Three.js wraps it in a Texture with repeat and offset, Godot loads it as a SpriteFrames resource.

Can I batch the image to pixel art grid pipeline across multiple animations?

Yes — both True Pixel and Slicer support batch mode, and the right pattern is to lock the palette once and reuse it across every animation in the project. The palette is the dominant visual signature of pixel art; switching palettes between the idle and the walk cycle reads as two different characters. The batch workflow in True Pixel locks a custom palette (extracted from the first source or imported from a palette file), then runs the same quantizer across the idle, walk, run, jump, attack, hit, and death frames. The output is N quantized PNGs at the same target resolution sharing the same palette. Feed those into Slicer with the same grid configuration and you get a folder of named frames ready for engine import. The naming convention to follow is animation-name-frame-NN (idle-frame-00, walk-frame-01) — engines read it directly, and the manifest Slicer emits maps frame indices to the source cells for any custom loader.

Sources

  1. Sprite (computer graphics) — Wikipedia
  2. Texture atlas — Wikipedia
  3. Color quantization — Wikipedia
  4. Animate Sprite Sheets in Phaser 4 Made Easy (Phaser official news)
  5. Working with sprite-sheets (Phaser Editor docs)
  6. Pixel art — Wikipedia
  7. K-means clustering — Wikipedia
  8. PICO-8 — Wikipedia
Written by Arron R.·2,988 words·13 min read

Related posts