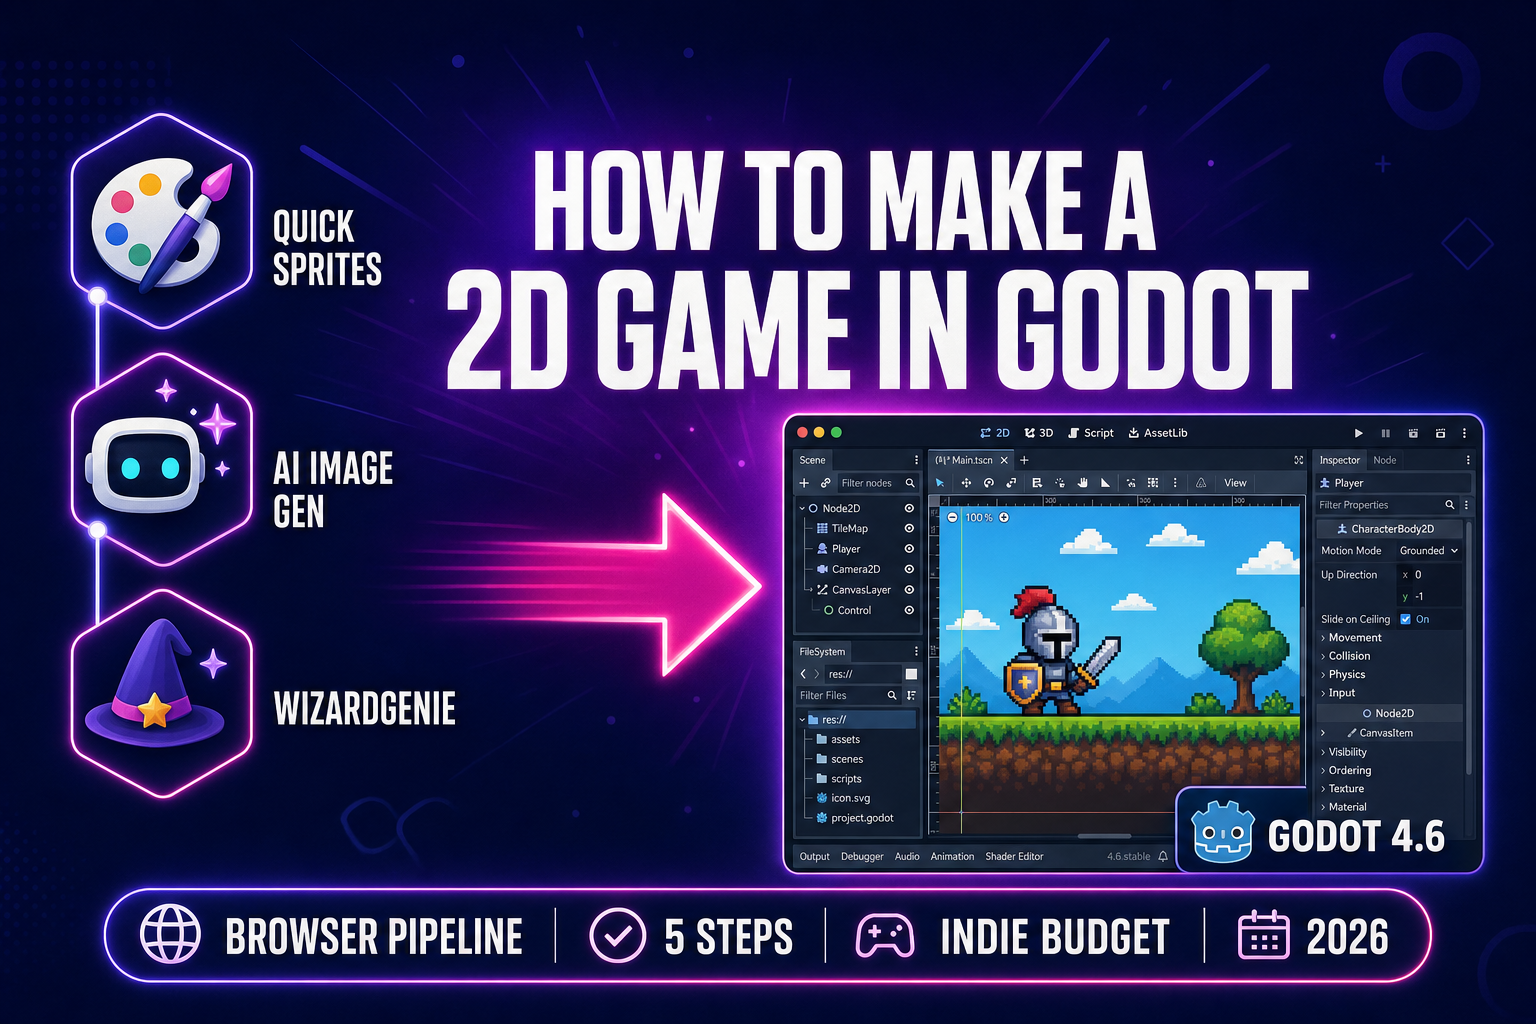
The phrase "how to make a 2D game in Godot" gets typed into Google about a hundred times a month in 2026, and the answer that searcher actually wants has changed twice in the last twelve months. The 2024 answer was "open Godot, draw your sprites in Aseprite, hand-write GDScript." The 2025 answer was "use a single AI image model for the sprites, hand-write the rest." The 2026 answer is something cleaner: a browser AI pipeline that produces every asset the project needs plus the GDScript glue, and drops the result straight into Godot 4.6.3 for play-testing. This piece walks the five-step pipeline end-to-end with credit costs, model versions, and Godot 4.6 import paths verified against the live source on May 26, 2026.
What "how to make a 2D game in Godot" actually means in 2026
The honest framing for how to make a 2D game in Godot in 2026 is that the engine itself has not changed dramatically — Godot 4.6.3 shipped on May 20, 2026 as a maintenance release of the 4.6 line that arrived in January 2026, verified against the official release archive on May 26, 2026 per Hard Rule #16. What changed is the asset and code production layer that feeds the engine. Where a 2024-era beginner spent the first week of a project drawing pixel art and the second week writing GDScript by hand, a 2026-era beginner spends the first afternoon prompting a browser-native AI pipeline and the second afternoon polishing the result inside Godot’s editor.
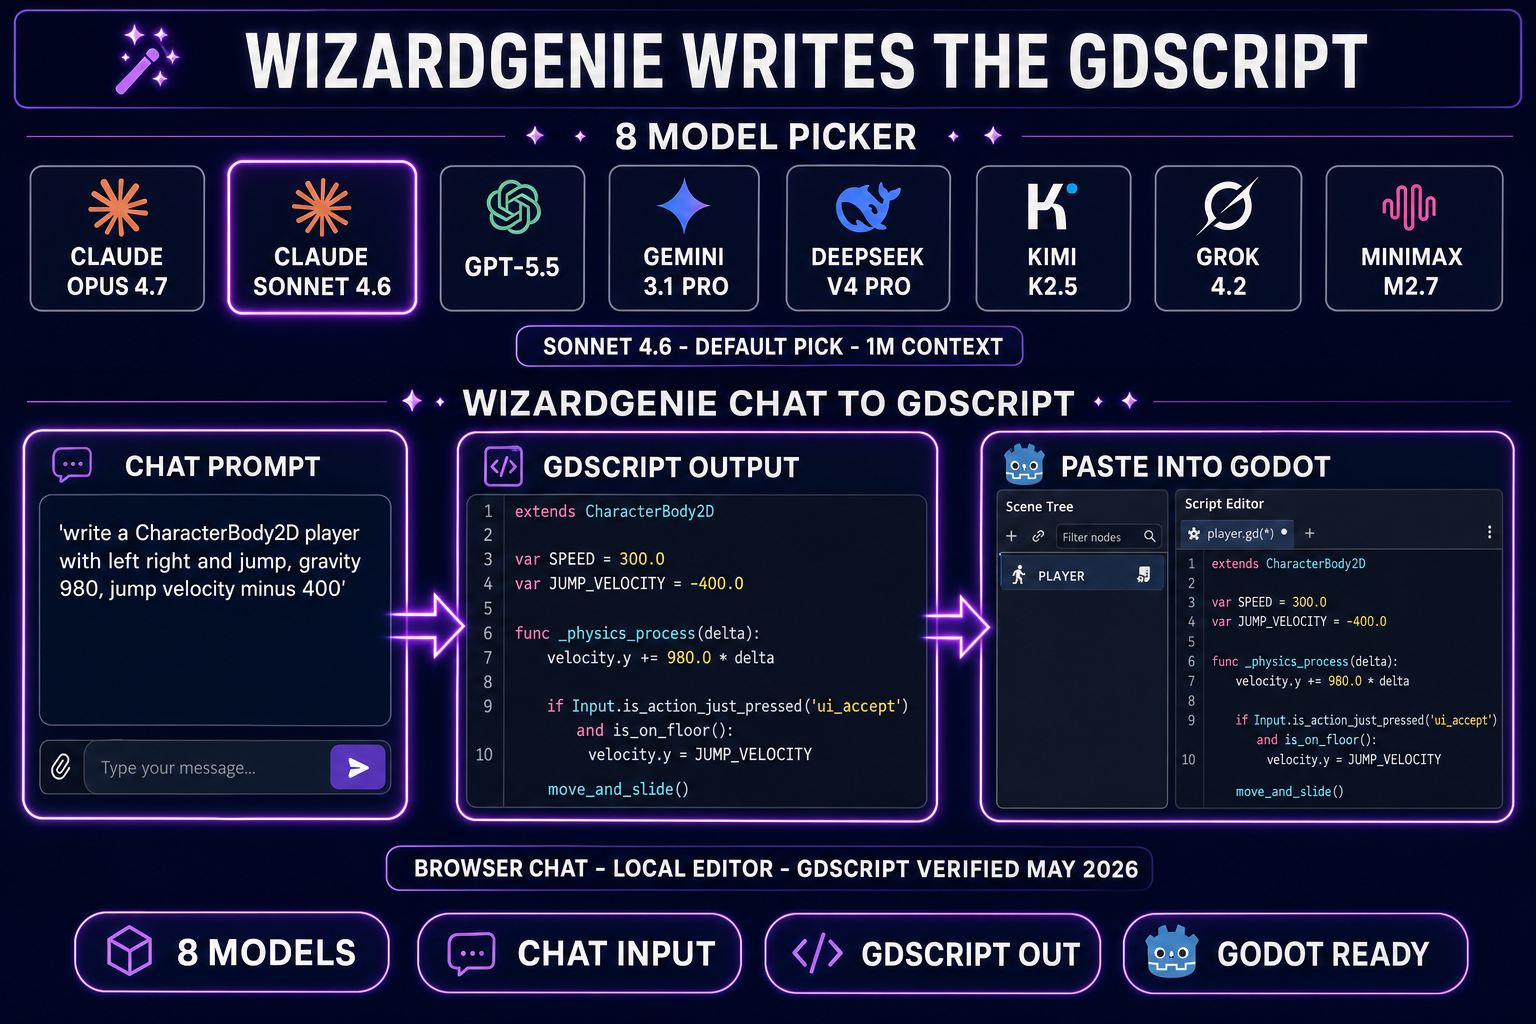
The Sorceress Game Creation Suite is one expression of that pipeline. Three tools carry most of the load when the engine target is Godot: Quick Sprites for animated pixel-art sprite sheets, AI Image Gen for backgrounds and concept art, and WizardGenie for the GDScript itself. Two more tools fill in the corners — Sound Studio for music and SFX, and Tileset Forge for level tilesheets — and the rest of the suite stays available for richer projects.
The piece deliberately frames Godot as the runtime and the browser AI pipeline as the asset farm. Godot 4.6 keeps its native desktop editor, its CharacterBody2D physics system (a standard 2D game physics primitive for character controllers), its TileMapLayer level tooling, and its export templates — those are the parts the developer keeps full control of. The AI pipeline produces the inputs to that engine. The two halves meet at the file boundary: a PNG sprite sheet drops into the project folder, an AudioStreamPlayer references a WAV file, a GDScript file pastes into the script editor. Nothing in the workflow asks the developer to abandon Godot for a different runtime — it asks them to stop hand-producing inputs that an AI model produces faster.
How to make a 2D game in Godot in five steps — the workflow at a glance
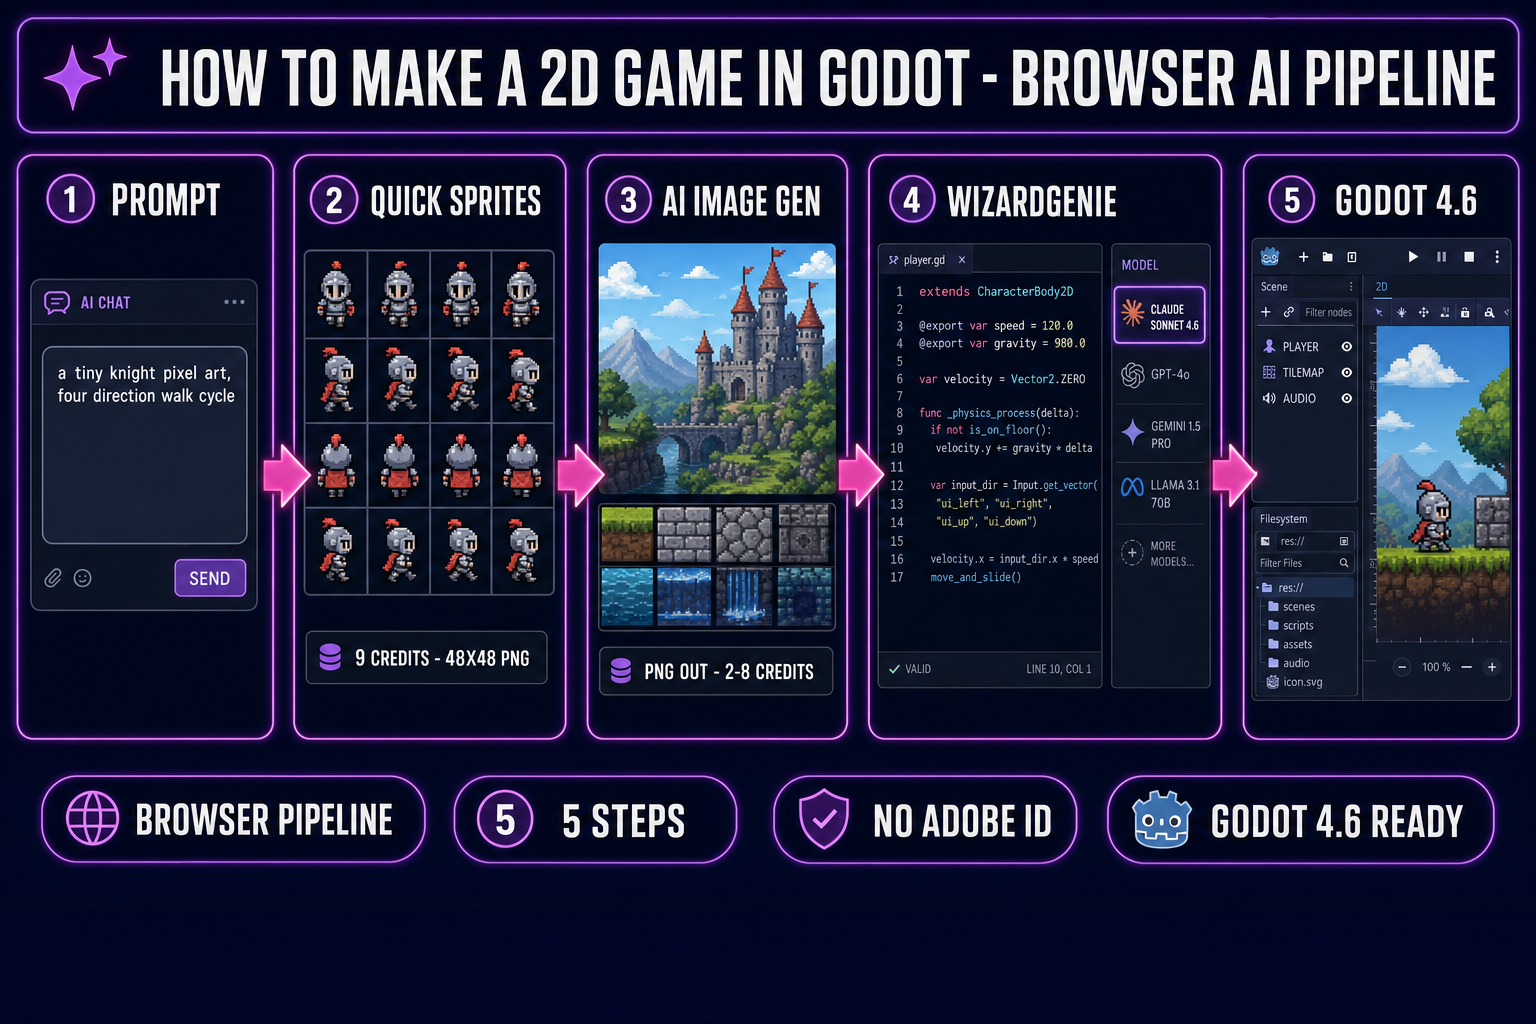
The five-step workflow for how to make a 2D game in Godot with the browser AI pipeline is the same shape regardless of genre. Whether the target is a top-down RPG, a side-scrolling platformer, or a single-screen arcade game, the five steps stay the same; only the prompts change.
- Generate the hero sprite sheet in Quick Sprites at 9 credits per generation. Pick Four Angle Walking for a top-down game or Small Sprites for a six-pose movement set. Output is a PNG with a transparent background, ready to import.
- Generate the level art in AI Image Gen and the tileset in Tileset Forge. Z-Image at 2 credits or Seedream 5 Lite at 6 credits are the cheap workhorse picks. Output is one PNG background plate and one tilesheet PNG.
- Generate the audio in Sound Studio. A typical first-pass set is one looping music track, two SFX (jump and pickup), and zero voice lines for an MVP. Output is WAV or MP3 files.
- Generate the GDScript in WizardGenie using the eight-model coding picker. Prompt for a CharacterBody2D player script, the TileMapLayer collision setup, and any signal wiring the level needs. Output is GDScript that pastes into Godot’s script editor.
- Wire everything together inside Godot 4.6.3. Create the scene tree, drop the generated assets into the project folder, paste in the GDScript, set up an input map, and press F5 to run. The whole sequence runs in roughly two hours of focused work on a moderate budget.
The rest of the piece walks each step in detail, with the model versions, credit costs, and Godot 4.6 import paths spelled out so the reader can follow along without guessing at the in-between bits.
Step 1 — Generate your hero sprite with Quick Sprites
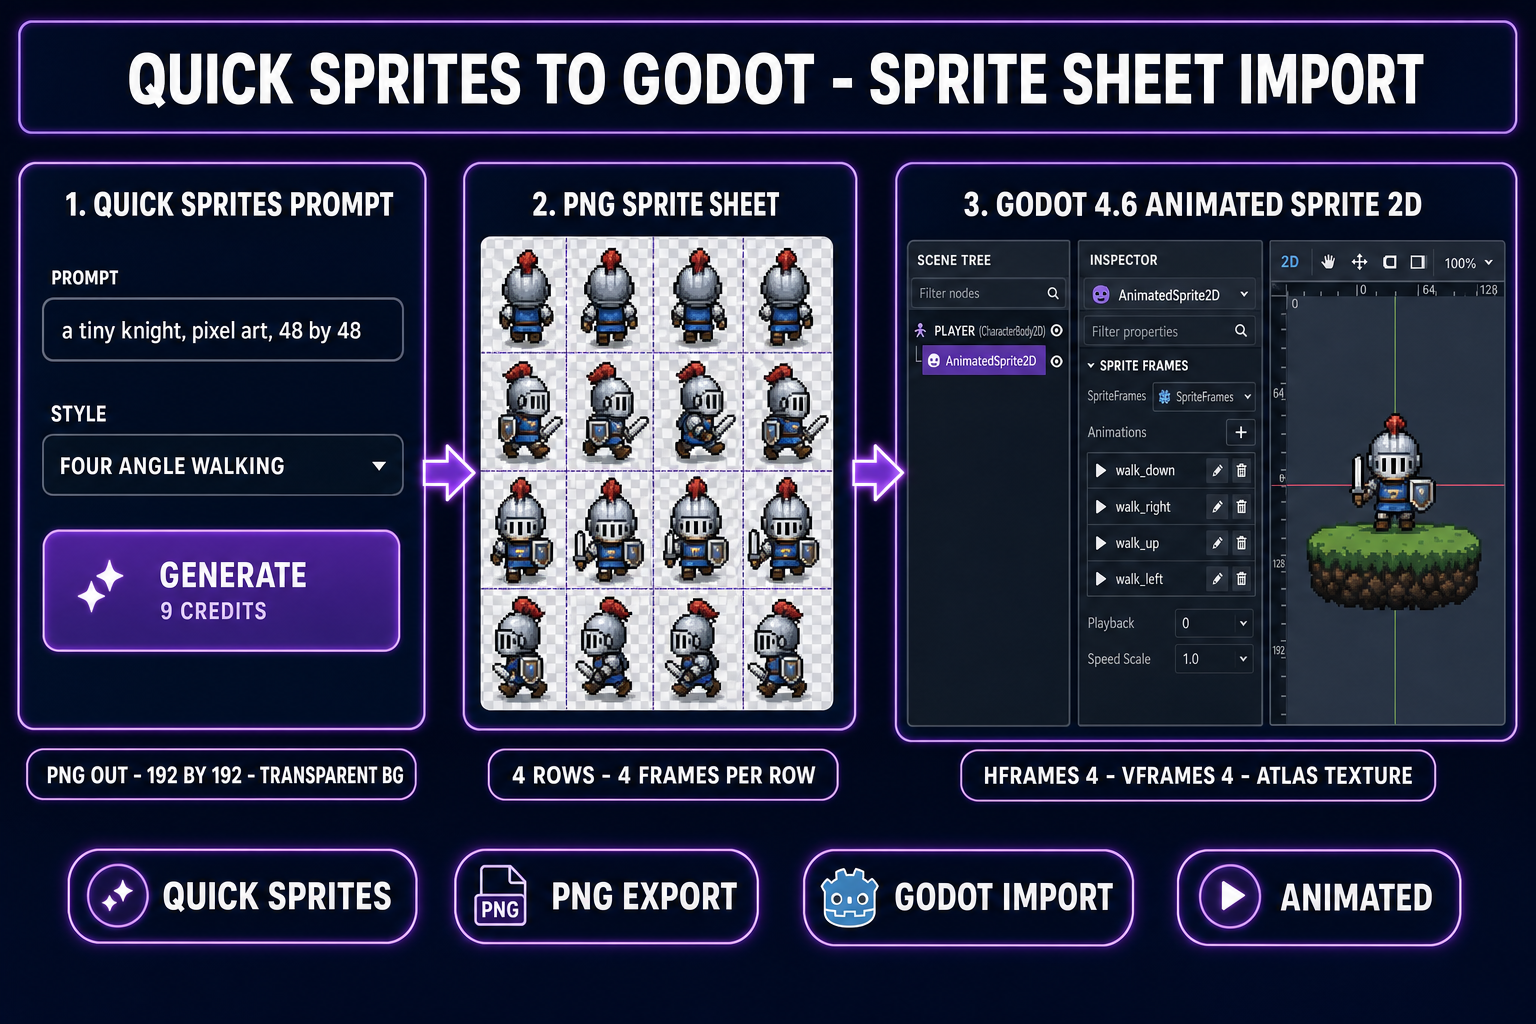
The first step in how to make a 2D game in Godot with the browser pipeline is the hero sprite, because every other asset decision flows from the character’s visual style. Quick Sprites runs the Retro Diffusion retro-diffusion/rd-animation model at 9 credits per generation, verified against src/app/quick-sprites/page.tsx on May 26, 2026. Three style presets ship in the picker, and the right choice depends on the game’s perspective.
Four Angle Walking at 48 by 48 pixels is the right pick for top-down games — RPGs, adventure games, exploration games. The output is a 4-row, 4-column PNG with the character walking up, right, down, and left across four-frame cycles. Small Sprites at 32 by 32 pixels is the pick for projects that need a richer pose library — the six-row layout includes right walk, left walk, arm movement, look, surprise, and lay-down poses. VFX Effects at 24 to 96 pixels covers the explosions, fire, lightning, and impact frames that any combat-heavy game needs as a separate pass.
A useful prompting recipe for the hero pass: "a tiny knight in steel armor with a red plume, pixel art, 48 by 48, simple silhouette, vibrant primary colors, transparent background." The prompt language matters more than the visual reference image for Quick Sprites; the model is tuned for short pose-focused descriptions and the eight-frame walk cycle stays consistent across re-rolls when the prompt anchors on a strong visual silhouette. After three or four re-rolls the developer accepts the best output and downloads the PNG. For a deeper Quick Sprites prompting guide, see our Quick Sprites pixel-sprite workflow piece. The full Sorceress tools guide indexes every tool with credit costs.
Step 2 — Generate the level art and tileset
The second step in how to make a 2D game in Godot is the level art that fills the world around the hero. The browser pipeline splits this into two passes: background plates and tilesets. Background plates are static scene art (a parallax sky, a fixed dungeon backdrop, a title-screen illustration); tilesets are reusable tile artwork that a level layout tool arranges into rooms.
Background plates go through AI Image Gen, whose model picker ships ten image models in 2026, verified against src/lib/models.ts on May 26, 2026. Z-Image at 2 credits per generation is the cheapest, fastest pick for first-pass background plates where the developer needs to see ten options quickly. Flux 2 Pro at 6 base credits plus 3 per reference image is the right pick when the project needs visual consistency across multiple plates — the reference-image input keeps the art style locked across a hundred generations. Seedream 5 Lite at 6 to 8 credits is the budget mid-tier. Nano Banana Pro at 18 credits (2K) or 33 credits (4K) is the high-quality pick for hero illustrations.
Tilesets go through Tileset Forge, which generates tile artwork from a prompt and outputs a tilesheet PNG plus a JSON map describing the tile indices and adjacency rules. The tilesheet imports into Godot 4.6 as a TileSet resource via the TileSet editor; the JSON map can be parsed by GDScript at level-load time to seed the TileMapLayer with the procedurally generated room layout. The Tileset Forge output covers the standard 2D tile vocabulary: grass, dirt, stone, water, lava, dungeon walls, indoor floors, and so on. For a deeper tileset workflow, see our AI tileset generator deep-dive.