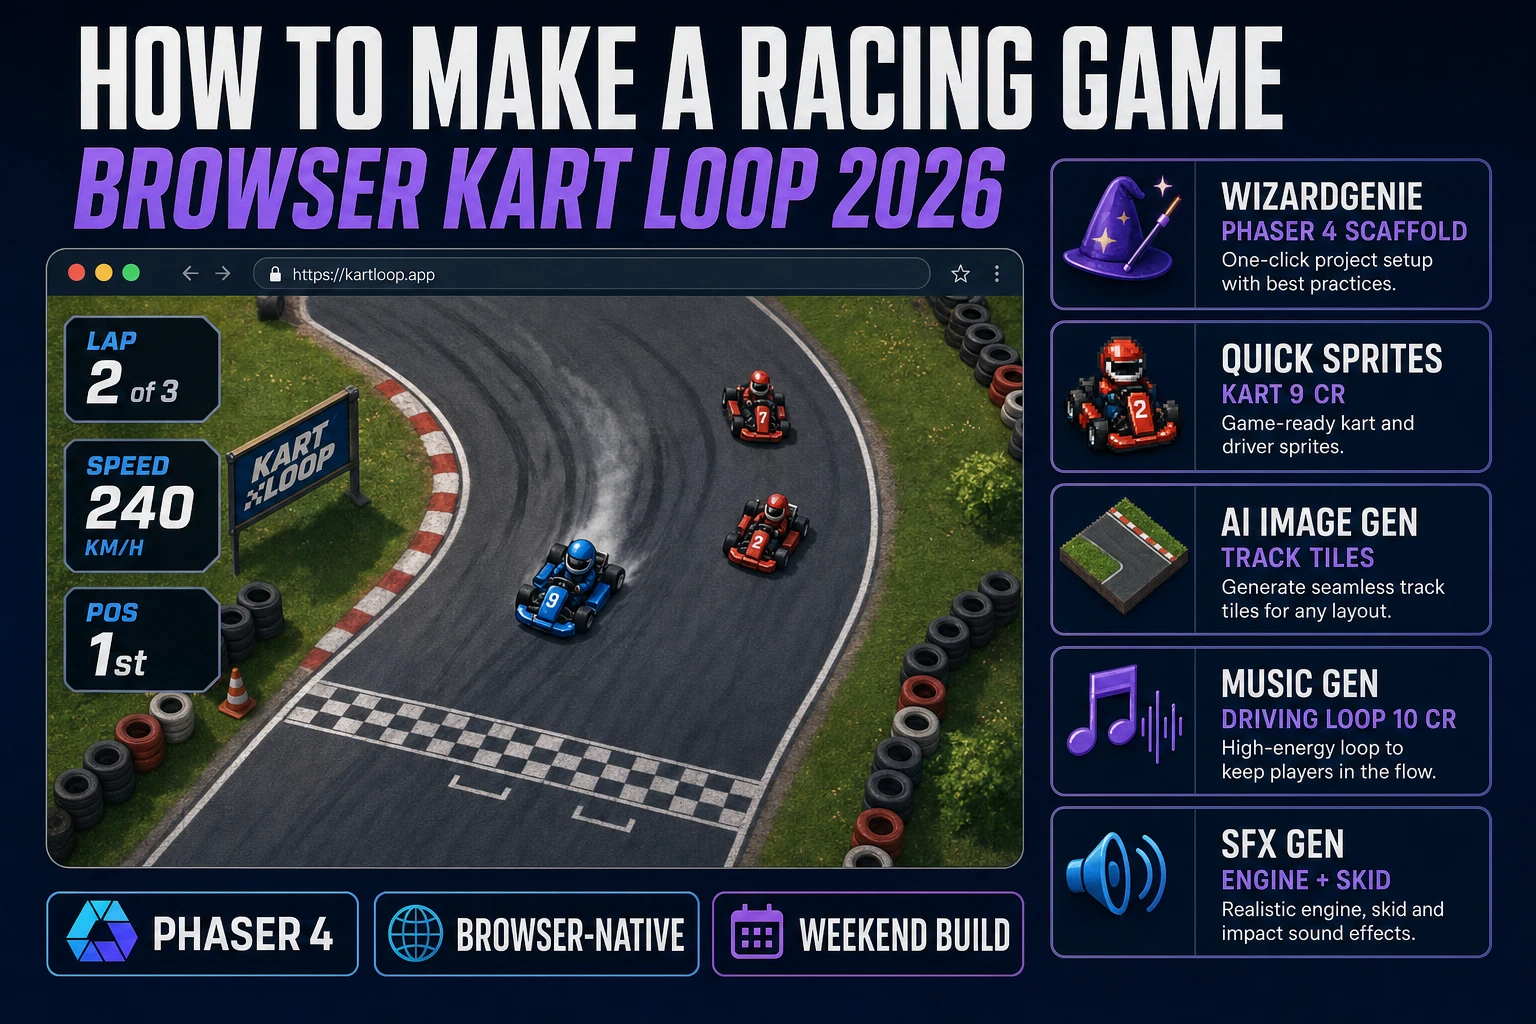
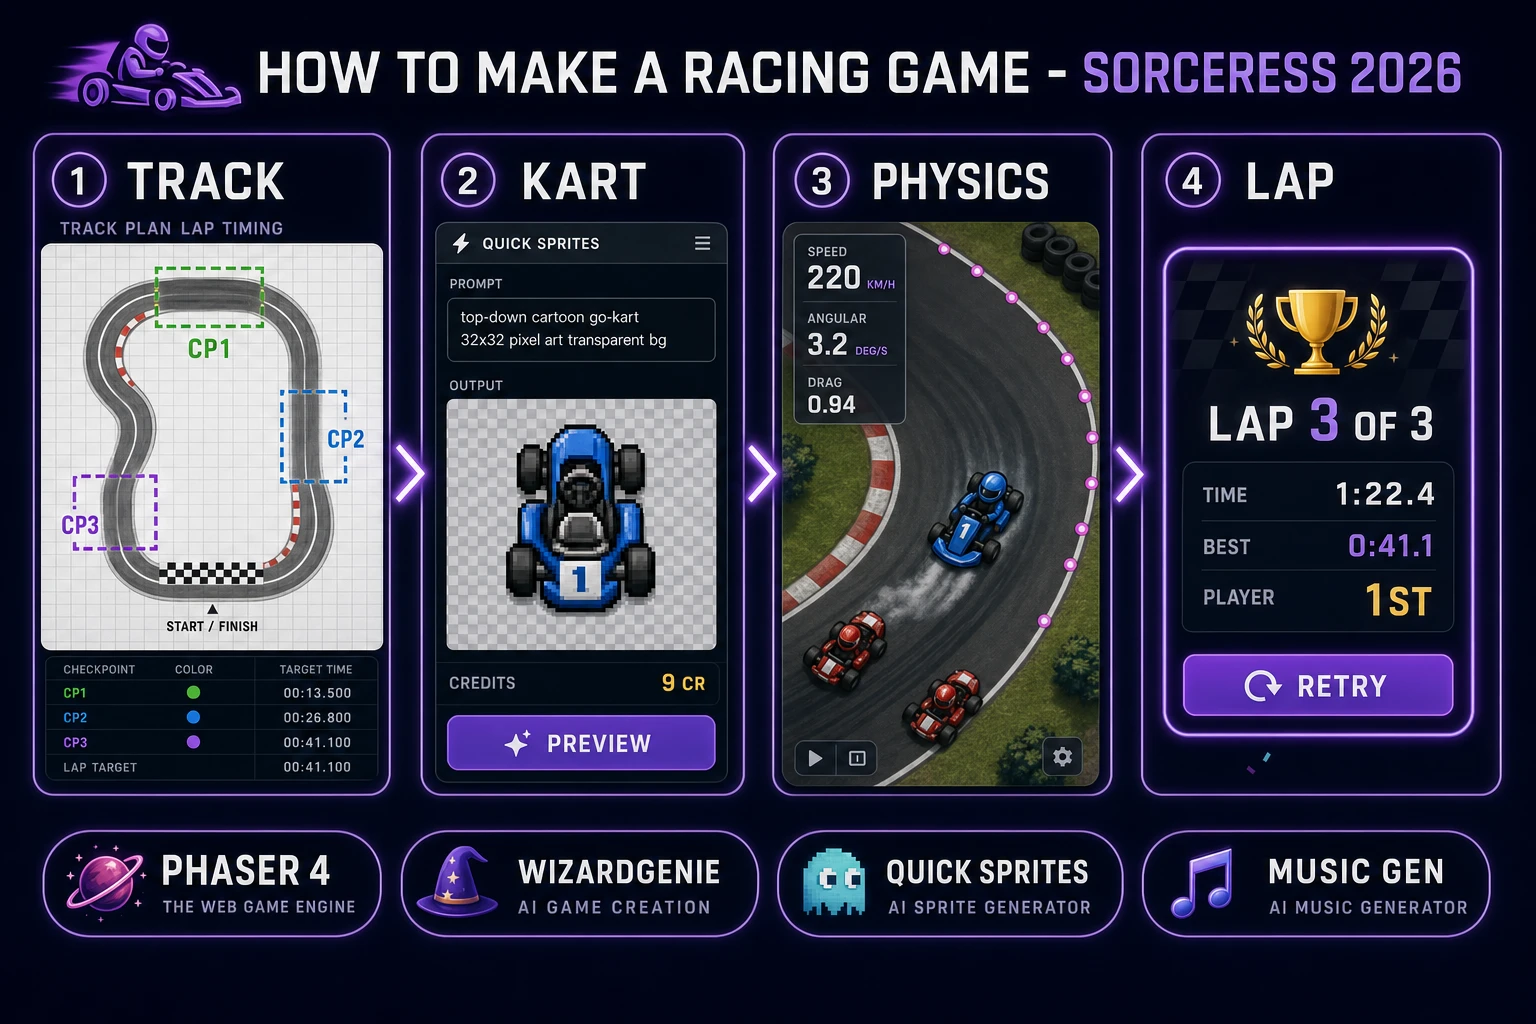
The most abandoned tutorial category on the internet is "how to make a racing game". Not because racing games are hard, but because the vast majority of tutorials start with real vehicle physics - Pacejka tyre curves, weight transfer, differential drive - and by hour four you have a wobbling cube on a plane and no game. The 2026 recipe is very different: build a top-down arcade kart game first, ship it in a weekend, and only reach for 3D and real physics on the follow-up. In a browser, that means Sorceress Quick Sprites for the kart sheet, Sorceress AI Image Gen for the track tiles and start-finish banner, WizardGenie to scaffold a Phaser 4 project with the accel-steer-drag physics already wired, Music Gen for a driving-loop bed, and SFX Gen for engine growl and skid squeal. This guide is the honest end-to-end.
What "how to make a racing game" actually means in 2026
The query "how to make a racing game" hides three very different requests. Some searchers want an arcade top-down kart game in the Micro Machines or classic Mario Kart top-down lineage - one screen, four cars, laps, and a simple scoring UI. Some searchers want a 3D driving game with a chase camera, tyre-model physics, and a hand-modelled track - the Forza or Gran Turismo mental model. And some searchers want a stylised side-view runner where the car is fixed on the screen and the road scrolls left, closer to Road Rash or classic OutRun. Each of the three is a completely different code base. The first can ship in a weekend with the right toolchain; the second is a two-month project even with agentic code assistance; the third sits somewhere in the middle depending on how far you push the pseudo-3D scanline effect.
The honest default for a first browser racing game is top-down arcade kart. It has the shortest path from empty repo to playable, the smallest asset budget (one kart sprite, one track image, one lap-timer UI), and the friendliest physics model (four numbers per car). This guide targets that. Section seven costs the whole project out at under two dollars in Sorceress credits, which is worth reading before you commit to the full 3D version and burn a week on tyre grip curves.
The racing game loop in one minute (accel steer collide lap checkpoint)
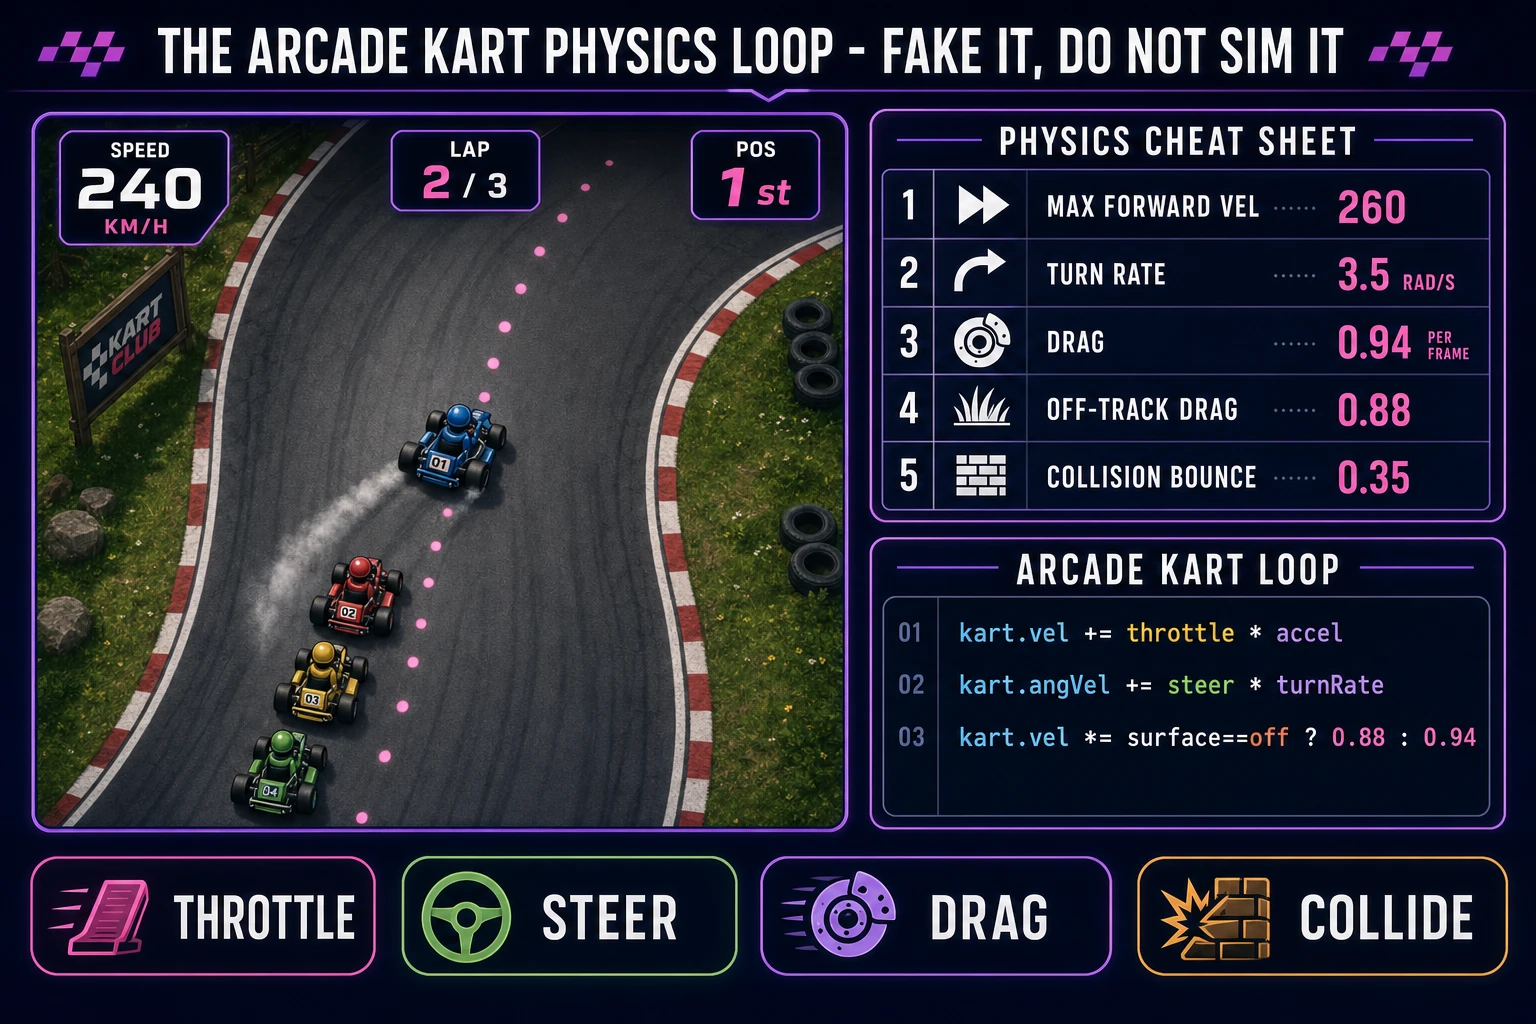
Six moving parts and nothing else, in a strict order per frame. First, read player input - throttle (up arrow or A button on gamepad), brake (down arrow or B button), left steer (left arrow or left stick), right steer (right arrow or left stick). Second, update velocity - add throttle-scaled acceleration along the kart's facing vector, subtract brake, then multiply by drag (0.94 per frame is a good arcade default). Third, update angular velocity - add steer input scaled by a per-kart turn-rate constant, then multiply by angular drag. Fourth, update position - move the kart by its velocity vector, rotate by its angular velocity. Fifth, collide - check overlap with track walls (push the kart back, reverse a fraction of velocity) and with other karts (elastic bounce). Sixth, advance the lap state machine - if the kart overlaps its next checkpoint zone, advance the checkpoint counter; if it crosses the finish line with the counter at max, increment the lap and log the lap time.
That is the entire game. Six steps, executed once per frame at 60 frames per second, driven by requestAnimationFrame. Everything else - the AI opponents, the countdown timer, the finish-line camera zoom, the pause menu, the audio, the leaderboard - is polish layered on top of this core loop. If you keep the loop tight and the six-step order strict, the rest of the game feels arcade even on a mid-range phone browser. Fight the temptation to write a full physics simulation; every arcade racing game shipped in the last thirty-five years uses some flavour of this cheat.
Pick your engine for how to make a racing game: Phaser 4, Three.js, or WizardGenie
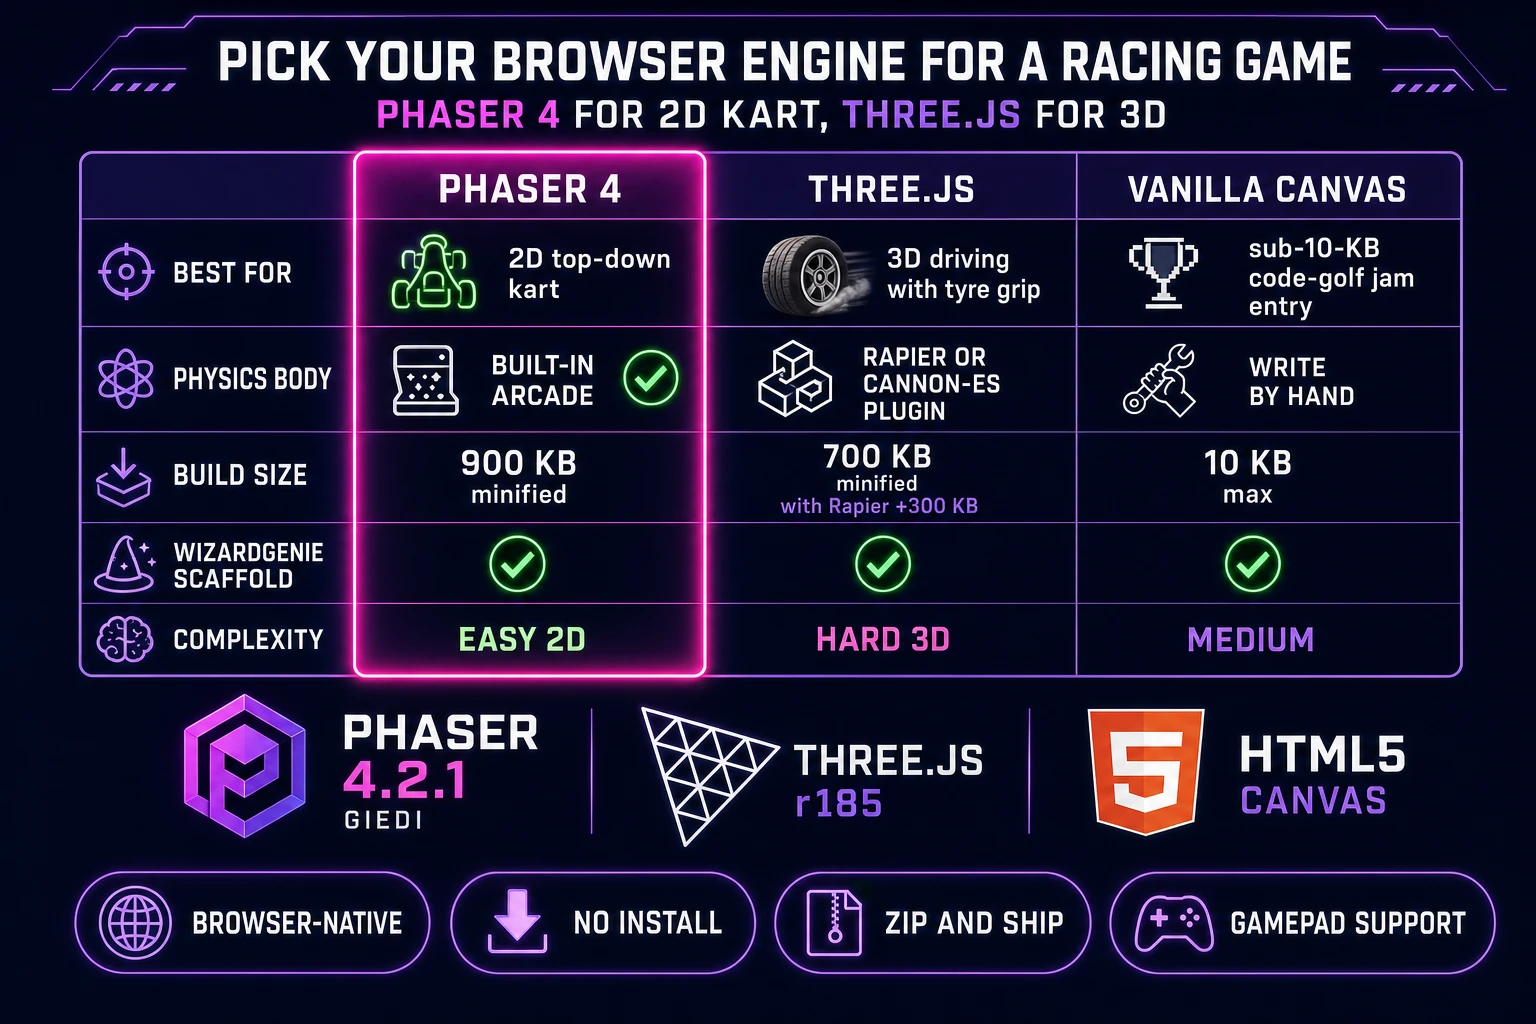
Three good browser targets in 2026, each with a very different trade-off. Phaser 4 is the honest default for a top-down kart. Phaser 4.2.1 "Giedi" was released on 9 July 2026 (verified against phaser.io/download/stable on 2026-08-09) and ships an arcade physics body that already has velocity, angular velocity, drag, and collision baked in. The kart becomes a Sprite with an arcade physics body, opponents live in a Group, the track is a Tilemap, and a Scene drives the tick loop. Every primitive you need is already there. Bundle is around 900 KB minified, which is fine for a mobile browser build. This is the fastest path to a playable kart game and it is the pick 90% of readers should take.
Three.js r185 is the right choice for a 3D driving game with a chase camera, a modeled track, and reflections on the car body. You get a scene graph, cameras, materials, and shadow maps for free, but you will need a physics plug-in for anything more than trivial motion - Rapier or Cannon-ES are the two production-grade options. Three.js is the wrong pick if this is your first racing game because the camera rig, the track collision geometry, the four-wheel suspension, and the tyre grip curves each need a working day of tuning. It is the right pick if you already shipped a 2D kart game and want to level up to a full driving sim on your second attempt.
Vanilla HTML5 Canvas 2D plus requestAnimationFrame is the leanest possible path. You write about 300 lines of JavaScript, produce a build under 10 KB minified, and end up with something eligible for a JS13K-style code-golf jam. The trade-off is that every physics primitive (velocity clamping, angular integration, AABB collision, tile-map lookup, waypoint AI) has to be written by hand. Use vanilla Canvas if the exercise itself is the point; use Phaser 4 if you want the game done by Sunday night. WizardGenie will scaffold whichever of the three you pick from a single natural-language prompt - the engine choice is a paragraph in the seed prompt, not a hard fork in the pipeline.
Step 1 — design the track, checkpoints, and lap timing on paper
Skip this step and the entire project will grind at the third H2 review, guaranteed. Grab a sheet of graph paper, or open a whiteboard tool, and draw the track outline as a closed loop. A first-time build should be a simple oval or a figure-eight - three straights, four gentle turns, nothing exotic. Mark the start-finish line as a thick red bar. Number the checkpoint zones one, two, three, four going clockwise (or counter-clockwise if you want a rally style) around the inside of the loop. Three or four checkpoints is the sweet spot: enough to prevent the kart from cheating by driving backwards over the finish line, few enough that placement is not a chore.
Next, sketch the racing line as a dashed curve running down the middle of the road. This becomes the waypoint list for the AI opponents in step three. Place a pink dot every 60 to 120 game-world pixels along the racing line - a full lap of the oval is typically 20 to 30 waypoints. Each waypoint gets an ID matching its order. Save this sketch as a PNG or screenshot; you will hand it to WizardGenie as a reference in the coding step.
Finally, write down the lap-count design on the same sheet. Three-lap sprint is the standard arcade default. Best lap is displayed alongside current lap time in the HUD. Position (1st, 2nd, 3rd, 4th) is a simple sort of cumulative distance across all karts. Grand prix mode (four tracks in sequence, points-based scoring) can wait for version two - do not bake it into the seed prompt. Ship the three-lap sprint first, then extend.