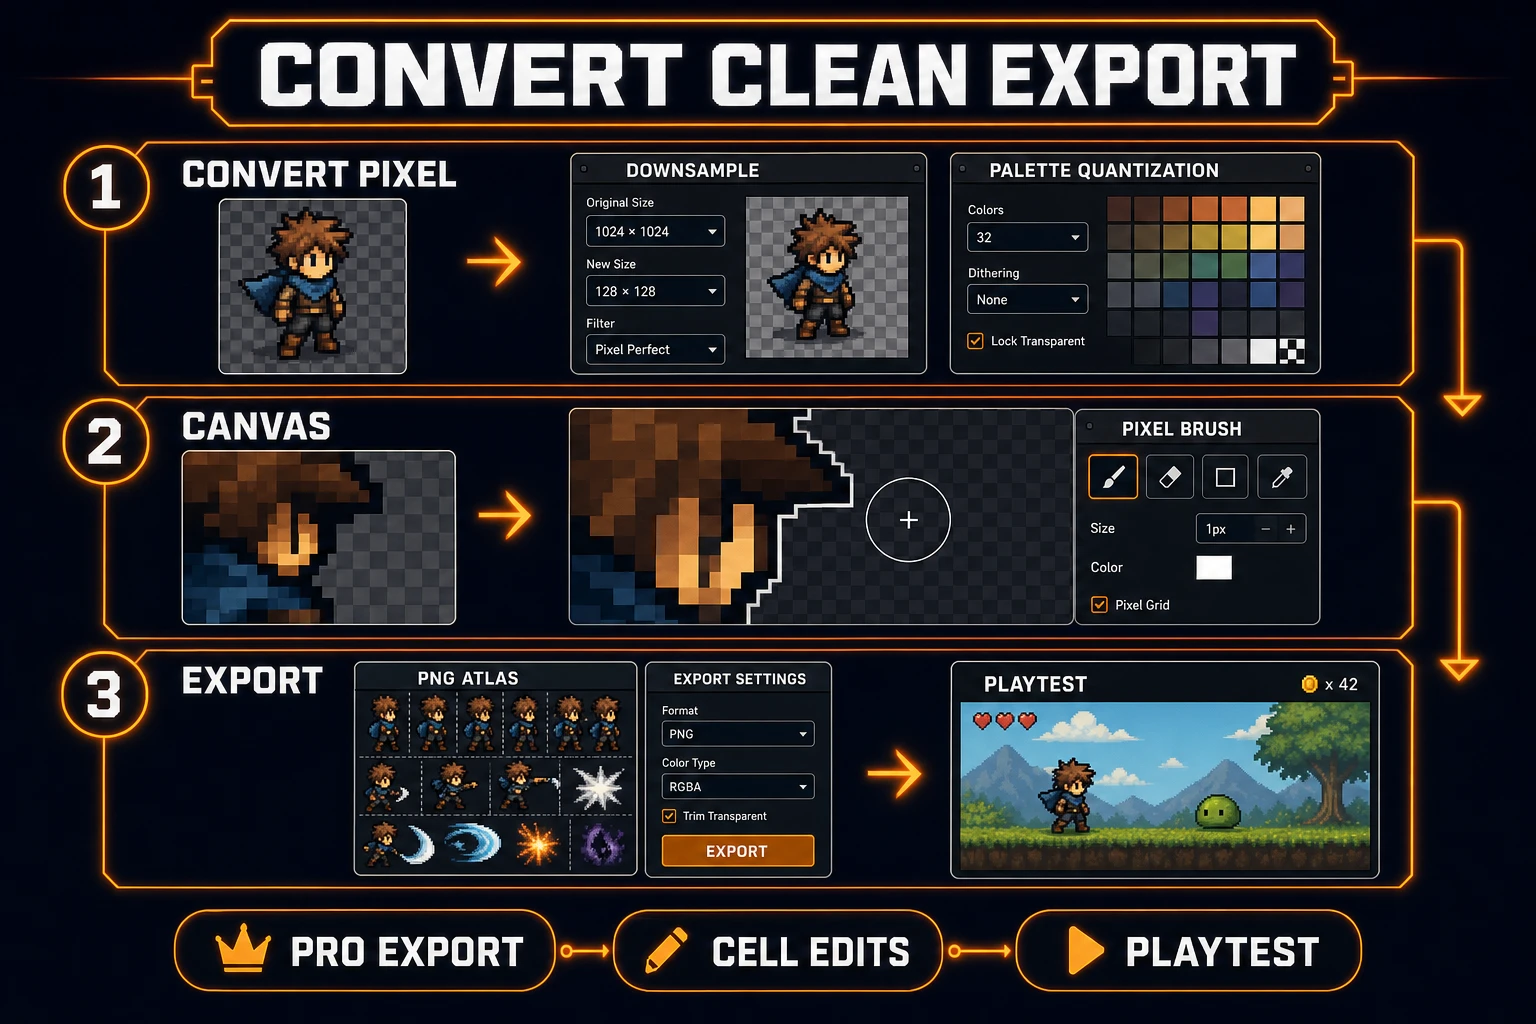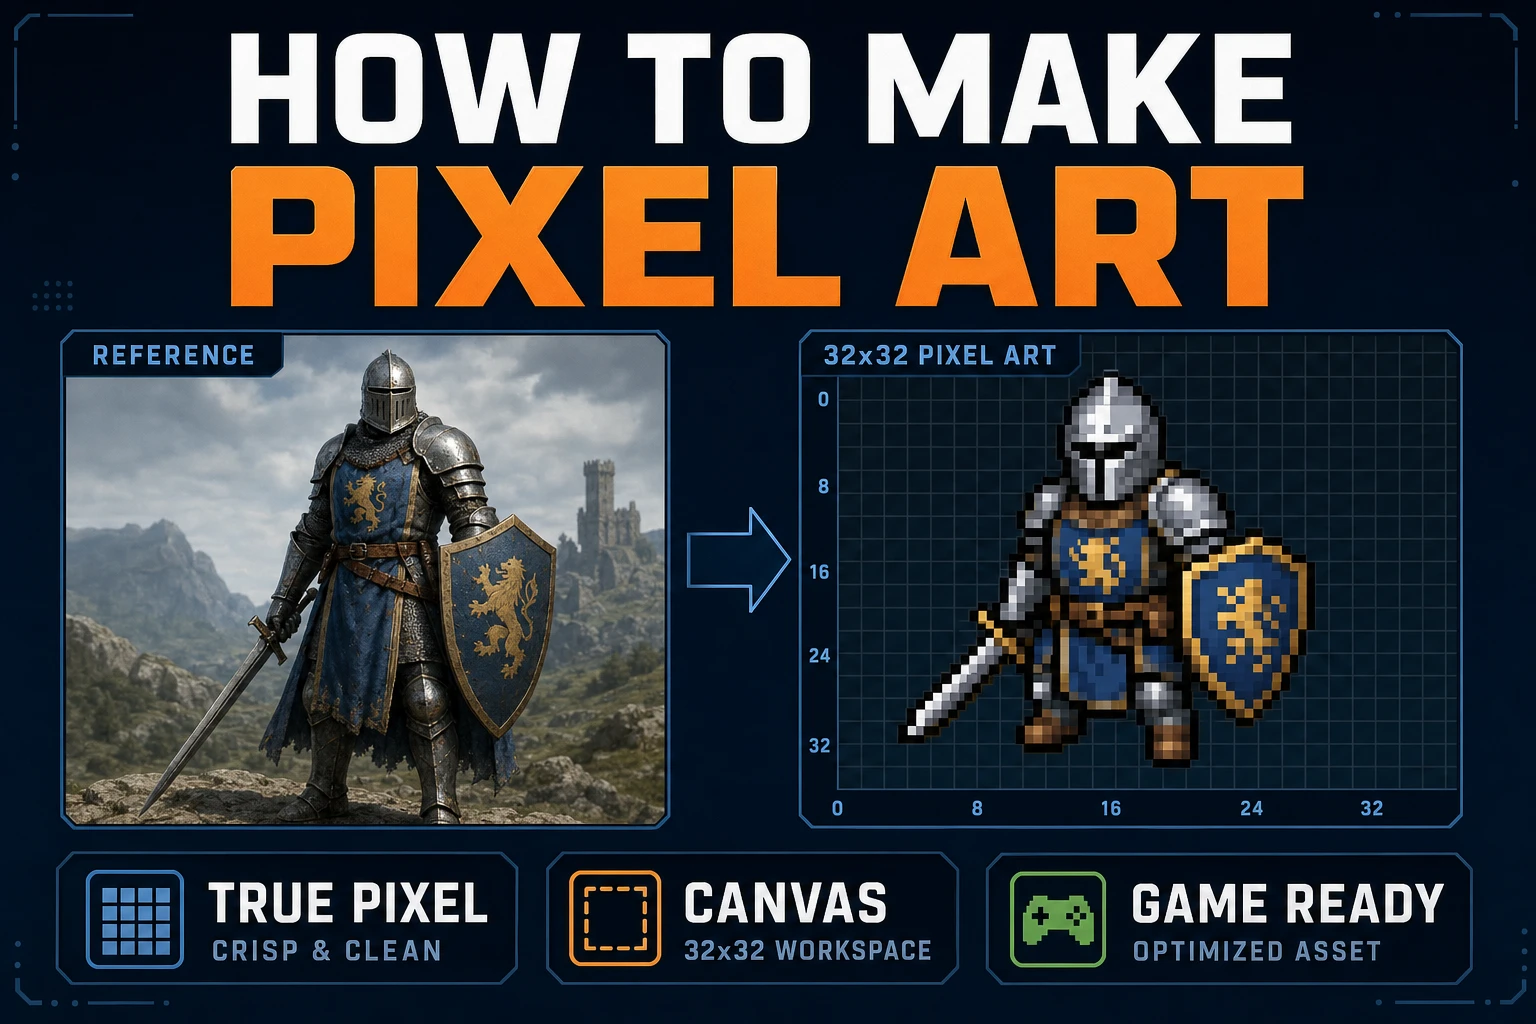
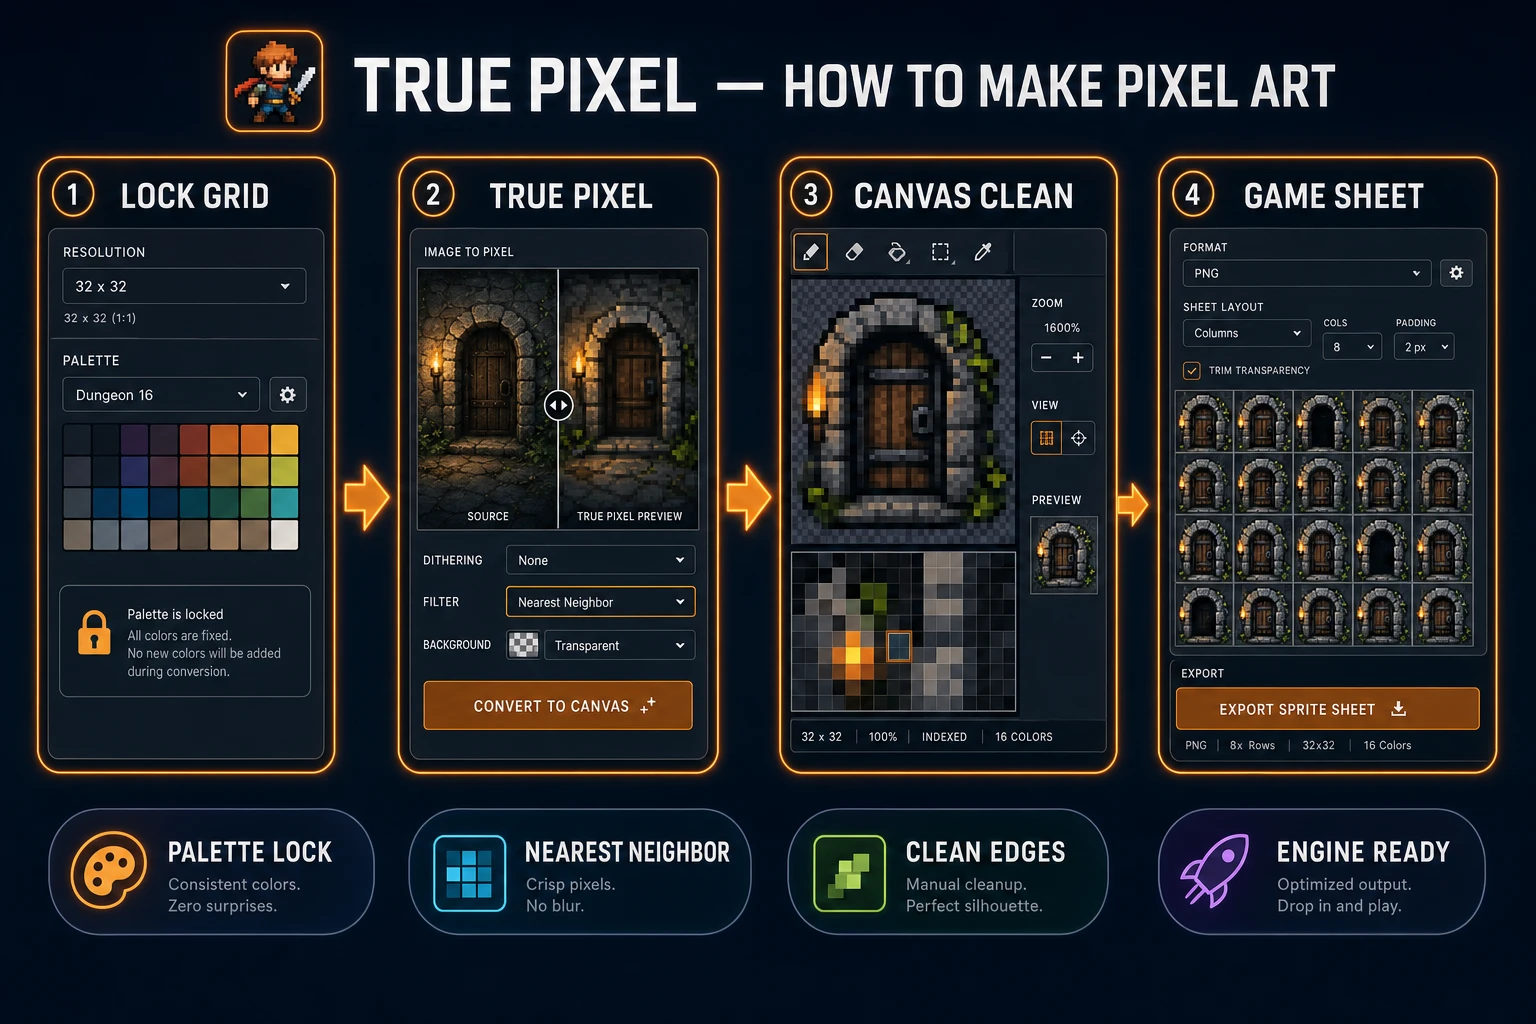
Most beginners open a huge canvas and paint with soft brushes, then wonder why the sprite turns to mud at game scale. How to make pixel art for a playable build is the opposite habit: pick a tiny grid, lock a short palette, and refuse anti-aliased edges until the silhouette reads from across the room. This guide maps that workflow in the browser with True Pixel, Canvas, and Quick Sprites, then drops the frames into a one-screen playtest. Palette names and Pro export gates below were verified against src/app/pixel-art/page.tsx on July 21, 2026.
What how to make pixel art must define first
DataForSEO lists how to make pixel art at 2,400 monthly searches with KD 7 in research-supplement.md, verified July 21, 2026. The sibling phrasing how to make a pixel art shares the same volume with KD 2. Readers typing either query want a concrete production path, not a gallery of aesthetic moods.
Wikipedia’s pixel art page frames the craft as digital images edited at the pixel level—clusters of intentional cells rather than continuous tone. For games that definition tightens further: every frame must share a resolution contract so walk cycles, tiles, and UI icons sit on the same optical scale. A sprite is still a 2D bitmap composited into a larger scene; if your cells disagree about size, the compositor cannot save the look.
Write three decisions on a sticky note before you touch a tool:
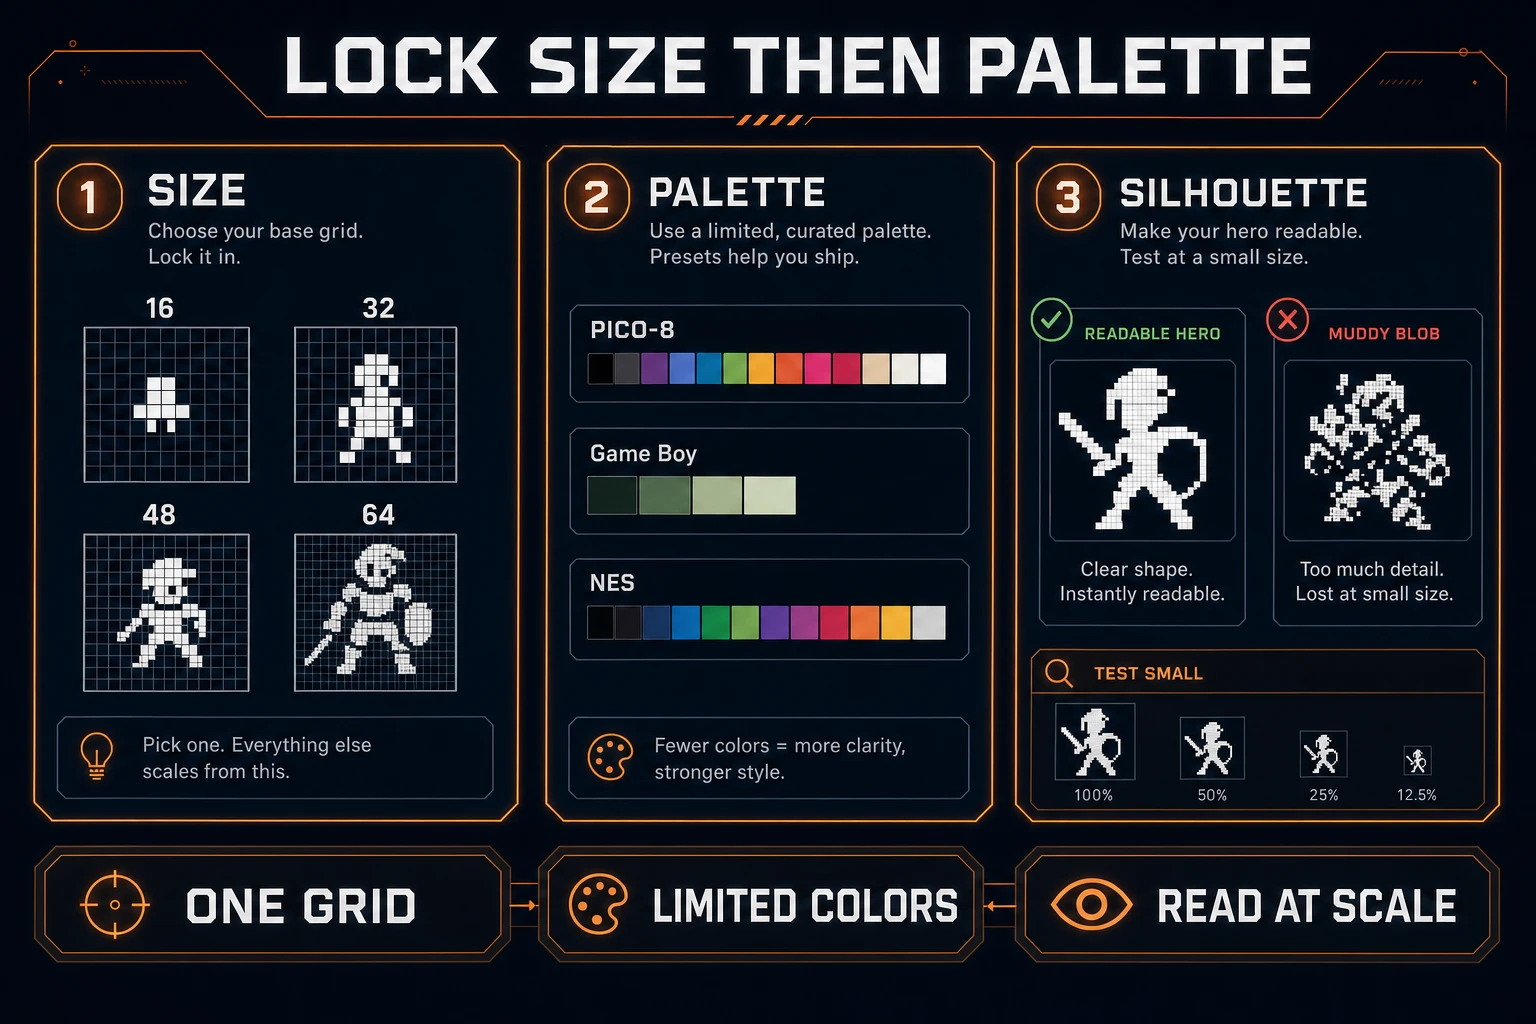
- Cell size: 16×16, 32×32, 48×48, or 64×64 for the hero—pick one and keep props on the same modulus.
- Palette budget: classic preset (PICO-8, Game Boy, CGA, NES) or a capped auto count you will reuse on every asset.
- Transparency rule: one keyed background or true alpha—never both mixed inside one sheet.
Those three lines are the map. Everything else is routing traffic along them. If you skip the sticky note, you will “finish” a hero, then redraw the hero when tiles arrive at a different scale, then redraw again when UI icons refuse to sit next to either. The redo tax is what makes people quit pixel craft—not the first hour of careful cells.
Also decide what you will not draw yet. A how-to-make-pixel-art session that tries to invent the whole cast, the tileset, and the title font in one sitting almost always ships muddy compromises. One hero idle, one walk row, and one floor tile that matches the hero’s contrast is a complete first milestone.
Lock resolution, palette, and silhouette
Resolution is a camera choice. A top-down jam at 320×180 world pixels wants chunky 16×16 actors. A brawler that fills a 1920×1080 window with a close camera can afford 48×48 or 64×64 faces. Changing size mid-project forces a full redraw; treat the first locked number as sacred.
Palette is a lighting choice. True Pixel ships named presets in source—including PICO-8 (16), SWEETIE-16, Endesga 32, Game Boy, CGA, NES (54), Grayscale (8), and 1-Bit—so you can snap a conversion to a known look instead of inventing 200 near-duplicates. If the game already has a mood board, pick the closest preset and delete colors you will not use. If you are starting fresh, PICO-8 or SWEETIE-16 keeps decisions cheap.
Silhouette is a readability choice. Squint at a 32×32 draft from two meters away. If you cannot tell player from crate, add contrast on the outer ring before you add eye highlights. Pixel art fails in playtests more often from weak silhouettes than from missing shading bands.
A practical silhouette test: paste the sprite on pure black, pure white, and a mid-gray floor color from your tiles. If it disappears on any of the three, raise outline contrast or shift the fill value—do not add more internal decoration. Internal detail is optional; the outer ring is load-bearing.
Convert a reference in True Pixel
Open True Pixel when you already have a readable source—AI concept art, a photo of a clay model, or a single video frame. Set targetWidth to your locked cell size (the page defaults to 64; change it if your game is 32). Choose a palette mode: a classic preset for a locked look, or a constrained max-color count when the source has unique hues you must keep.
True Pixel’s core path downscales, quantizes, and can apply dither modes (none, ordered, floyd-steinberg), edge enhance, and outline options entirely in the browser. That matters: you are not waiting on a remote “stylize” model to invent a new character. You are forcing the existing image onto a grid. For stills that is usually enough. Chroma-key backends that call Corridor can spend credits; local keying and quantization do not invent a credit bill on their own—verify the Corridor path in getCkCreditCost if you enable cloud keying.
Upload and export are Pro-gated in the current page (drag-drop returns early when isPro is false; export shows Upgrade to Pro). Sign in on a Pro-capable account before you commit a batch. Once the preview looks right at 1× cell size, download the native grid PNG—not a soft upscale—and keep the 1× file as the master. Upscale only for marketing mockups, never as the engine texture if you care about sharp cells.
If your starting point is a pure photo-to-pixel conversion problem, the sibling pipeline convert image to pixel art goes deeper on downsample math. This article stays on the broader how to make pixel art map: decisions, conversion, cleanup, sheet, playtest.
Source quality still matters. A blurry phone photo of a figurine will quantize into soup; a sharp orthographic concept with a plain background gives True Pixel clean clusters to snap. When you generate concepts upstream in AI Image Gen, prompt for flat lighting, a single character, and an empty backdrop—then convert. Fancy cinematic rim lights look great in a portfolio and terrible after a 32-wide downsample.