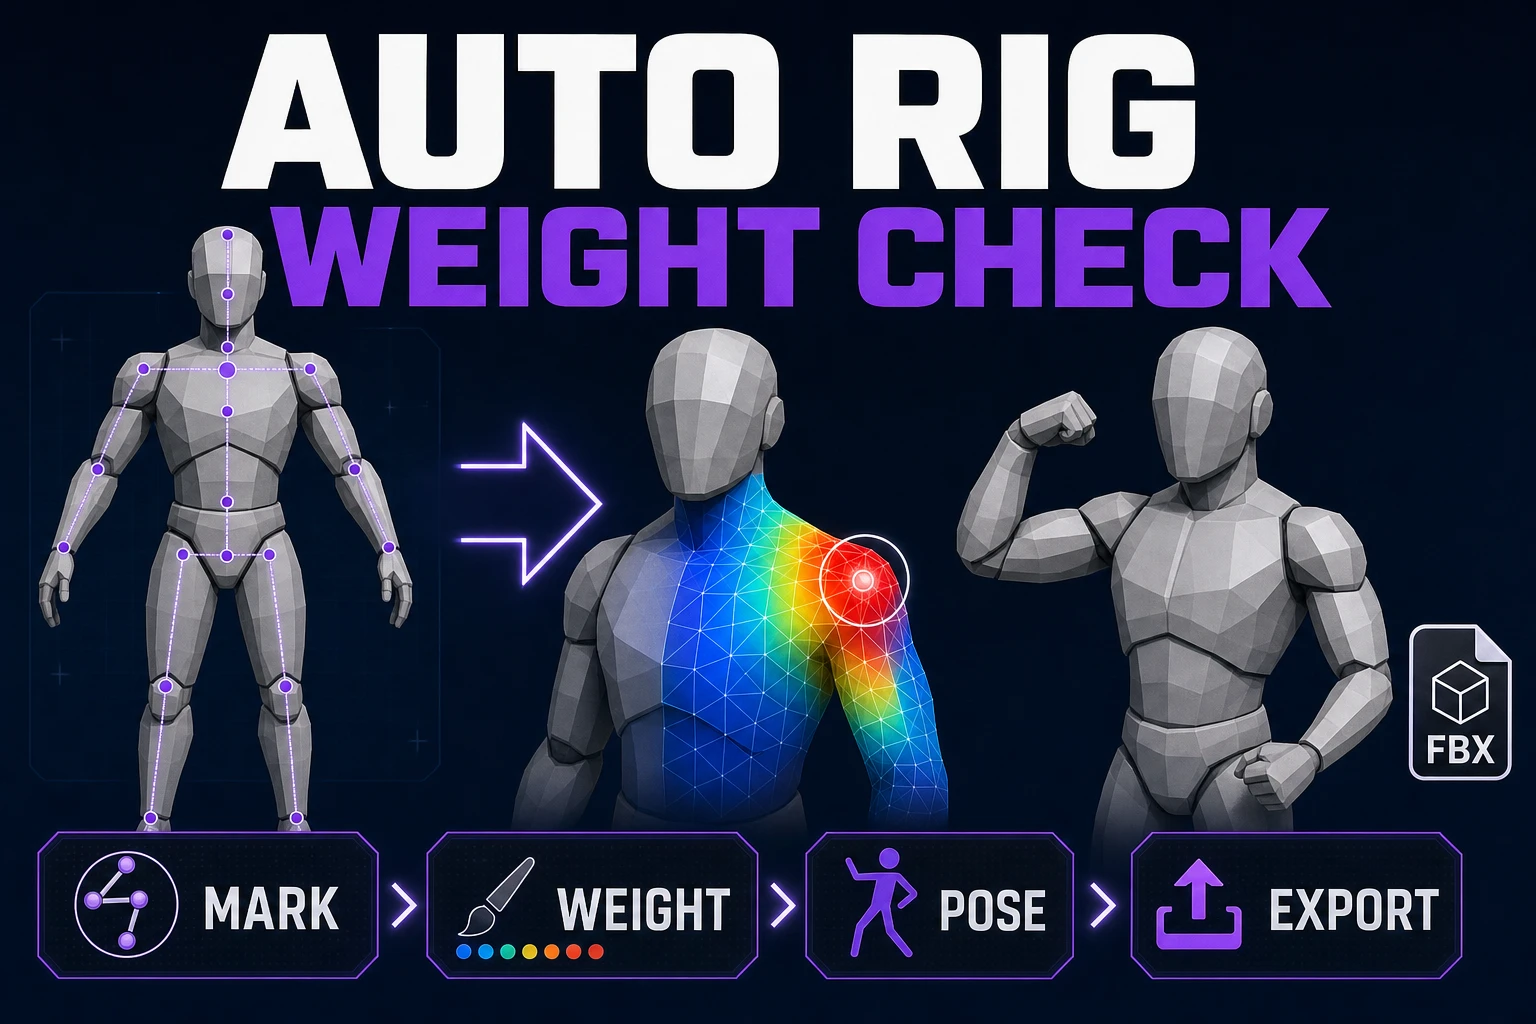
Rig With Auto Rig for Game Characters (Weight Check)

By Arron R.8 min read
Auto rig is only finished when the skeleton and skin weights pass shoulder, hip, elbow, knee, wrist, and ankle pose checks. Sorceress keeps those checkpoints vi

Most failed character rigs do not fail at the skeleton. They fail at the shoulder fold, the hip crease, or a handful of vertices that follow the wrong limb. This guide treats auto rig as a testable workflow: load a neutral humanoid mesh, place anatomical landmarks, build the skeleton, compute weights, bend the difficult joints, and export only after the deformation passes. The Sorceress controls and behavior described here were verified against the live product source on July 19, 2026.
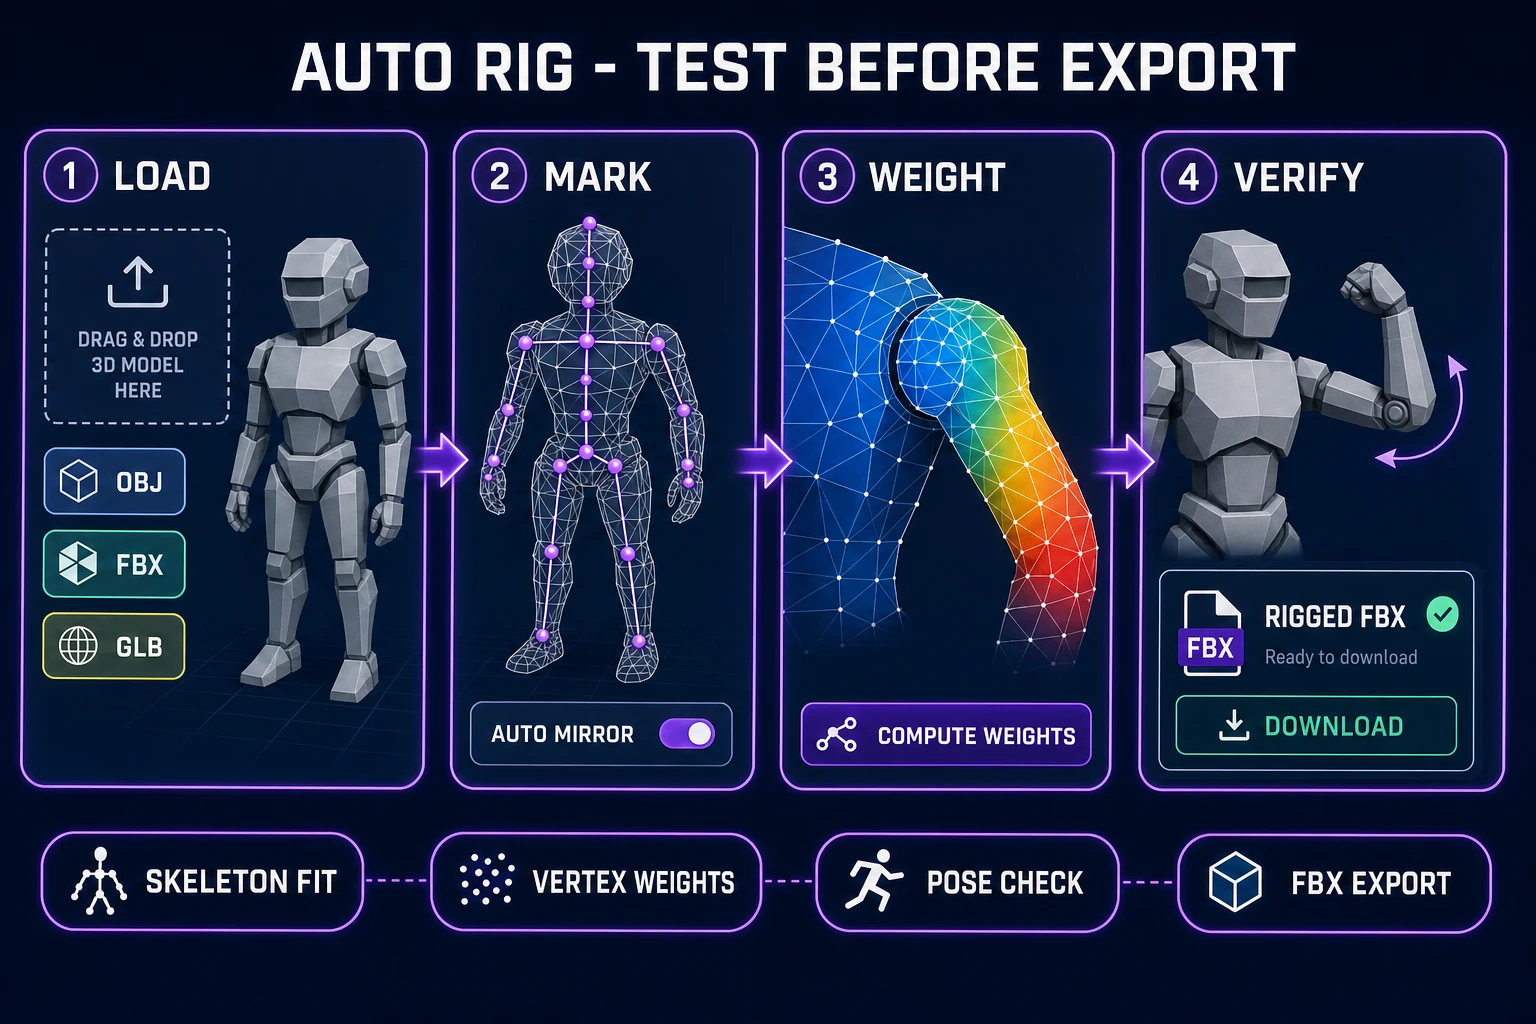
Auto rig workflow for game characters from mesh import through marker placement, skin weights, pose testing, and FBX export
A useful automatic rigging pass exposes the mesh, skeleton, skin weights, pose test, and export as separate checkpoints.

What auto rig must produce for a game character

An auto rig has two deliverables. The first is a skeleton: an ordered hierarchy of bones whose joints sit at the character’s real rotation centers. The second is skin weights: values that tell every mesh vertex how strongly it follows each bone. The glTF 2.0 skin specification represents that relationship with joints, inverse bind matrices, and a mesh reference to the skin.

Those deliverables can fail independently. A correctly placed elbow can still pinch if the forearm and upper-arm influences switch too sharply. Smooth weights cannot rescue a knee joint placed above the actual knee. A clean viewport pose does not prove the downloaded file carries the same bone and skin data. Keep the checks separate so each defect points to the stage that created it.

The exact primary phrase auto rig has 720 monthly searches and KD 12 in the DataForSEO pull generated July 19, 2026. The search intent is practical, but “automatic” should not mean invisible. The safest automation handles repetitive skeleton construction and weight calculation while leaving enough evidence for you to reject a bad result before it reaches animation production.

A passing rig should preserve the character’s silhouette in a raised-arm pose, a deep crouch, a bent elbow, a bent knee, and a rotated wrist. It should also reload from the exported file at the intended scale and orientation. If one of those checks fails, the character is not ready merely because an idle animation happens to look acceptable.

Check the mesh before automatic rigging

Start with a humanoid in a neutral pose. The arms need visible separation from the torso, and the legs need enough space for the hip, knee, and ankle centers to be identified. Crossed limbs, a deep action pose, a cape fused to the arm, or a weapon merged into the hand can make a valid anatomical fit impossible. Fix the source mesh instead of asking skin weights to disguise unclear geometry.

Inspect the model from front, side, and three-quarter views. Confirm that the character is upright, that both feet share a sensible floor, and that the body faces the expected direction. Sorceress Auto-Rigging accepts OBJ, FBX, and GLB files. The file is selected through the browser, parsed into mesh data, and displayed in a Three.js viewport. The W3C File API defines the browser file-selection boundary behind that local upload interaction.

Topology also matters. Look for disconnected fragments, accidental interior surfaces, holes around joints, and extreme triangle density. A solver can assign weights to flawed geometry, but the output remains flawed geometry with a skeleton attached. Remove pieces that should not deform with the body, and keep intentional accessories organized so their motion contract is clear.

Do not judge the mesh only in the rest pose. Imagine the shoulder rotating overhead and the thigh moving forward into a crouch. There must be enough surface structure around those joints to fold rather than collapse. Rigging changes transforms; it does not create missing volume or repair a badly fused sleeve.

Run the Sorceress auto rig workflow

Open Sorceress Auto-Rigging. It is marked as a Pro tool in the current product catalog. Use this focused page when you already have a humanoid mesh. Use 3D Studio when the rig belongs to a larger image-to-3D, refinement, and animation workflow.

  1. Load the mesh. Drop an OBJ, FBX, or GLB into the upload area, or click to browse. Wait for the viewport and mesh statistics to appear before placing landmarks.
  2. Orient the character. Verify the front-facing direction and inspect more than one camera angle. A landmark that looks centered from the front can sit outside the body from the side.
  3. Place the landmarks. Guided mode starts enabled, Auto Mirror starts enabled, and Center Snap is available for center-line points. The source defines pelvis, neck, chin, paired hips, shoulders, elbows, wrists, knees, and ankles.
  4. Build the skeleton. Run the detection/build action only after every required visible landmark is present. Inspect the resulting bone chains inside the body volume.
  5. Compute weights. Click Compute Weights. The live implementation sends the mesh and generated deform skeleton to the project’s Blender auto-weight service, then maps the returned influences back onto the viewport mesh.
  6. Inspect and pose. Select bones, show the weight visualization, and use pose controls to expose deformation around major joints.
  7. Export after acceptance. The current export path builds a skinned GLB internally, converts it through the project’s FBX pipeline, and downloads a rigged FBX.

The compute step is deliberately not described as browser-only. Mesh parsing and interaction happen in the web app, while the current weight calculation calls the Blender service. That distinction matters when diagnosing a failed request: a missing viewport mesh is an import problem; a weight request error is a compute-service problem.
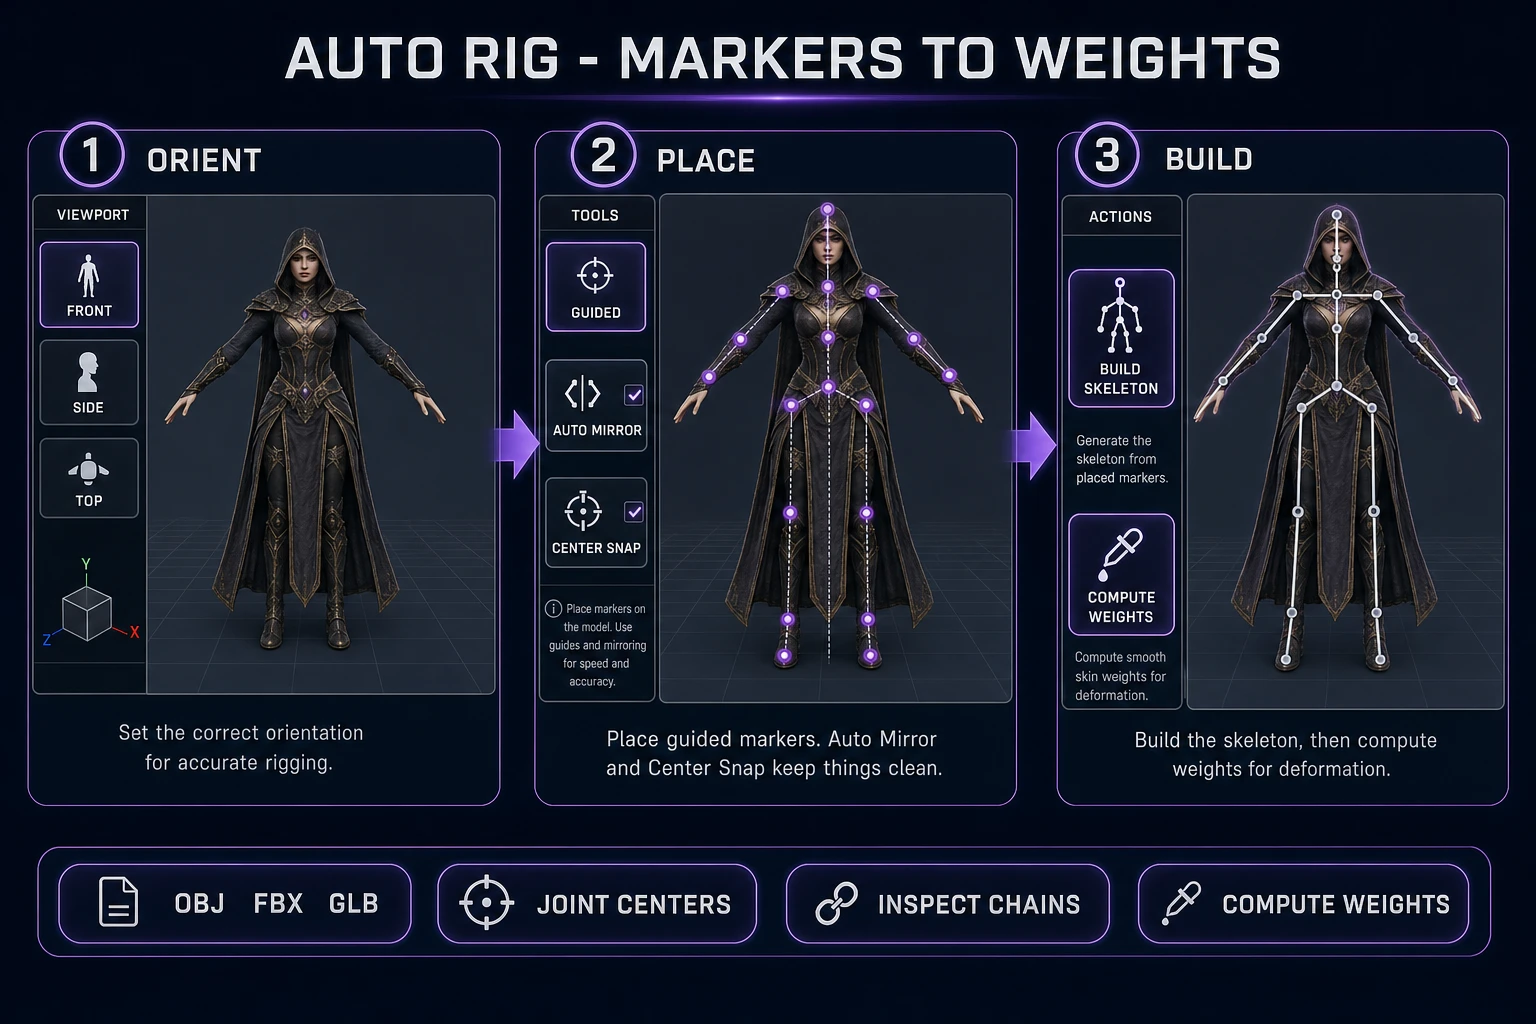
Sorceress auto rig interface showing OBJ FBX GLB import, guided anatomical markers, Build Skeleton, and Compute Weights
Place landmarks at rotation centers, inspect the generated chains, and calculate weights only after the skeleton fit is credible from multiple views.

Place and inspect the humanoid markers

Markers are anatomical evidence, not decoration. Put the elbow inside the arm where upper arm and forearm rotate. Put the knee within the leg volume rather than on the front surface of the kneecap. Place the wrist where the hand rotates against the forearm, and place the shoulder where the arm joins the torso without pushing the joint into the chest.

Auto Mirror saves repetitive placement on a symmetric character, but it does not prove that the source is symmetric. Armor, clothing, a shifted stance, and asymmetrical proportions can move the visible joint center. Inspect the generated point on the opposite side. If it misses the anatomy, adjust that side directly instead of preserving a convenient mirror error.

After building, orbit around the skeleton. The spine should remain inside the torso. Arm and leg chains should pass through the limb volumes. Left and right chains should have comparable lengths when the design is symmetric. The feet should end near the ground rather than above the ankle surface or below the floor.

If a joint is wrong, correct the marker or use the joint-adjust interaction before recomputing weights. Weight painting answers “which vertices follow this bone?” It cannot change the location around which that bone rotates. Fixing structure first prevents hours of treating a skeleton problem as a skinning problem.

Review skin weights at shoulders, hips, hands, and feet

Three.js models the rendered result with a SkinnedMesh: geometry carries skin indices and weights, while a skeleton supplies the bone matrices. That separation is useful during review. When a surface defect appears, ask whether the rotation center is wrong or whether the vertex influences are wrong.

Use the weight display and a repeatable pose checklist:

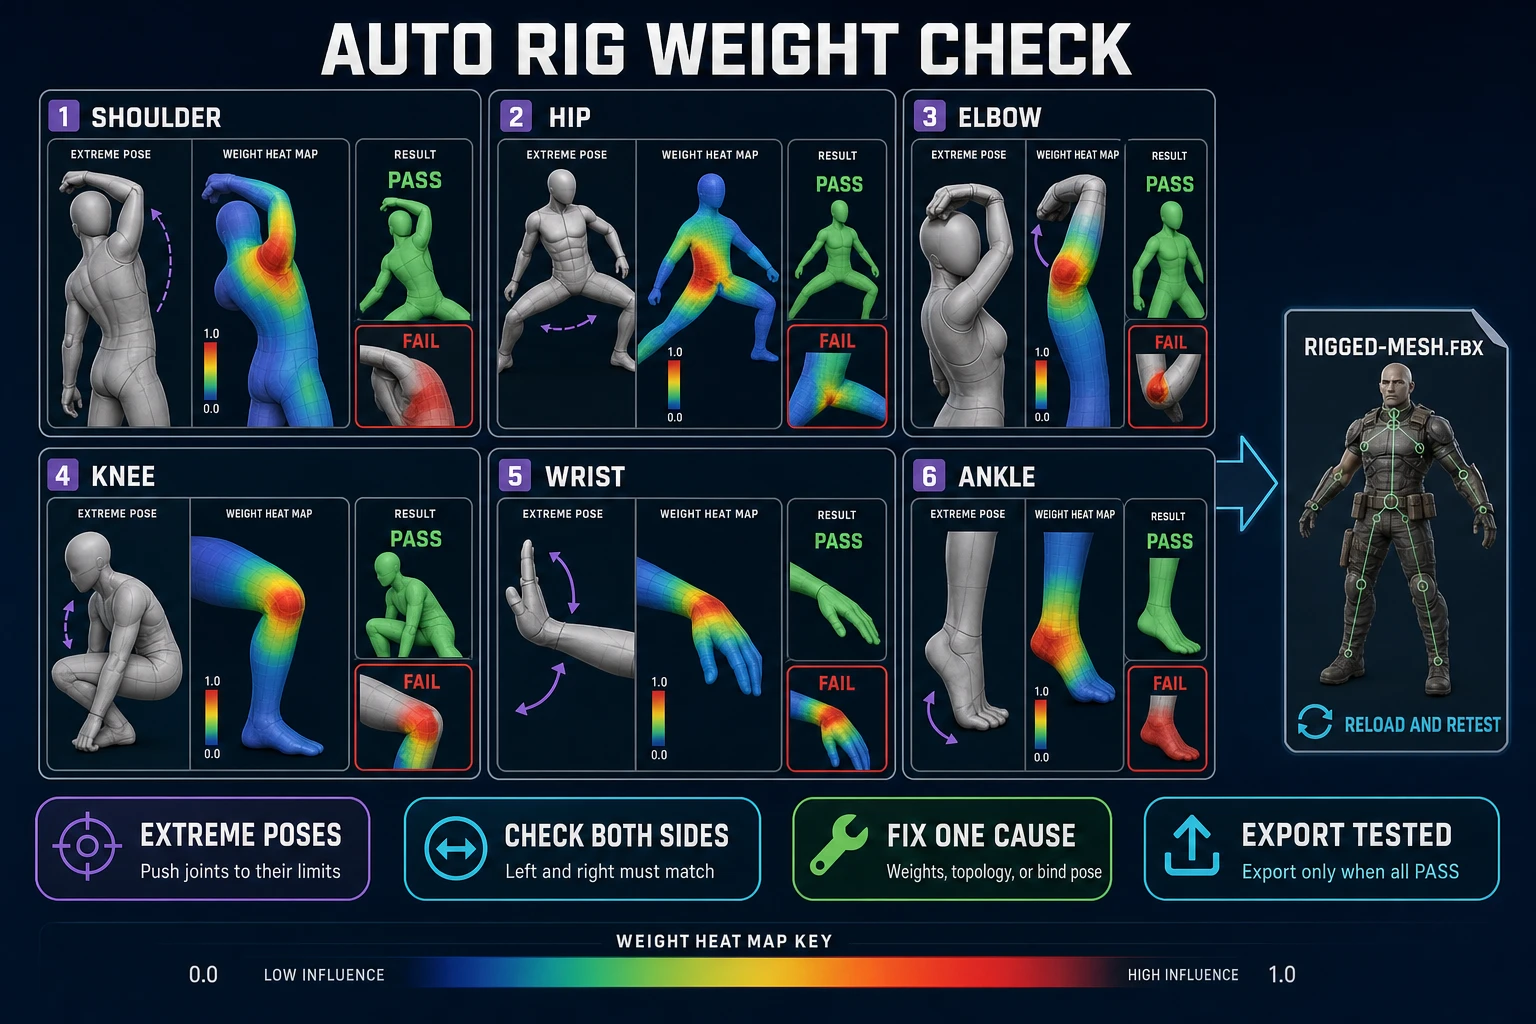
  • Shoulders: raise each arm. Reject chest collapse, a detached-looking upper arm, or a sleeve that drags half the torso.
  • Elbows: bend beyond a mild angle. Look for a knife-edge crease, lost volume, or forearm vertices following the upper arm too strongly.
  • Hips: lift one thigh and crouch. Watch for pelvis collapse, opposite-leg pull, and a hard seam at the groin.
  • Knees: inspect both the front silhouette and the back fold. The lower leg should not drag thigh vertices through the joint.
  • Wrists and hands: rotate the hand. Forearm vertices should taper into wrist influence instead of snapping as one rigid block.
  • Feet: rotate around the ankle and confirm that the sole remains coherent and nearby leg vertices do not follow the wrong foot.

Change one cause at a time. If a shoulder collapses, first verify the shoulder marker and bone position. If those are correct, inspect the upper-arm, clavicle, and torso influences. Recompute after a meaningful joint change because the old weights were calculated for the old skeleton geometry. Then replay the same pose instead of switching to a new animation and losing the comparison.

Test the skeleton with a motion clip

A static bend catches local weight errors; motion catches timing and chain errors. Use a short set of diagnostic actions: walk, deep crouch, raise both arms, rotate the torso, and turn in place. Pause at the most extreme frame and inspect from the side as well as the front. Fast playback can hide one broken frame that will be obvious in a screenshot or attack anticipation.

Keep rig quality separate from clip quality. If the same shoulder collapses in every action, return to the skeleton or weights. If one generated clip contains an implausible pose while other clips deform correctly, reject or revise that clip. If the whole character drifts while the limbs look clean, inspect root-motion handling rather than rebuilding the skin.

For a connected creation path, hand the accepted character to 3D Studio and test text-generated motion on the actual skinned model. The broader Sorceress Tools Guide maps the neighboring 3D and animation tools, while the Mixamo alternative workflow explains how rig evidence fits into a complete browser pipeline.

Auto rig weight check showing shoulder hip elbow knee wrist and ankle pose tests before rigged FBX export
A rig passes when repeatable extreme poses preserve volume and the exported file reproduces the accepted skeleton and skin relationship.

Export and validate the rig without hiding deformation

Export is another test, not a victory screen. The current Sorceress path requires a loaded mesh, built skeleton, and computed weights. It builds the skinned asset, runs the FBX conversion pipeline, and downloads the result. Keep the source mesh and the accepted viewport state until the exported file has passed a clean reload.

  1. Open the exported FBX in a clean test scene.
  2. Confirm scale, upright axis, facing direction, and floor contact.
  3. Verify that the skeleton exists and that the mesh is bound to it.
  4. Replay the same shoulder, crouch, elbow, knee, wrist, and ankle checks.
  5. Compare the exported silhouette with the accepted viewport result.
  6. Record the character version, export date, and known camera-distance limits.

Do not hide a deformation problem by choosing a gentle idle clip or a forgiving camera angle. If gameplay includes overhead attacks, deep crouches, climbing, or close-up hands, those are acceptance poses. The rig must pass the motion the player will actually see.

The practical rule is simple: automatic rigging earns its name by removing repetitive setup, not by removing inspection. Start with the focused Auto-Rigging tool, keep skeleton and weight failures separate, and export only after the difficult joints survive a repeatable pose set. That turns an auto rig result into a game asset rather than a hopeful preview.

Frequently Asked Questions

What does auto rig do to a game character?

Auto rig builds a bone hierarchy for the character and calculates skin weights that connect mesh vertices to those bones. The result still needs anatomical and deformation checks because a generated skeleton can be structurally plausible while shoulders, hips, or hands carry poor vertex influences.

Which files can Sorceress Auto-Rigging load?

The current standalone Auto-Rigging page accepts OBJ, FBX, and GLB mesh files. It parses the selected file, displays the geometry in a Three.js viewport, and provides guided anatomical landmark placement before skeleton construction.

Which joints should I test after automatic rigging?

Test raised shoulders, deeply bent elbows, a crouched hip and knee, rotated wrists, and ankle movement. Pause at each extreme pose and inspect from front and side views. These tests expose cross-limb weights, collapsing volume, hard seams, and misplaced rotation centers.

Should I move a joint or change skin weights first?

Verify the joint center first. If the bone rotates around the wrong anatomical point, move the marker or joint and recompute. If the rotation center is correct but nearby surfaces pinch, detach, or follow another limb, inspect and correct the skin weights.

What should I verify after exporting the rig?

Reload the exported FBX in a clean scene and confirm scale, orientation, floor contact, skeleton presence, mesh binding, and the same difficult poses used in the authoring viewport. The export passes only when it reproduces the accepted deformation.

Sources

  1. glTF 2.0 Specification - Skins
  2. THREE.SkinnedMesh - Three.js Documentation
  3. File API - W3C
Written by Arron R.·1,811 words·8 min read

Related posts